Case Selection & Computerized Guided Implant Surgery
Guided surgery for dental implants is an amazing clinical procedure and one that is used on a regular and consistent basis globally. A surgical guide is simply a device fabricated from 3D printing or CAD-CAM processes that assists the surgeon during drilling procedures to control the angle and depth of the drilling when preparing the recipient site for a dental implant. It’s been widely accepted in dentistry as a go-to tool in our toolbox in implant dentistry.
I receive many e-mails and questions during in-person courses that I teach… “is this a good case to use guided on?” often in conjunction with showing a 2D panoramic or CBCT radiograph. I’m a huge fan of guided surgery, especially when using a crown-down philosophy and focusing on the final restoration and working backwards so I love talking about it with clinicians!
The logical question then comes up is… what would be an ideal guided surgery case, maybe your first one you do? Such an important question to ask! Case selection with anything we do in clinical dentistry is of utmost importance as choosing a certain treatment modality for one patient could work fantastic but for another could result in a sub-optimal outcome. That clearly is the case with guided surgical implantology!
Many of those individuals who reach out to me with the same question posed earlier will show me their case workup and I typically see them choosing extremely challenging surgical cases. There’s something about the philosophy of “that’s a tough case… let’s order a guide” that sounds so appealing and pervasive in dentistry. We are sold on the sentiment that outsourcing the challenge of angle and depth to a computer plan to give us a “hand.” Some think guided surgery is the best and most reliable method for surgical implantology in those challenging cases… I caution you… be careful!
Keep in mind that I’m a huge fan of guided surgery, especially when using a crown-down philosophy. The logical question that should be asked… what would be an ideal case for guided surgery? What would be consider a great “first case?” What are some cases to avoid?
I have found that the “ideal guided surgery cases” are those that have plenty of bone and tissue volume that one could potentially place the implant blind-folded! So why bother use a surgical guide? In my opinion, there’s a whole lot more to a surgical guide than just surgery!!!! I have found that guided surgery is more about prosthetics than surgery. Ensuring that we place the implant in the proper x-y-z position not only within the bone volume but also within the proper crown position is critical to long-term health of implant. Predictability is key.
What are some defining characteristics of an “ideal” guided surgery case? While there are many factors that help guide a clinician, a proposed generalized list is below:

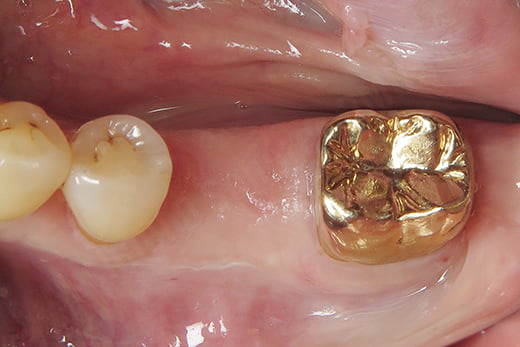
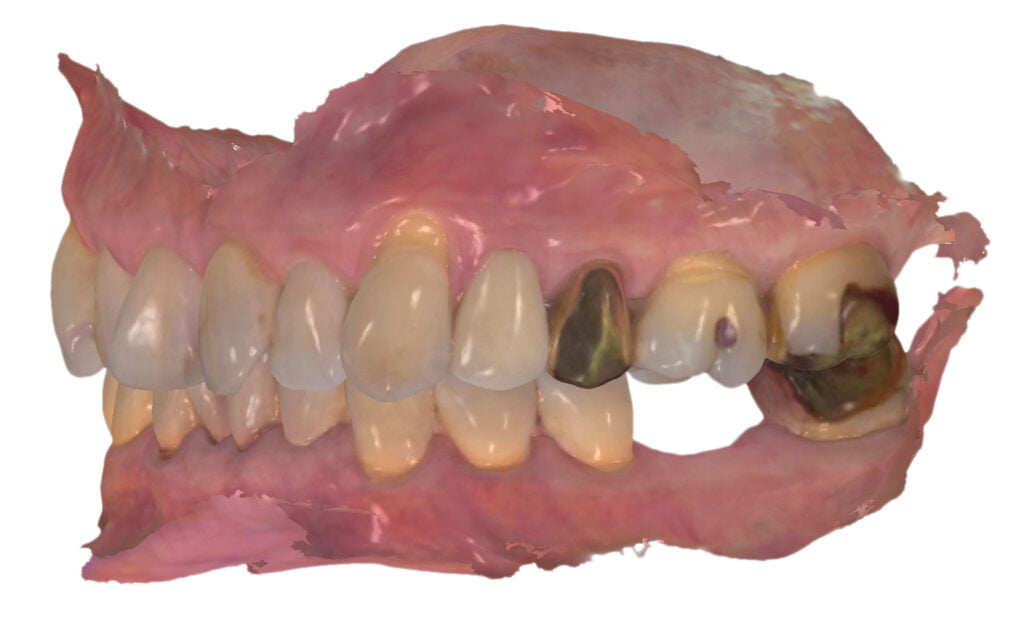
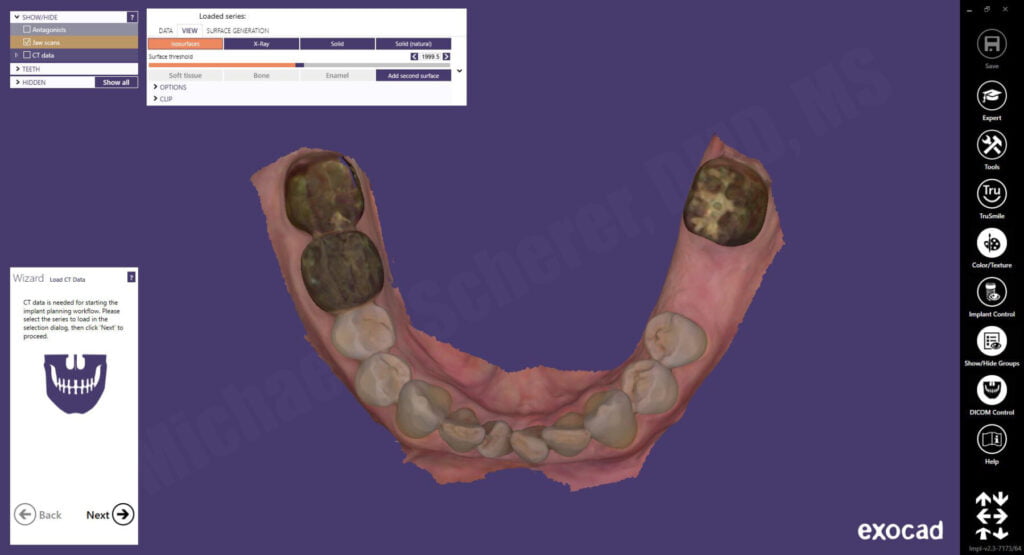
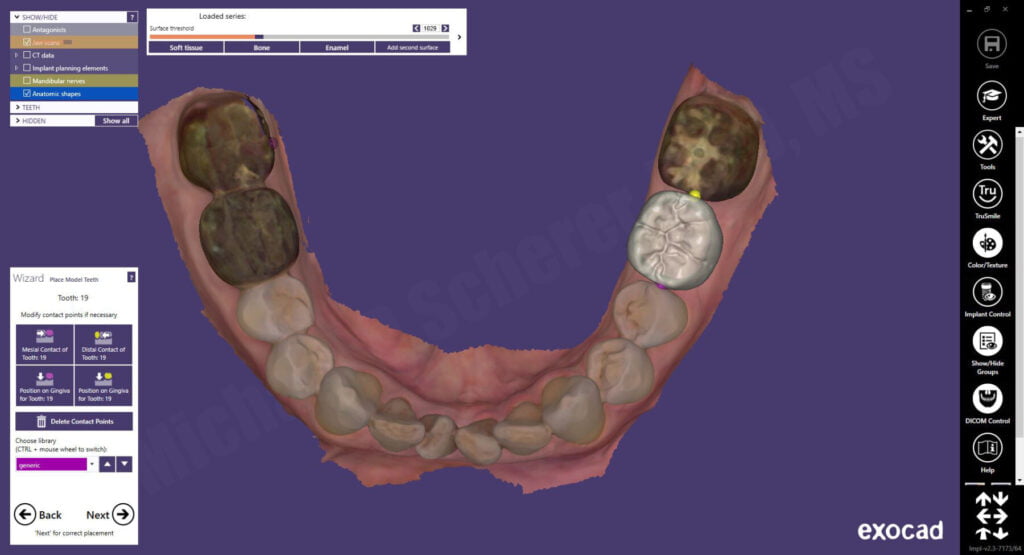
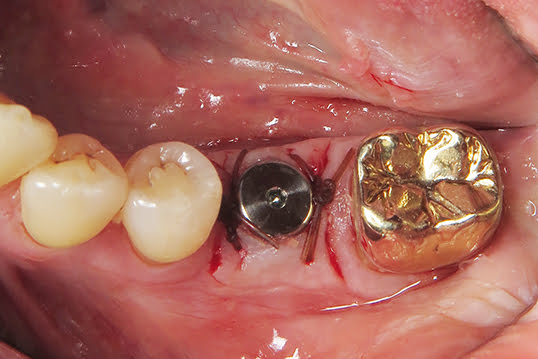
Let’s take a look at what I would consider an ideal, predictable guided surgery case and depicting how I work it up, step-by-step. A patient presented to my office requesting a dental implant for his missing #19 tooth. He had the tooth extracted and grafted approximately 3 years prior. The clinical presentation shows an adequate zone of keratinized tissue, rounded tissue/bony contours, sufficient prosthetic space, and our patient could open at least 40mm wide in the first molar region. We advised the patient we could make a CBCT and intraoral scan to evaluate the bone volume to ensure we were prepared for his treatment. We used a 3Shape TRIOS scanner to scan his mandibular and maxillary arches in occlusion. I typically recommend scanning the entire arch where an implant is to be placed as it will help in later alignment steps of the guided surgical procedure.
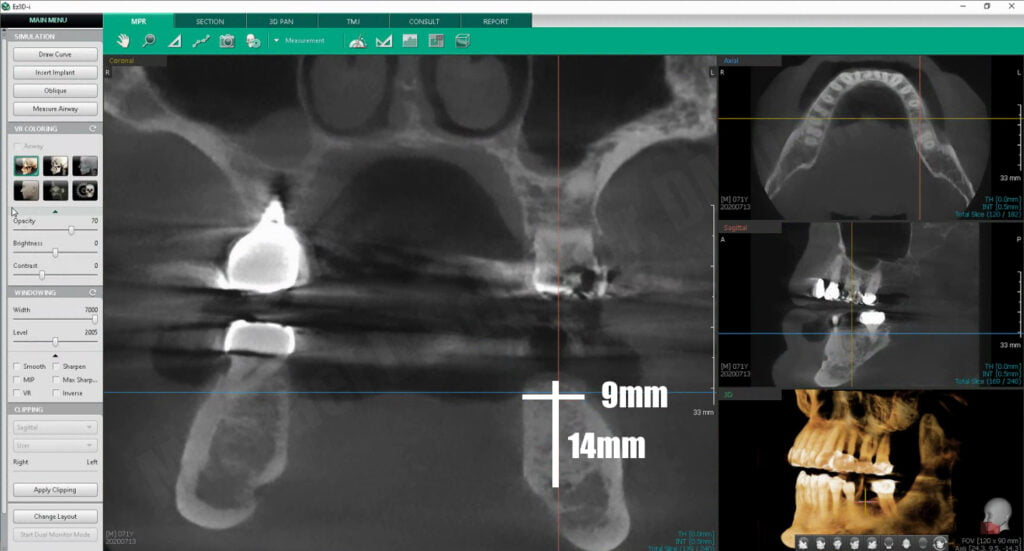
A CBCT scan using a VATECH Green using a cotton-roll separation technique was performed – a technique I have written about extensively which helps visualize the soft tissues of the dentition and gingiva separate from that of the cheeks and tongue. The scan showed that his bone width was approximately 9mm wide and he has a distance of 14mm from the crestal bone to the inferior alveolar nerve. The proposed #19 implant site would be an ideal candidate for any implant up to 5mm in diameter and 11.5mm in length. Referencing the chart mentioned earlier, our patient has more than sufficient bone width and length, thick keratinized tissues, and can open wide… an ideal candidate for guided implant surgery.
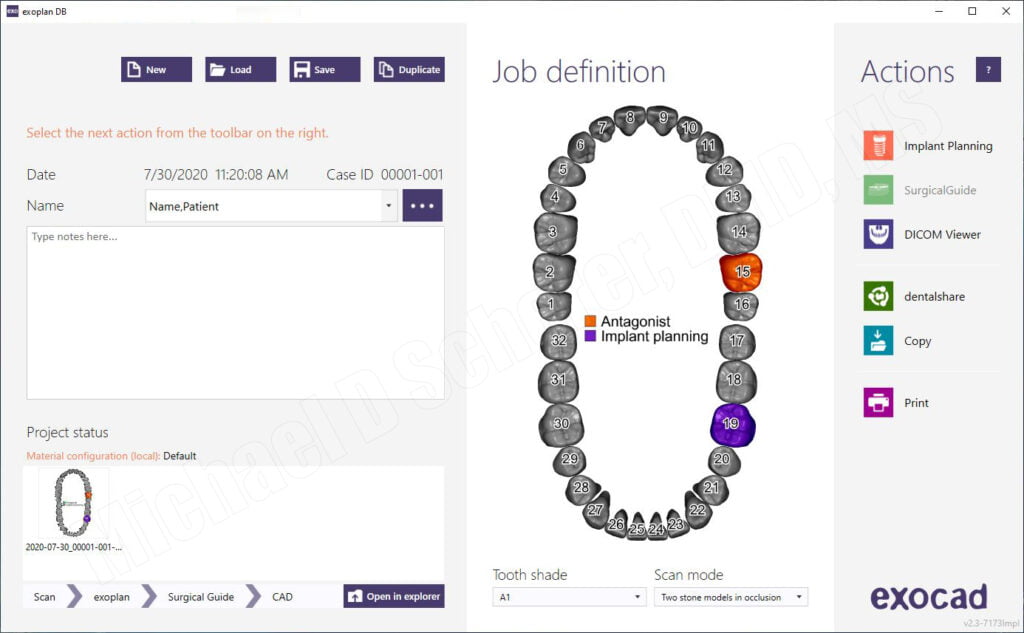
We decided to design his surgical guides using exoplan, a CBCT surgical guide planning software from exocad. A new work order/case was created in the dental database and the intraoral scan was imported.
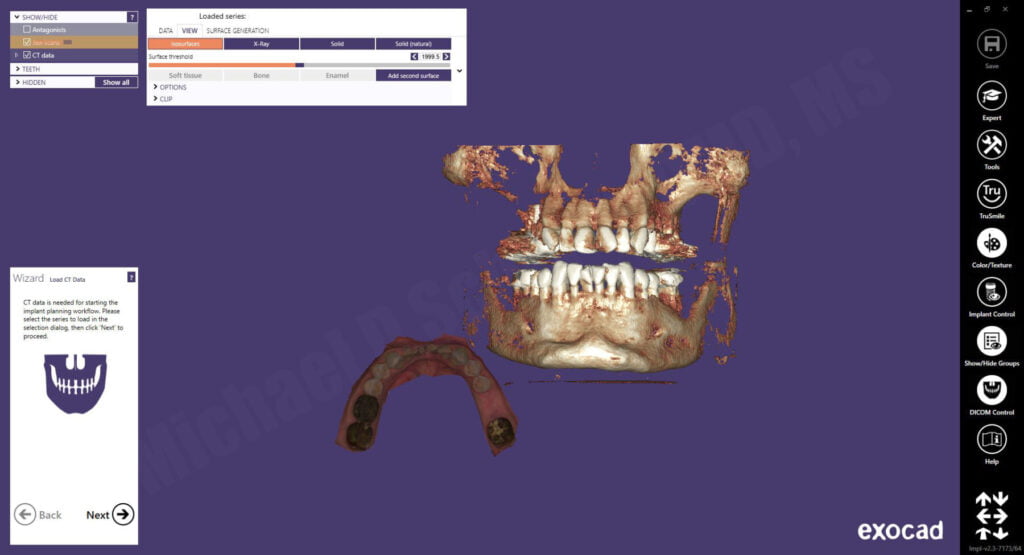
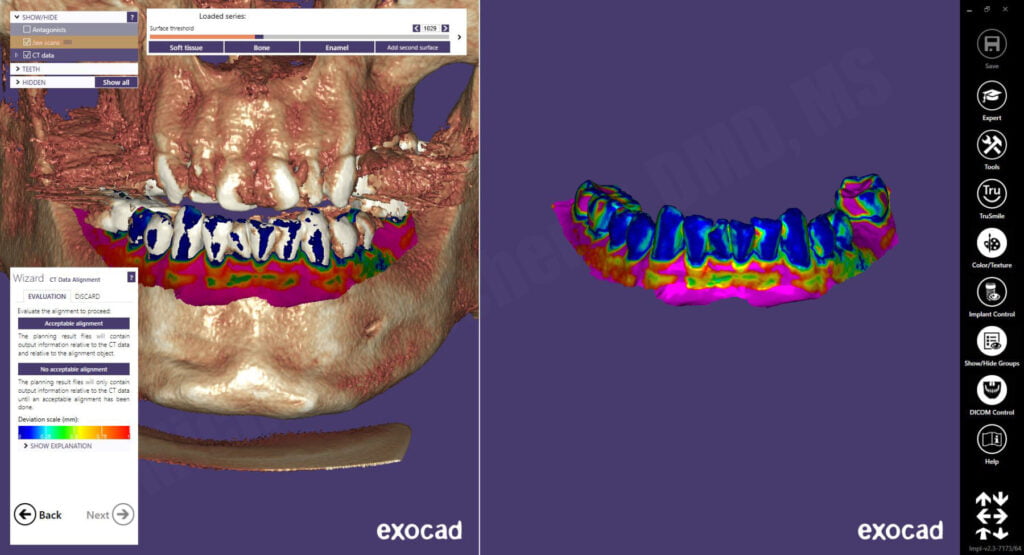
The CBCT scan DICOM files were imported and the intraoral scan was aligned to the CBCT using a point-by-point algorithm followed by an intuititive color map depicting the fidelity of the alignment.
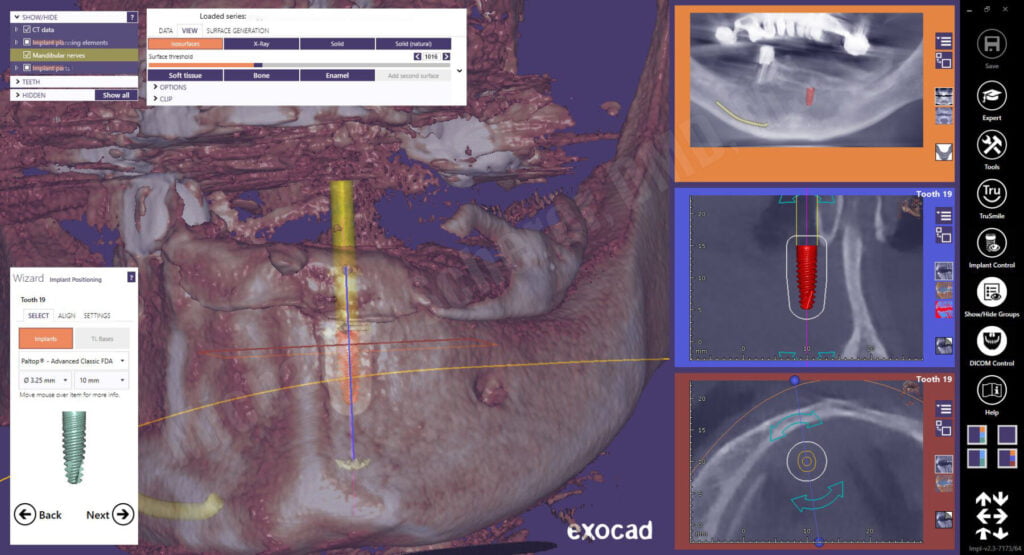
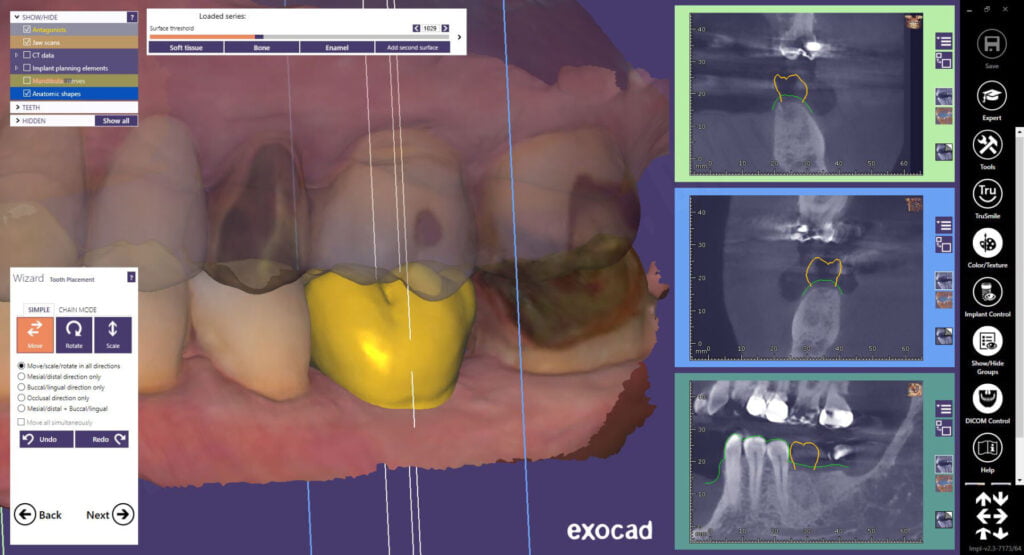
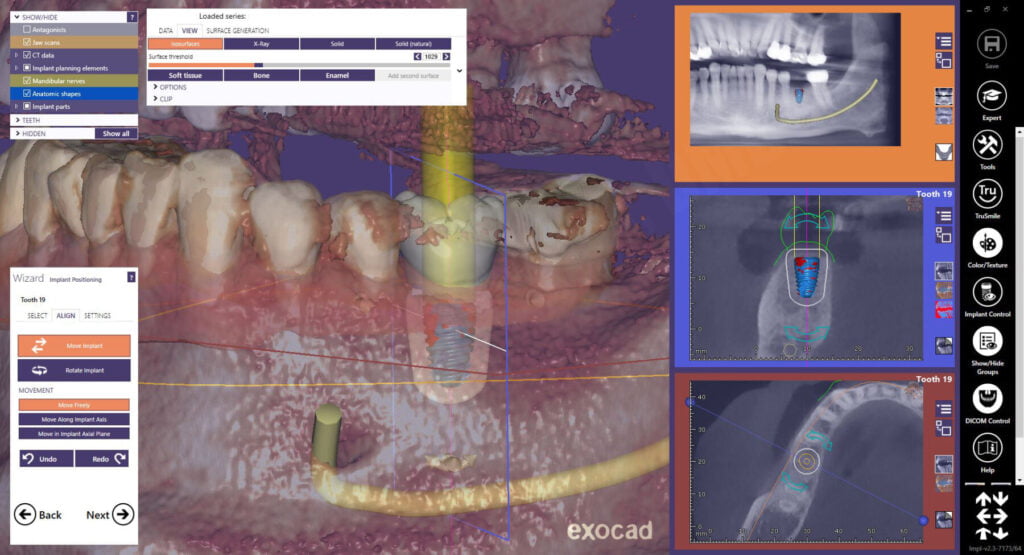
The panoramic curve was outlined using the axial view and the inferior alveolar nerve on the patient’s left side was mapped using the sagittal and tangental views. Using a crown-down philosophy, a virtual crown is planned using standard exocad controls. The software allows me to do an ideal wax-up of the proposed tooth, prior to virtual placement of the dental implant. This method ensures that I am visualizing the future restoration and crown prior to planning the dental implant!
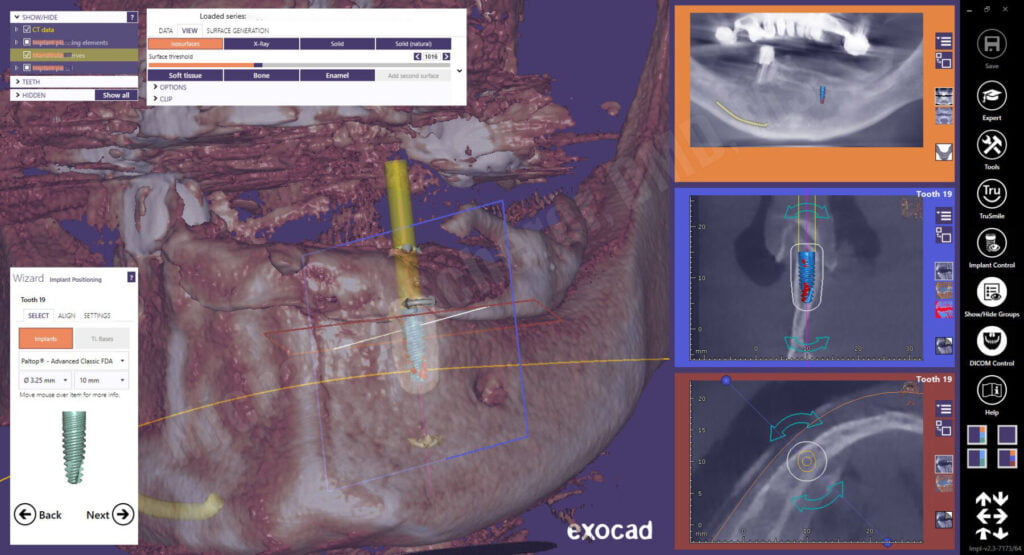
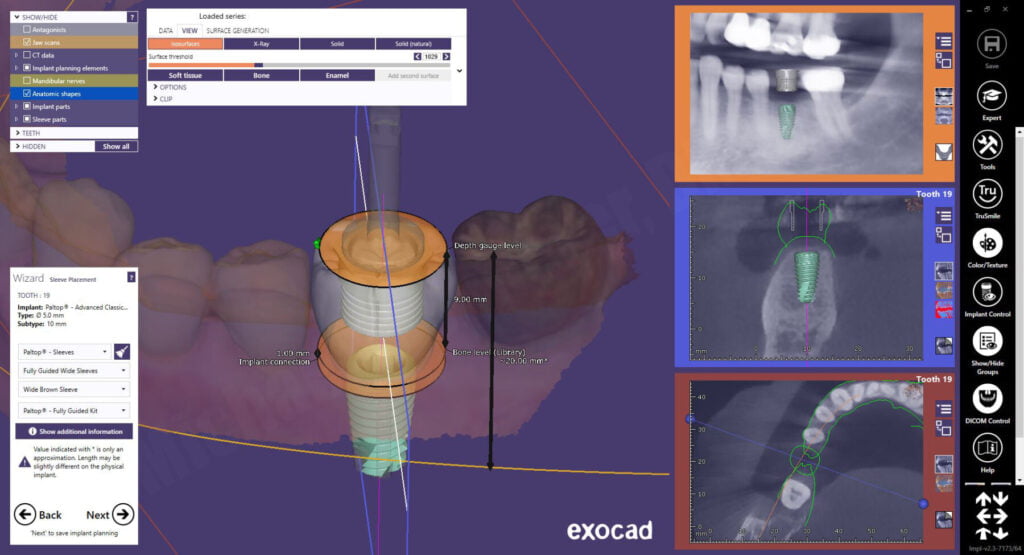
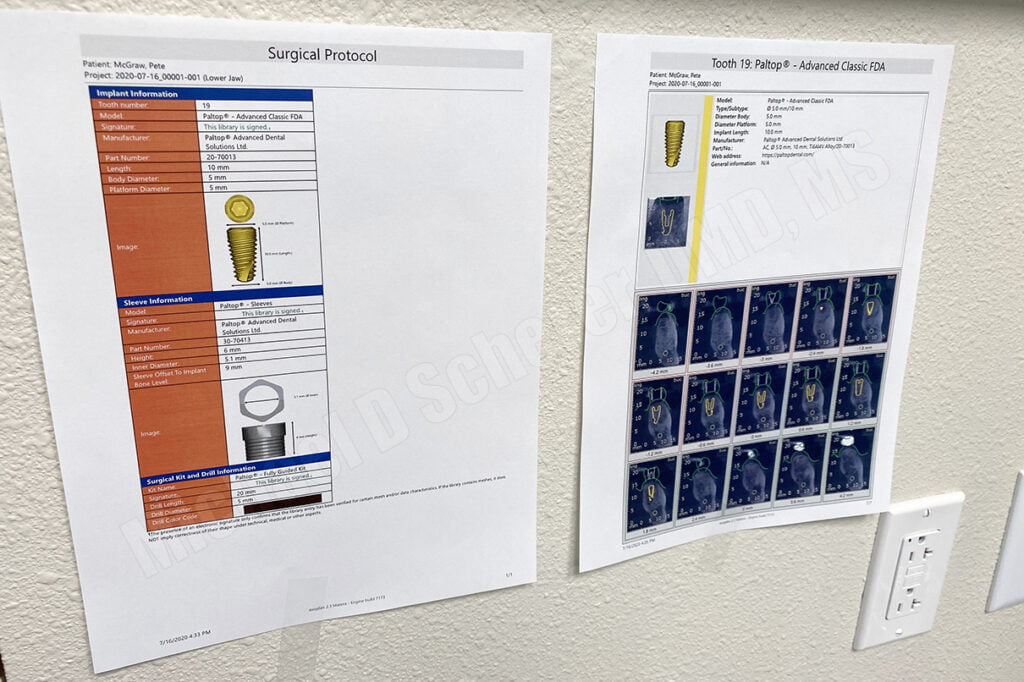
The wizard functionality of exoplan goes step-by-step pretty simply. When I get to the add implant mode, I need to make a decision on what type of implant I want to place for the patient. A Paltop Advanced Classic 5.0mm diameter dental implant was placed in the site. Even with a 5.0mm diameter implant, I still have 2.0mm on the buccal and lingual of the dental implant at the crest. Regarding length, I went back and forth between 10 and 11.5mm but since I wanted to place the dental implant slightly subcrestal, I decided on a 10mm implant which gives a bit of wiggle room above the nerve.
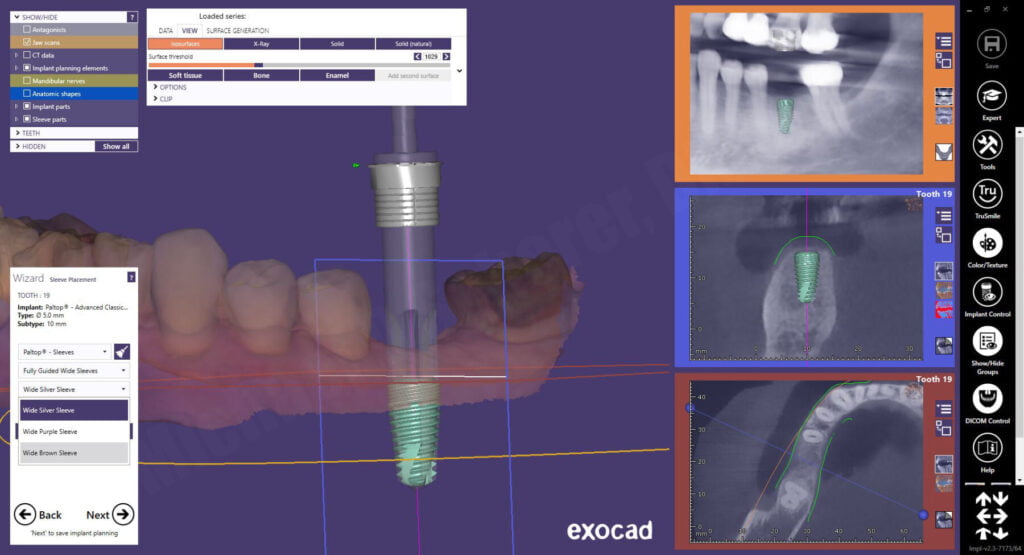
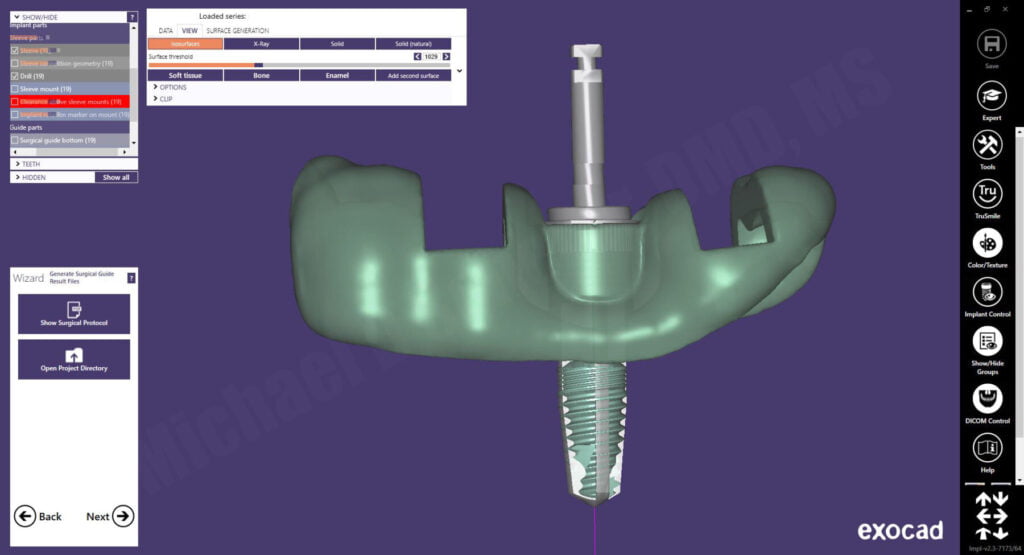
After confirming the proposed implant position and approving the plan, exoplan opens to the surgical guide wizard function. The software allows me to place a virtual “master sleeve” also known as a “guide-tube” over the implant. What’s neat is it gives me a visual appearance of the actual Paltop Fully Guided Kit drill on the software, cool! This visualization is unique to exoplan and greatly takes away some of “unknown” when looking at a guided case. At first, the software defaulted to the silver sleeve, which is a prolongation/offset length of 30mm… way too long! I ended up choosing the brown sleeve, which is a 20mm drill. While the patient could open wide enough for the longer drill, in guided surgery, shorter drilling is more reliable and less potential for deflection.
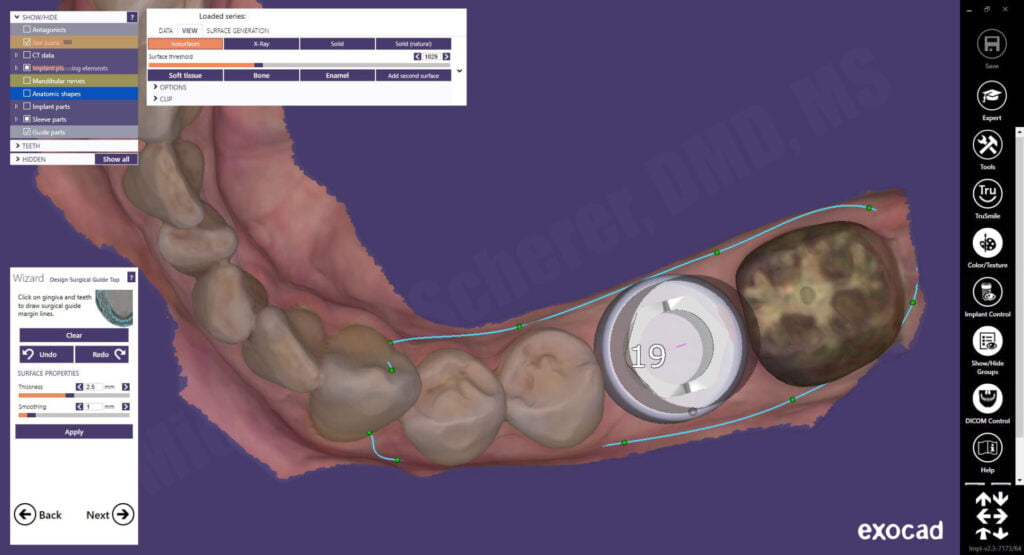
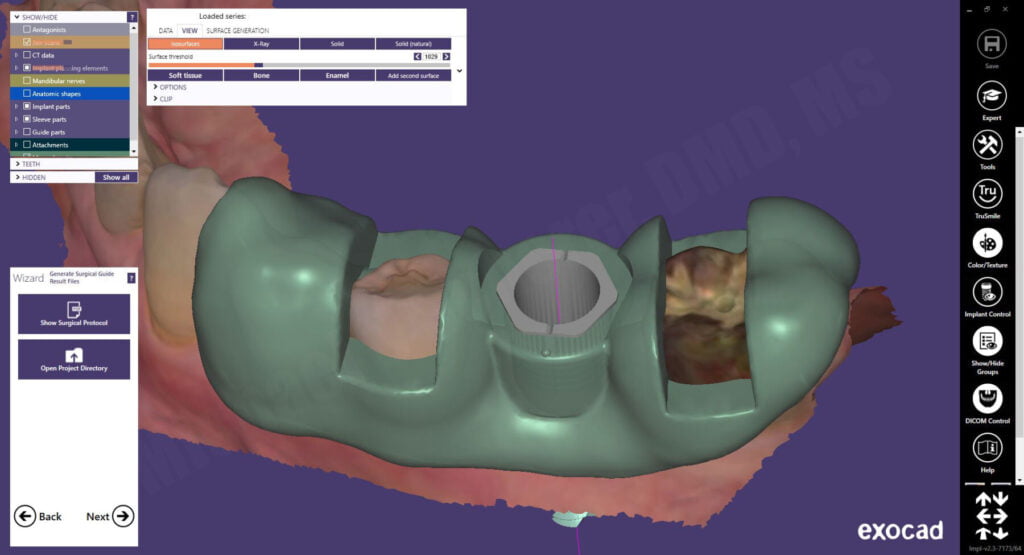
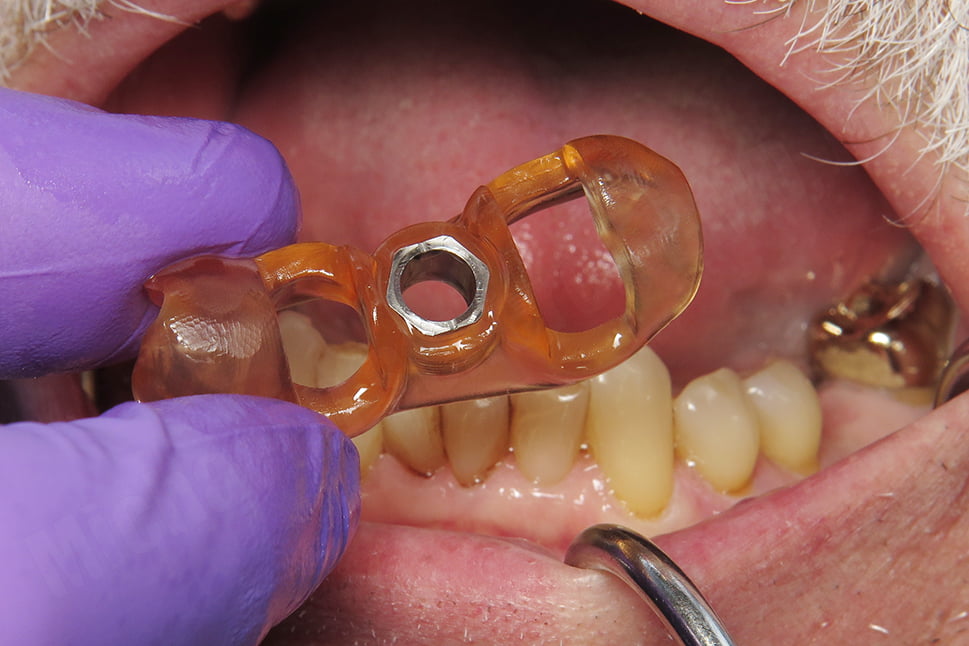
The surgical guide outline is drawn on the intraoral scan and the guide designed with a window on each side of the proposed implant site. A surgical guide doesn’t need to be huge nor cover the entire arch, in fact, more coverage risks places where the teeth can cause the guide to not seat properly. The windows allow the clinician to ensure the guide is fully seated during the surgical procedures. The final guide was fabricated and exoplan exports the STL file into the patient’s folder including the surgical plan PDF document for reference during the surgery.
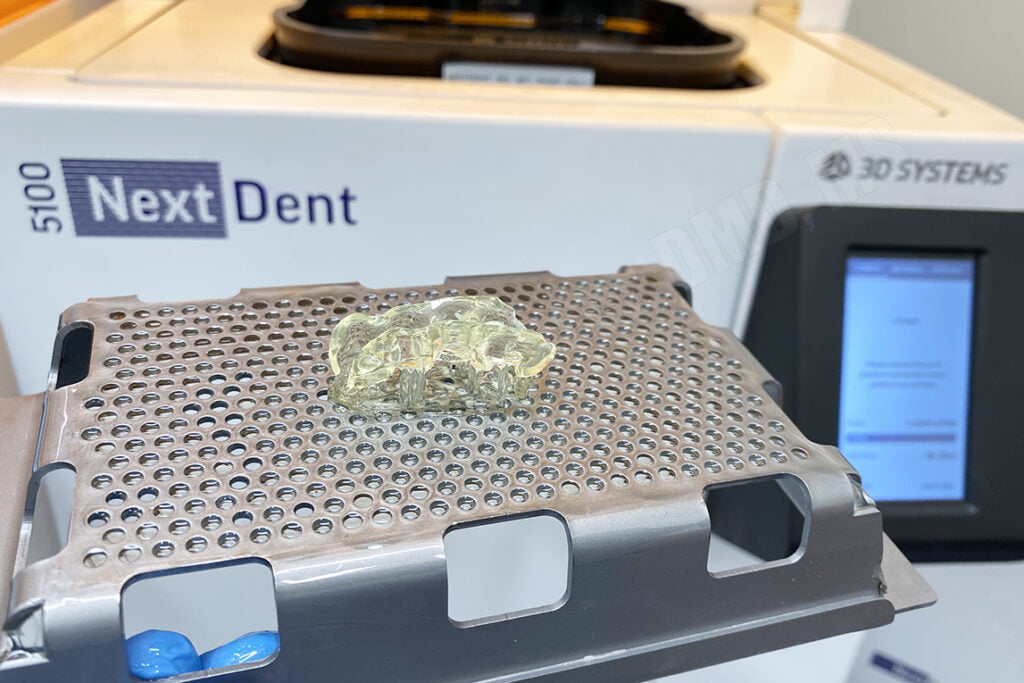
The surgical guide STL file was imported into a 3D printer software and printed. In this case, I printed the guide using a 3D Systems NextDent 5100 3D Printer using NextDent SG resin. The printer printed the guide in approximately 24 minutes. The surgical guide report was printed on a traditional document/paper printer to hang up in the treatment room during the surgical procedures for reference.
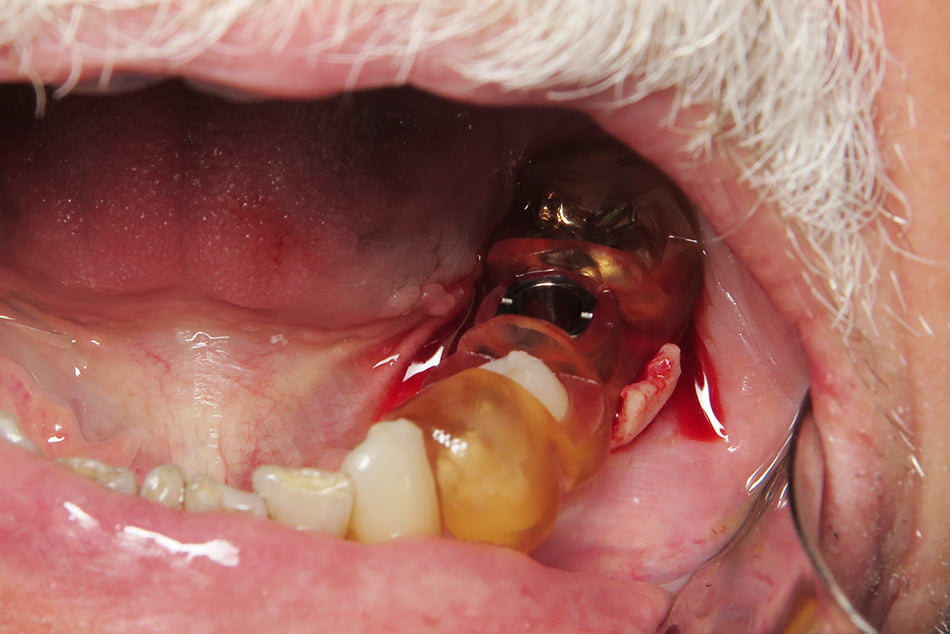
The patient returned for the surgical appointment where the surgical guide was tried in and adapted intorally. After anesthetic was placed, we decided against a tissue punch surgical procedure as we wanted to preserve as much keratinized tissue as possible so a crestal incision was made and flap elevated. The surgical guide was placed so the flap would lay on the facial/lingual of the surgical guide, permitting osteotomy preparation without the tissues interfering.
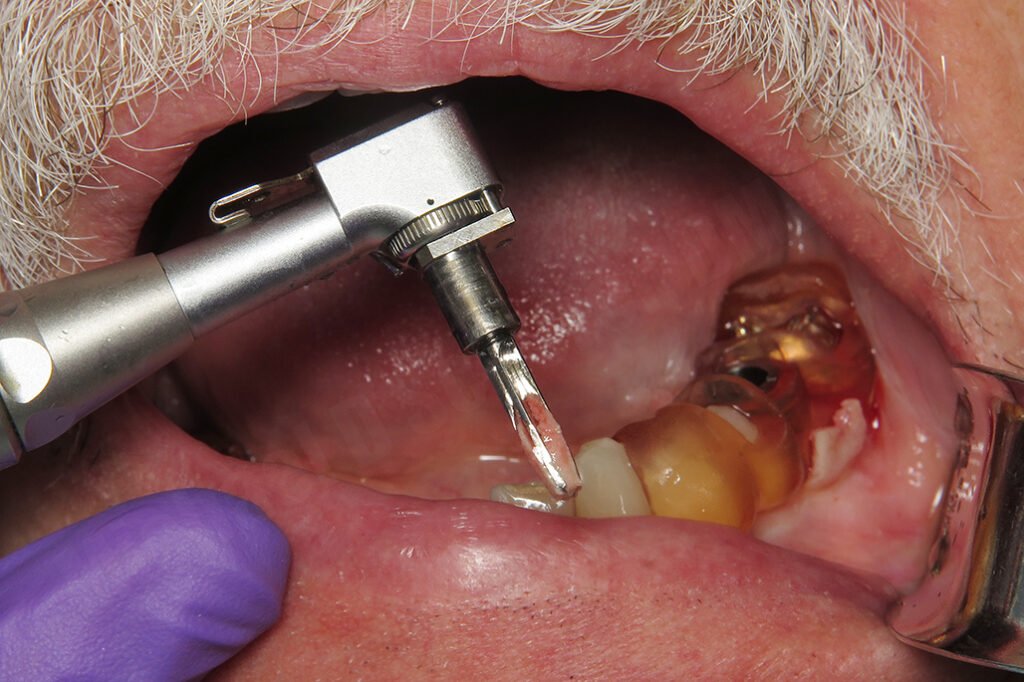
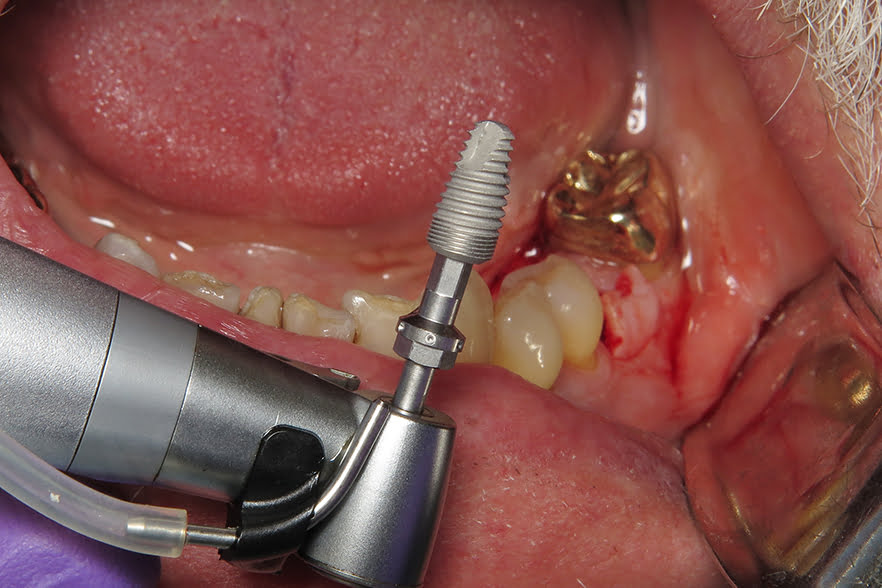
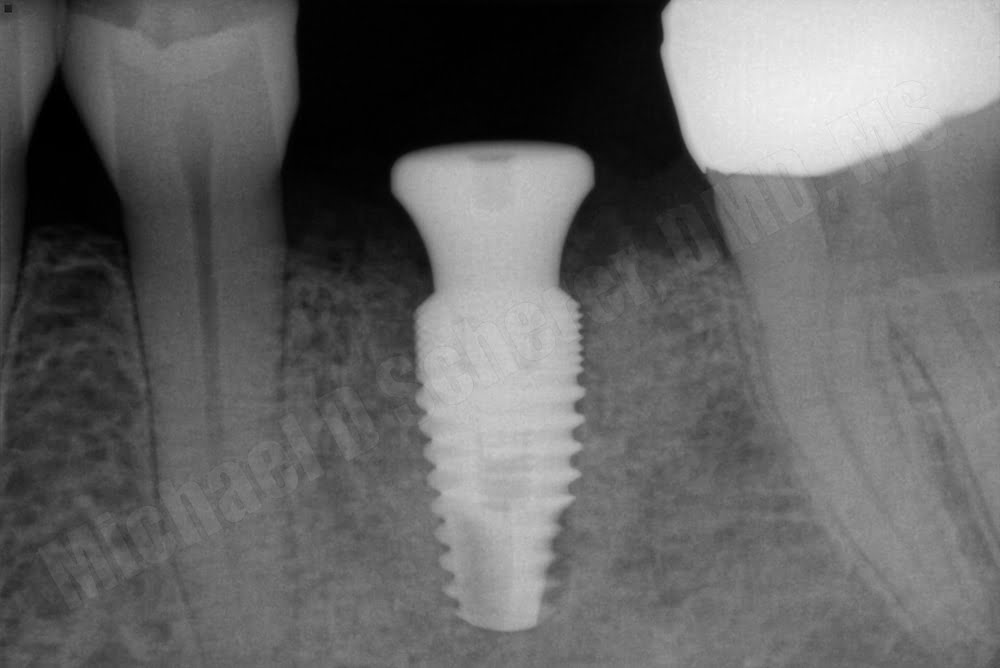
Osteotomy procedures were performed using the Paltop Fully Guided Kit. After the final drill, the guide was removed and the site irrigated. The implant was placed free-hand and a concave healing abutment placed. Chromic gut sutures were placed closing the site.
Guided implant surgery with straight forward cases is highly predictable and often quite enjoyable. Patients feel like you are using the latest in high tech gear and when you discuss why you are going “the extra mile,” they genuinely feel like they are in good hands. Creating value in what we do clinically helps us connect with patients!
The case above is a perfect case for guided surgery – a mandibular posterior molar with plenty of tissues and bone on a patient who can open wide enough for guided drilling procedures. Success with guided surgery is critically dependent upon case selection… choose wisely. I hope this has been a good guide on what helps make these cases go smoothly!
Interested in learning more about CBCT, implant planning, 3D printing, and some amazing step-by-step guided surgery protocols in your office and/or laboratory? Check out our innovative step-by-step online digital dentistry course at www.LearnDental3D.com

Dr. Michael Scherer, DMD, MS
Dr. Michael Scherer is an Assistant Clinical Professor at Loma Linda University, a Clinical Instructor at University of Nevada – Las Vegas. He is a fellow of the American College of Prosthodontists, has published articles, books, and in-person and online courses related to implant dentistry, clinical prosthodontics, and digital technology with a special emphasis on full-arch reconstruction.


