Customizing Clear Aligners for Elastics
In my experience, many clinicians limit the use of clear aligner therapy to class I malocclusions. Nothing wrong with that, it just seems that aligner treatment has been promoted as “for only simple class I cases…” which in my opinion is just crazy! Clear aligners are also really great for class II and III malocclusion cases too!
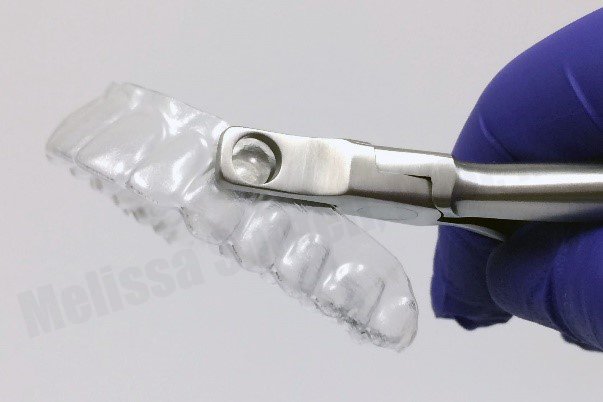
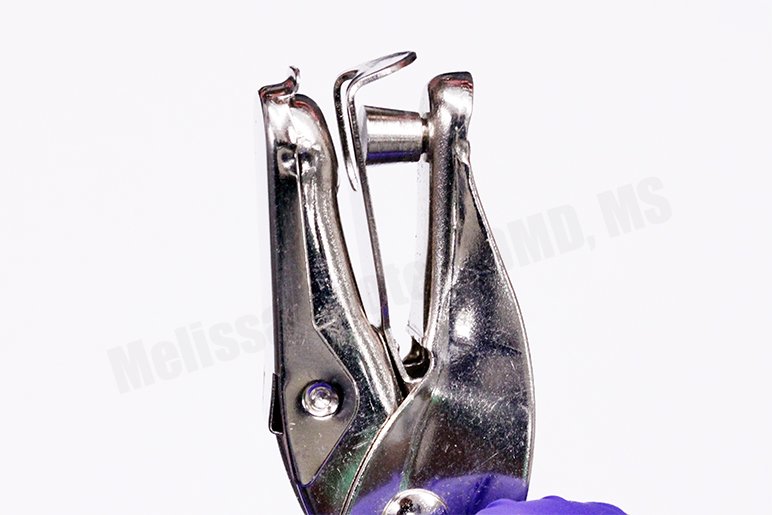
Plier Hole Punch
Many of those same clinicians simply are just not familiar with customizing aligners for the use of elastics, which is a huge step towards successfully treating class II and III patients. Many of the major aligner manufacturers will create slits or cut-outs in the aligners to accommodate elastic buttons. While pre-adjusted aligners from those manufactures are awesome, it is not always convenient or comfortable for the patient to have slits or cut-outs in the aligner throughout the entire course of treatment. Often the slits in the aligner or cut-outs will create a weak point in the aligner more prone to cracking, so it is advantageous for doctors to be able to modify aligners for elastics quickly and easily chairside at the appropriate stage in treatment.
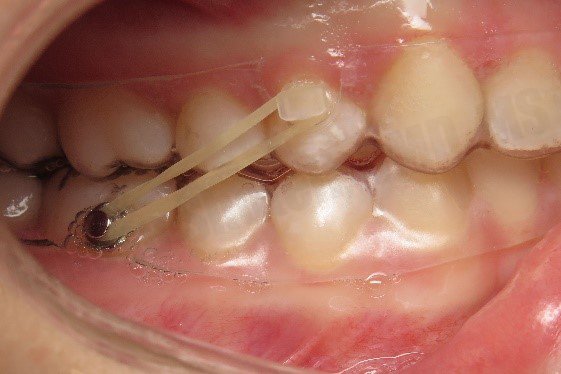
When talking buttons for orthodontic treatment, my personal preference is to bond buttons directly to the teeth. By bonding the buttons directly to the teeth and modifying the aligner to accommodate the buttons the force of the elastics is transferred directly to the teeth and avoids a dislodging force if attached to the aligners. This provides a more effective distribution of force to the teeth for class II and class III correction.
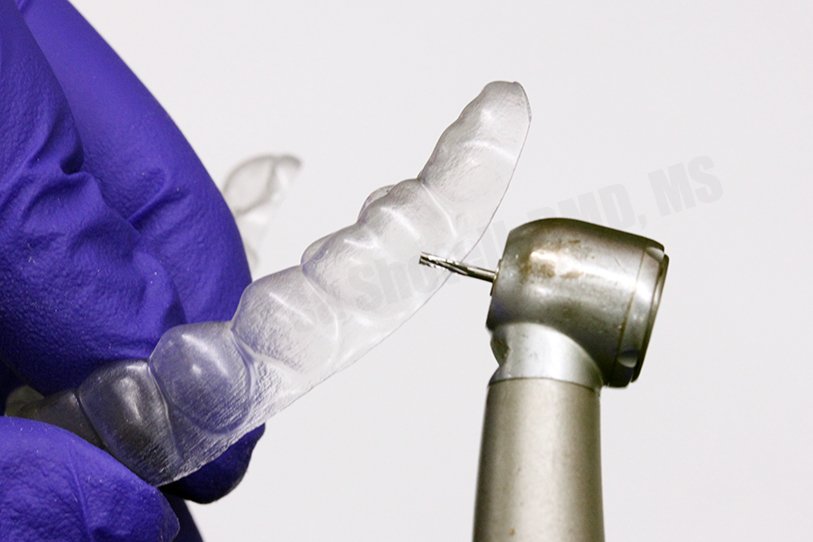
So as a clinician, we are forced with either having to let aligner manufacturer’s make the punch/slit in the entire series of aligners or adjust the aligner when it’s appropriate in the sequence to use elastics. In my opinion, I want to have the control and use the modified aligner only when I really need it! As a result, I have tried many methods of creating the perfect modification in the aligner itself including using a dental handpiece and even a paper hole punch from the office supply or crafts store.
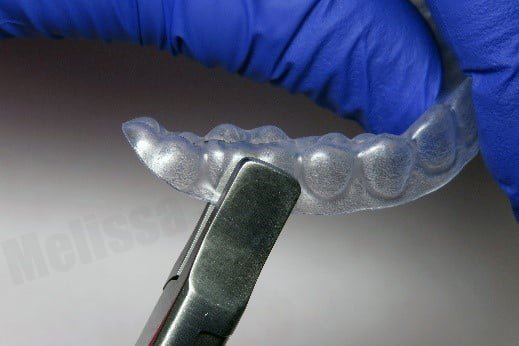
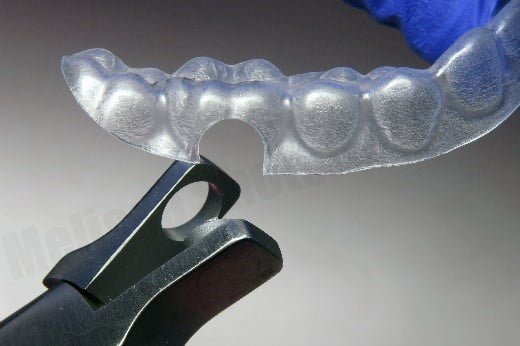
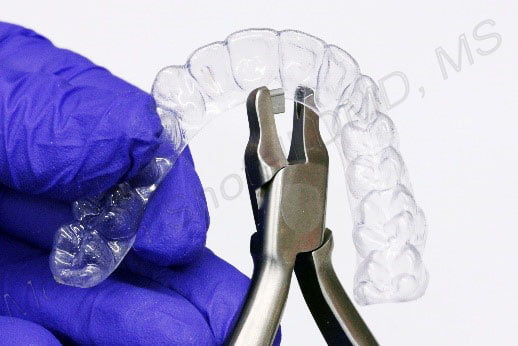
Then I discovered that several dental manufacturer’s made official aligner hole punch instrument! I have tried several of them with mixed results, but I find the Hu-Friedy Hole Punch from the Clear Collection really superb. I find this hole punch has the strength to punch through durable aligner materials and is so sharp it cuts leaving a clean edge. The hole punch can create a half-moon shaped cut-out approximately 6mm in diameter that can accommodate almost all bondable elastic button attachments. The edges of the aligner can easily be rounded with an acrylic bur if necessary for comfort of the patients.
The use of a hole punch plier helps eliminates the time required to sit at the lab bench cutting and trimming the aligners with burs. It may be beneficial to try a few different styles of aligner hole punch instruments; having a variety of aligner modification pliers allows for quick chairside adjustments to clear aligners and avoid unnecessary laboratory time. That being said, I find myself using the Hu-Friedy punch tool a lot…
Check out this video to see how simple and easy it is to modify clear aligners for elastic buttons.
Are you interested in getting into clear aligner therapy but unsure if they really work? Are you a general dentist interested in getting into orthodontics but not know where to start?
Check out our comprehensive fast-track clear aligner course featuring diagnosis and treatment planning, how to get started with clear aligner laboratories, the differences in technology, step-by-step clinical procedures from taking records to delivering aligners and monitoring your patients until case completion. We cover the basics to getting you started with clear aligner treatment using traditional and digital methods for recording taking, step-by-step clinical and laboratory workflows, insurance/billing and growing your clear aligner practice through innovative marketing strategies. The clear aligner course is eligible for up to 12 hours of continuing education credits.

Dr. Melissa Shotell, DMD, MS
Dr. Melissa Shotell is a Board Certified Orthodontist, focusing on the interplay of Orthodontics and restorative treatment. Dr. Shotell received her DMD at Nova Southeastern University and advanced hospital training a General Practice Residency Certificate from The Ohio State University. After spending years in general practice treating a broad range of patients, Dr. Shotell returned to complete a certificate and master’s degree in Orthodontics from Loma Linda University. At Loma Linda University, Dr. Shotell focused her training on cutting-edge three dimensional imaging technology for diagnosis and treatment planning for interdisciplinary dentistry. Dr. Shotell considers education to be her passion and regularly consults and lectures on dental technology, clear aligner therapy, orthodontics, office efficiency and workflow, and teamwork.


