How to Design & 3D Print Your Own In-Office Shell Temps!
Ever wonder to yourself, “Wow these laboratory generated shell temps sure make things really awesome, but wow, I wish they were less expensive and didn’t take so long to get!” Well, you’re not alone.
I have for a long time regularly used Glidewell’s BioTemp® solutions in my practice and really enjoy using them. They’re beautiful, long-lasting, and in reality, quite reasonably priced considering what’s involved.
The biggest challenge for me working with BioTemps? The working time – it often takes 5-10 days to get the temps back from the lab. Not normally a big deal as we can plan for it, but sometimes it can be challenging getting a case back from the lab when a patient is ready to go!
Often in my office I have a patient who is interested in restorative treatment but after I propose treatment, they looks at me and in excitement comment, “I would love to get started as soon as possible Doctor…. when can we schedule!?” With interest, I then look at my schedule and realize that we are booked out a few weeks so it would be perfect for me to send the case out to the lab for shell temps. As we walk up to the front, my treatment coordinator informs me that we just had a cancellation the next morning that would be perfect for for doing the procedure! I reach a conundrum… I wanted to send out for shell temps but I also have an opening that would be perfect for the patient. Can I get the case back that fast? No way. Should I just make temps chairside instead with putty? Maybe. I would love to still have the control of shell temps but don’t want to push the patient back. What’s a clinician to do?
You may be nodding your head to the story above. You may have been there too. I know part of the above story is a BIG reason why I got into 3D printing in my office. Initially I got started simply 3D printing models and then making vacuums over the models, evolving and adapting as newer materials and software became available. A big challenge of making in-office shell temps has been having to figure out the software steps. It can be confusing for the new user for sure! With the recent release of their latest version, exocad Galway has made shell temporaries much easier to design.
Let’s take a look at a recent case that will be a good example of where we can put the new features of Galway to the test.
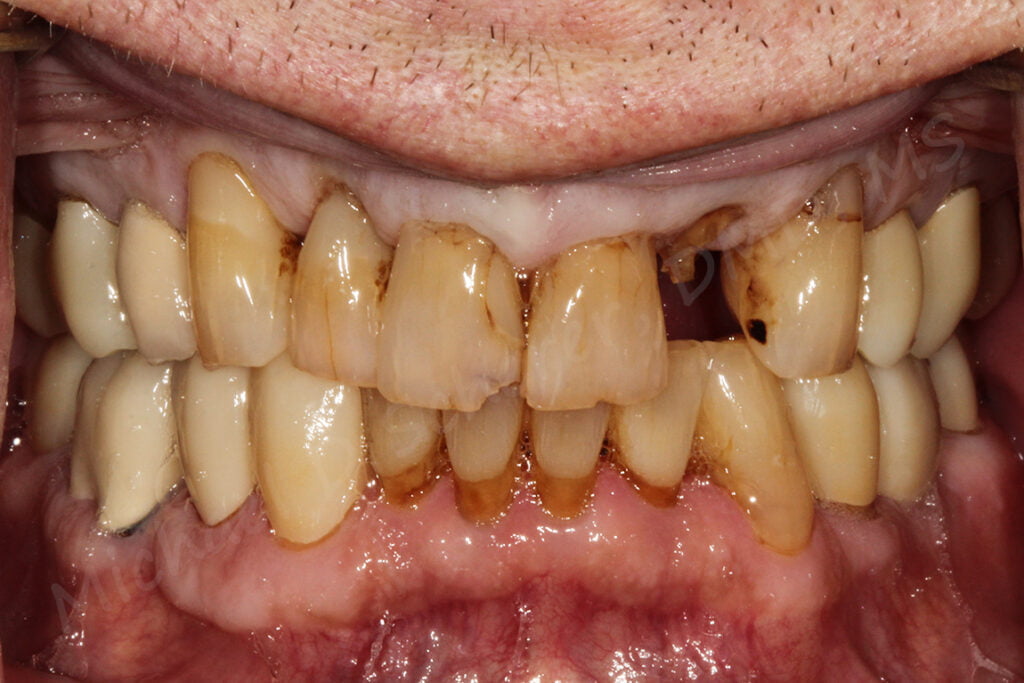
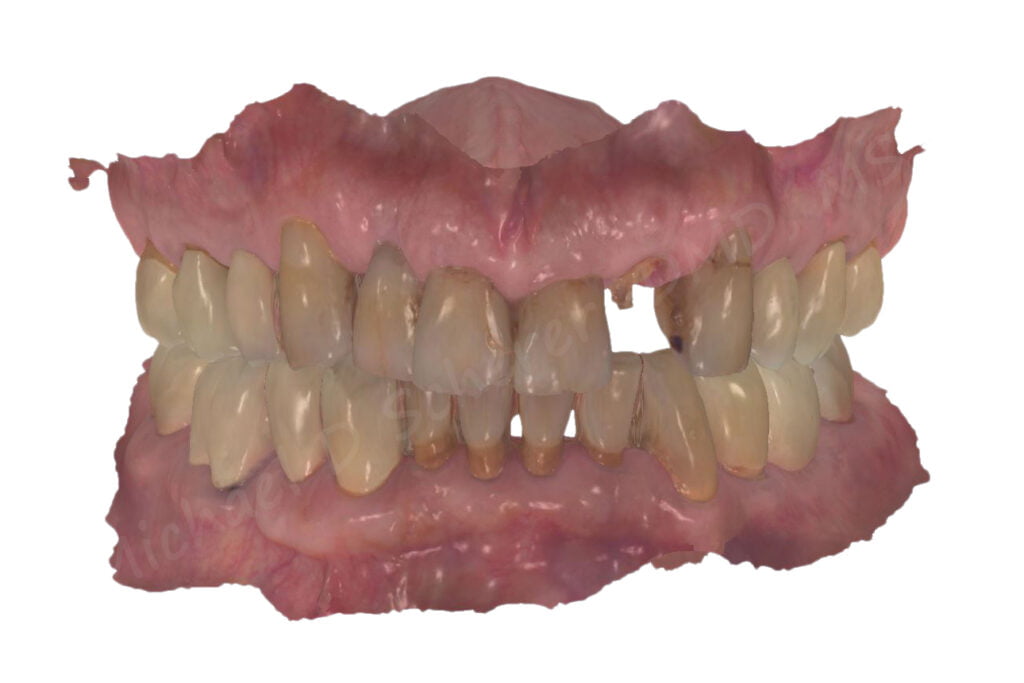
A patient who has been in the practice for sometime presented to the office with a broken lateral incisor, #10. No pain, but told me “Doc, I know you’ve been telling me these two front teeth need work for years, but I’m ready now, when we can get started!?!” Turns out the patient has been told about the possibility for breaking teeth #7,10 for a while but sometimes it takes a bit of motivation to get scheduled. Even in the post-COVID world where everyone hides behind a mask, the patient says to me, “Doc, can we do the bridges now, today…. hopefully?! I don’t want to run around town looking like this!!”
Turns out we recommended implants or two FPDs/bridges from teeth #6-8,9-11 and extracting teeth #7,10. He didn’t want to go through implants, cost was a factor – turns out his dental plan / insurance coverage was much better for bridgework than dental implants. I didn’t have time right then, but I looked at the patient and said, “I don’t have time now, but I just had some time open up this afternoon, want to come back and get started today?” Patient was THRILLED.
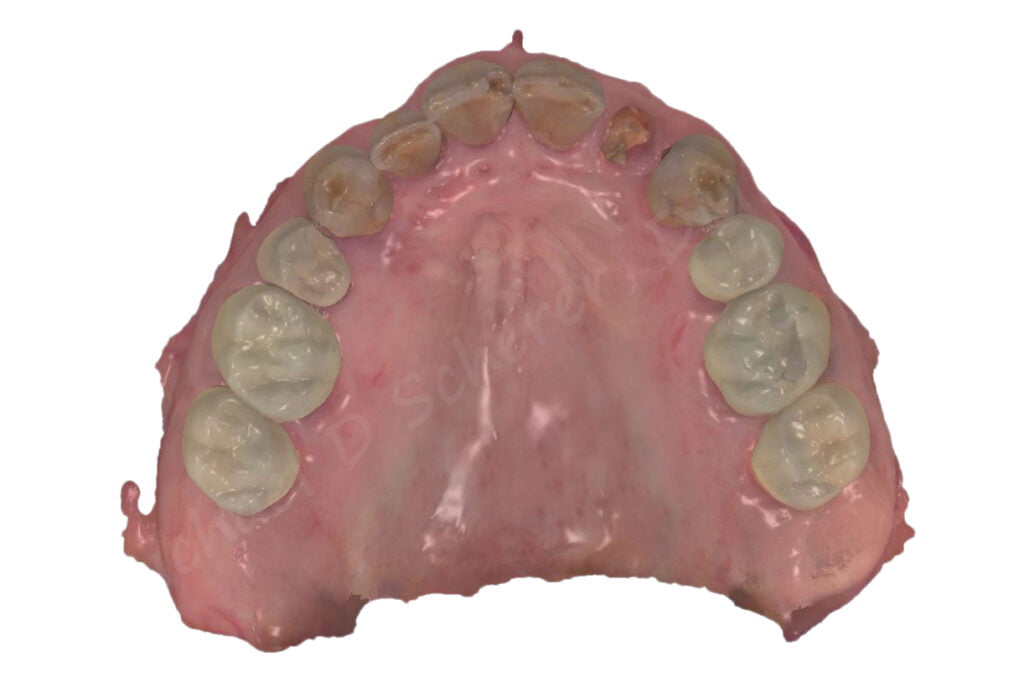
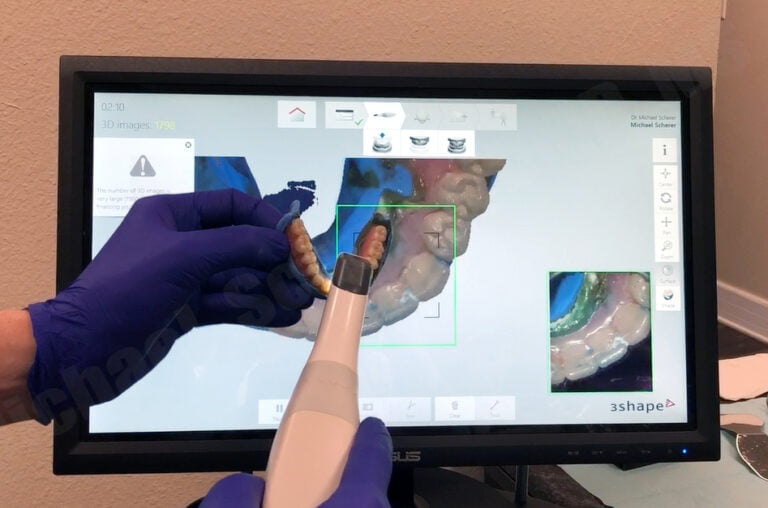
But my challenge? I didn’t want to have to do chairside temps for this patient. I just got my update to exocad Galway finalized and thought… hey, let’s try it out for this case! I used my 3Shape TRIOS intraoral scanner to scan his upper/lower teeth to start the process.
I imported the TRIOS scans into exocad DB and created a new case indicating shell crowns on teeth #6,8,9,11 and provisional pontics #7,10. A new new thing about Galway is it automatically populates the opposing arch, superb time saver!
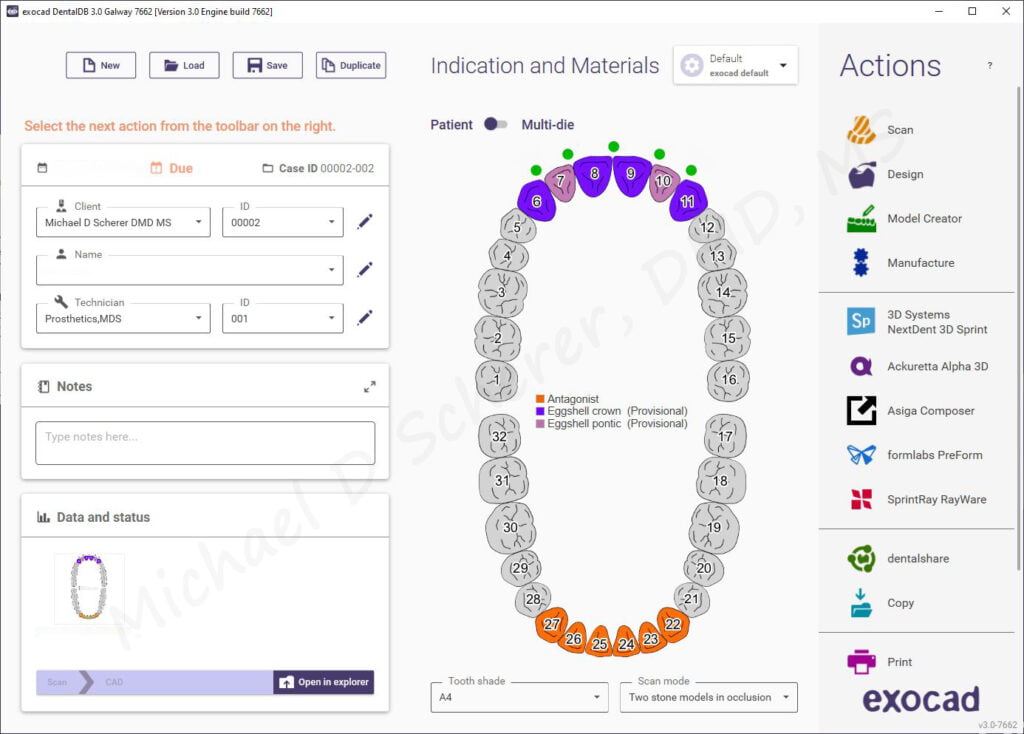
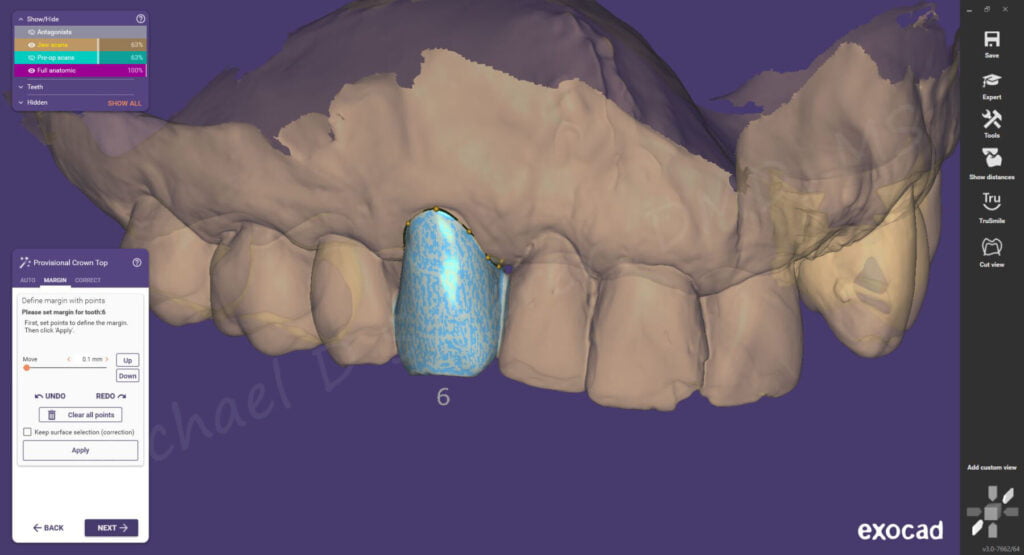
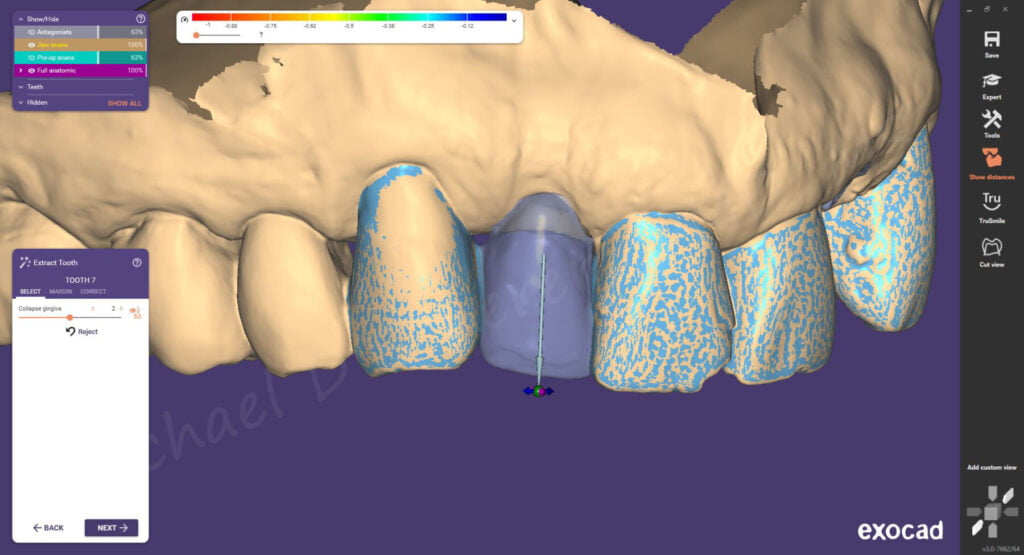
After importing the scans, I clicked on each tooth and exocad automatically selects the outline of the tooth. This is a huge improvement over earlier versions of exocad, as I often had to tweak the outline on each tooth, this time, nope… huge time savings especially considering the patient was coming back later in the day!! The software then knew that #7/10 were going to be virtually extracted from the scans so it prompted me to extract the teeth and then to wax up new teeth :).
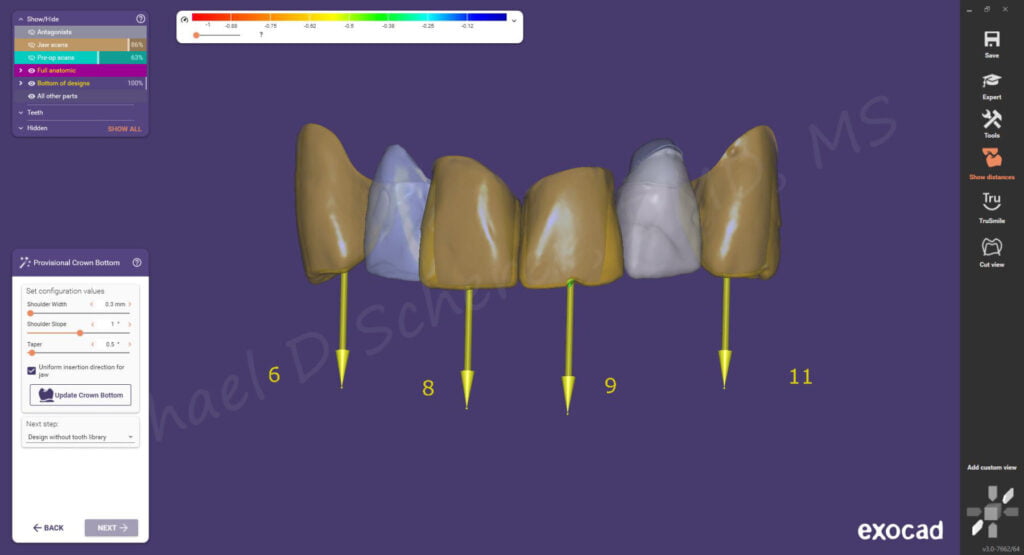
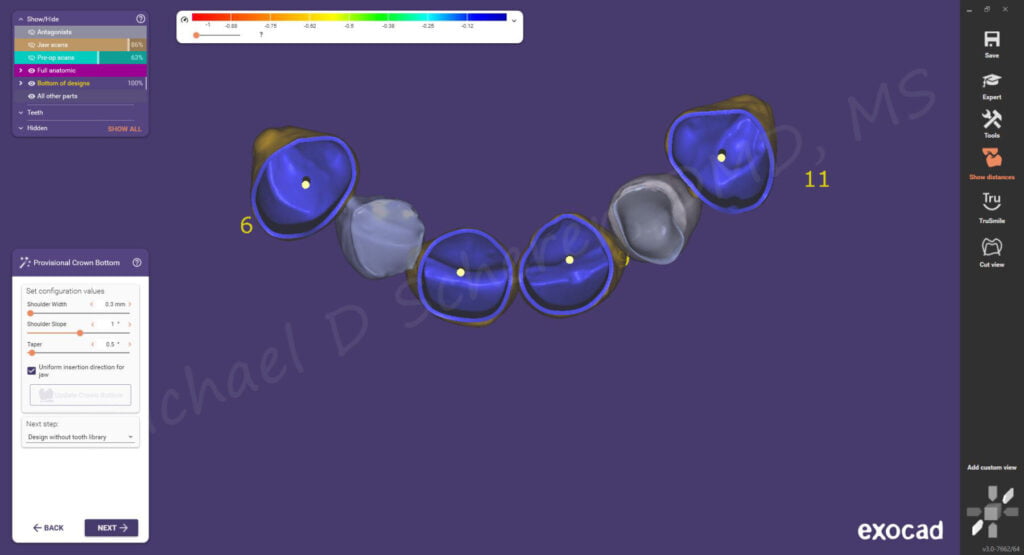
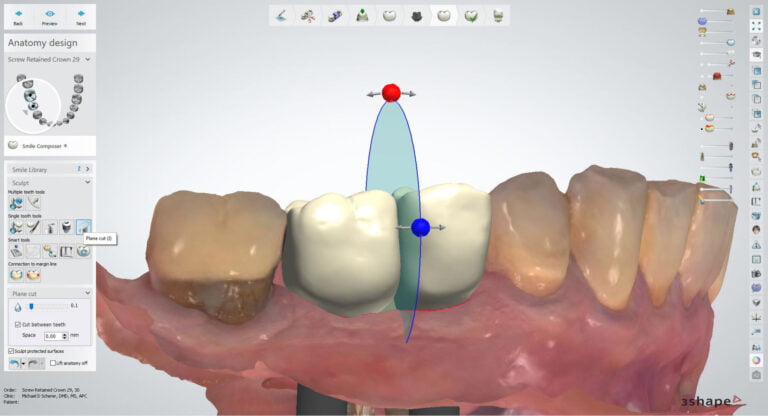
After completing the initial morphing procedures, I chose the path of insertion for the shell temp bridge and made sure that the shell was only 0.3mm thick so I wouldn’t have to adjust chairside.
After finalizing the case, I easily was able to jump back and forth in expert mode so I could smooth out any little areas around the connectors, increasing thickness in thin areas that are prone to fracture. In addition, I built up the pontic space a bit to make a bit more ovate of a pontic.
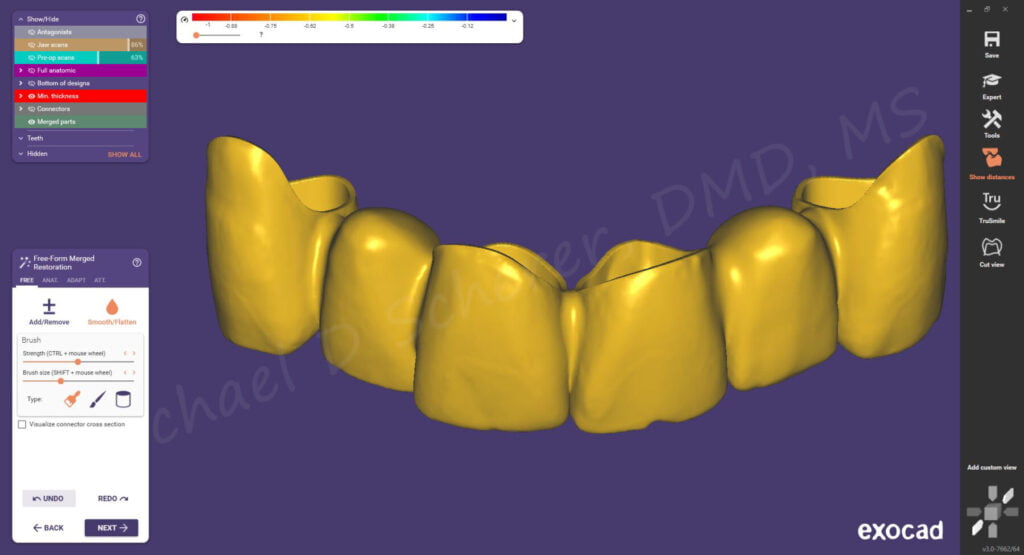
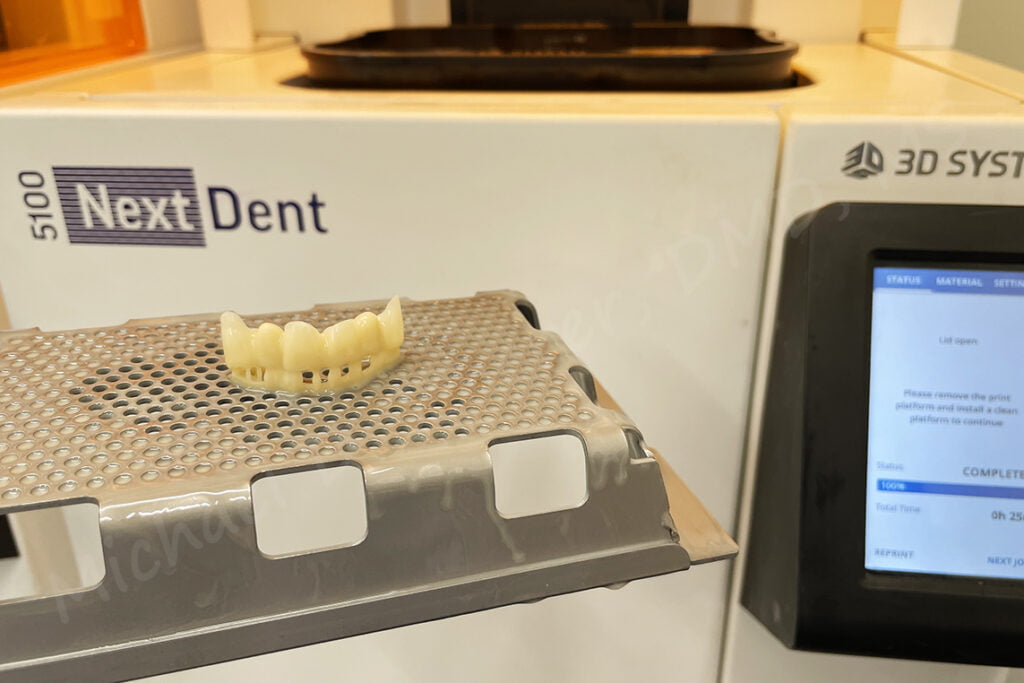
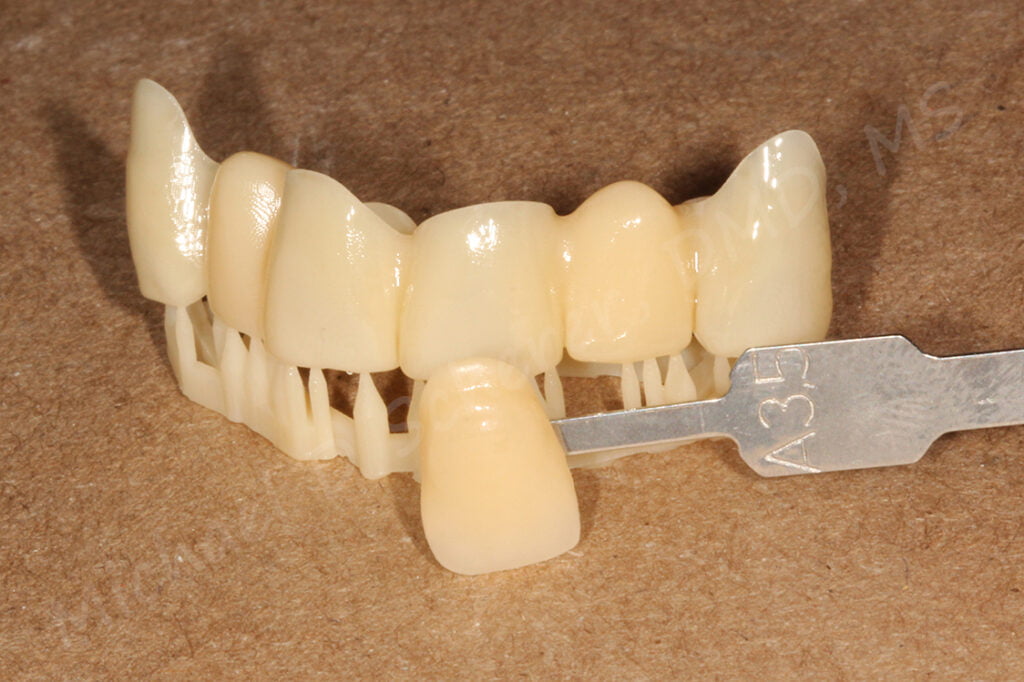
I 3D printed it using my 3D Systems NextDent 5100 printer using NextDent C&B MFH resin I ordered from Pearson Dental, shade N1.5 as we are shooting for A3.5 shade for his temp. The neat thing about the NextDent printer is it’s super fast. I printed the shell temp in 25 min total printing time.
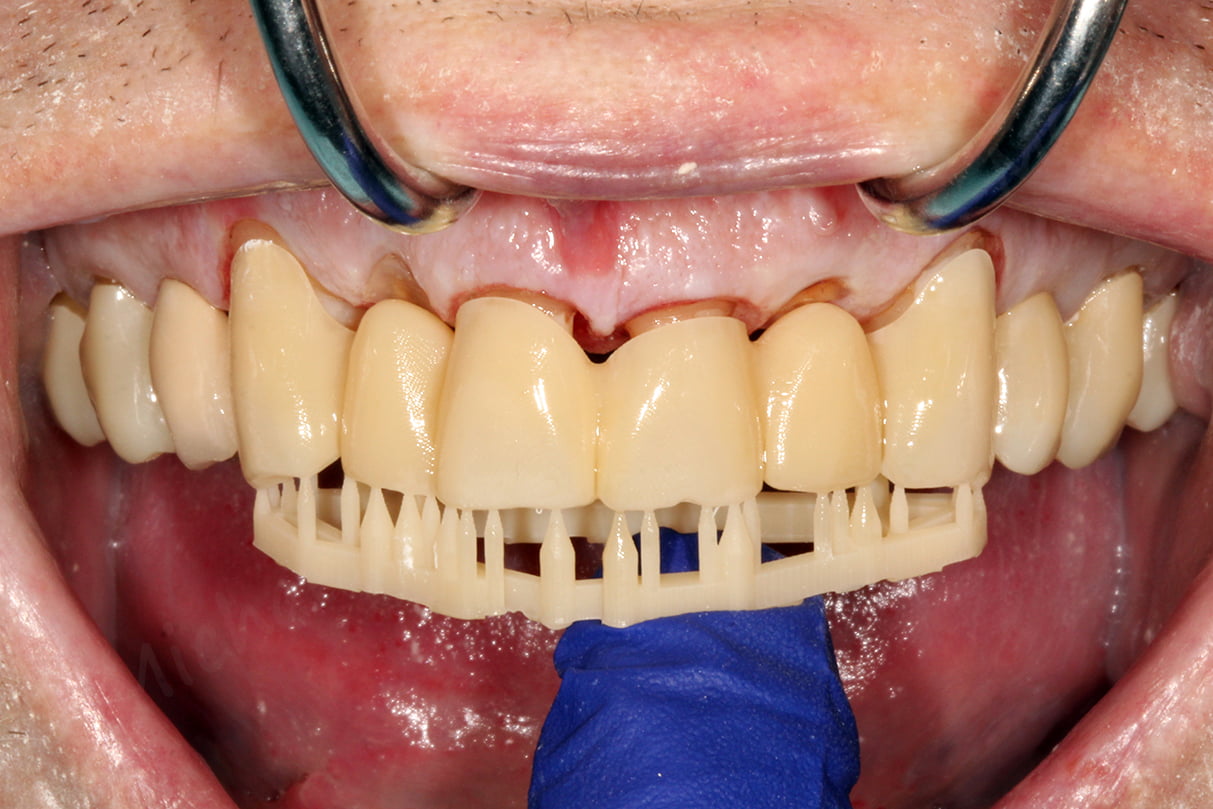
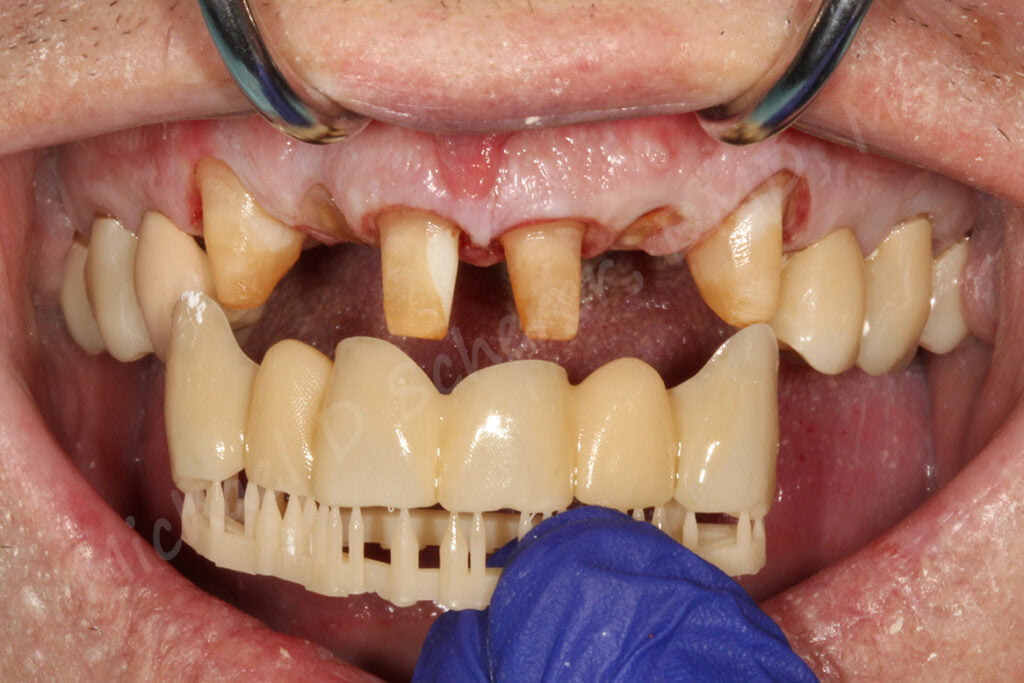
The patient returned later that day and after administering anesthesia and doing an initial prep, we were ready to reline the shell temps. Note, I prefer to extract teeth last, so you will see that I shaved down teeth #7/10 to the gingival margin prior to relining the temp. It keeps things very clean not having to manage hemostasis after extractions and I also don’t have to worry about getting reline material in the sockets.
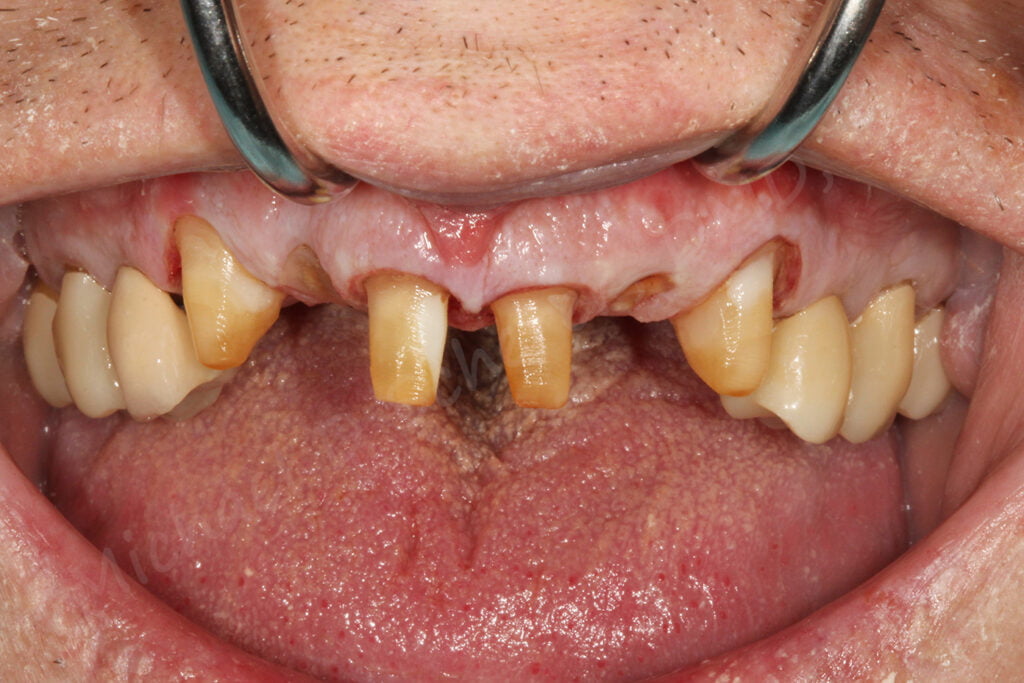
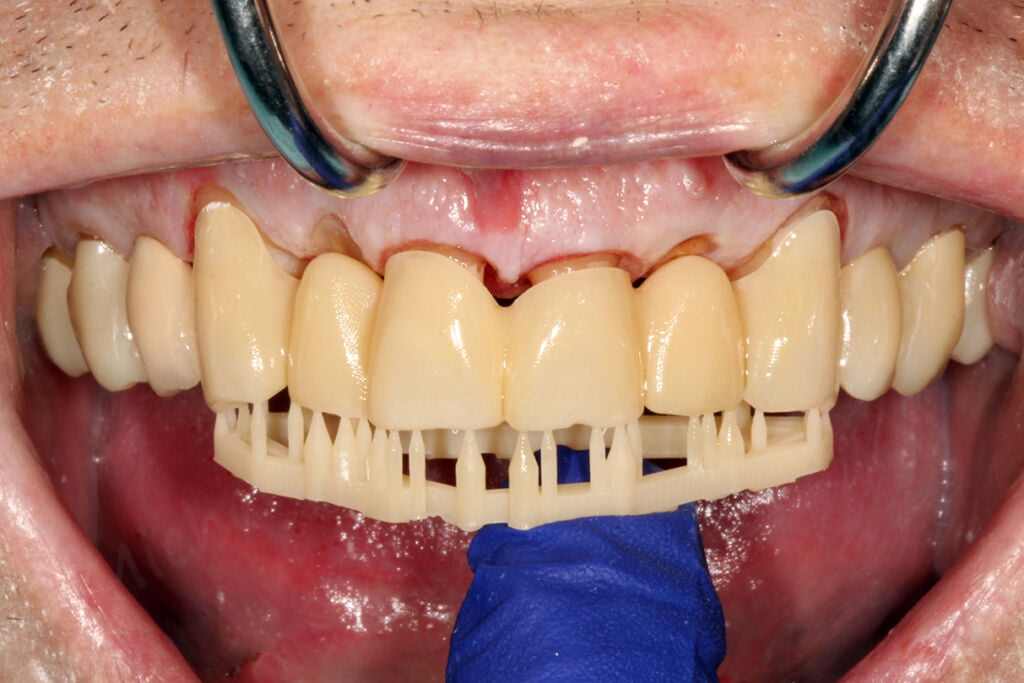
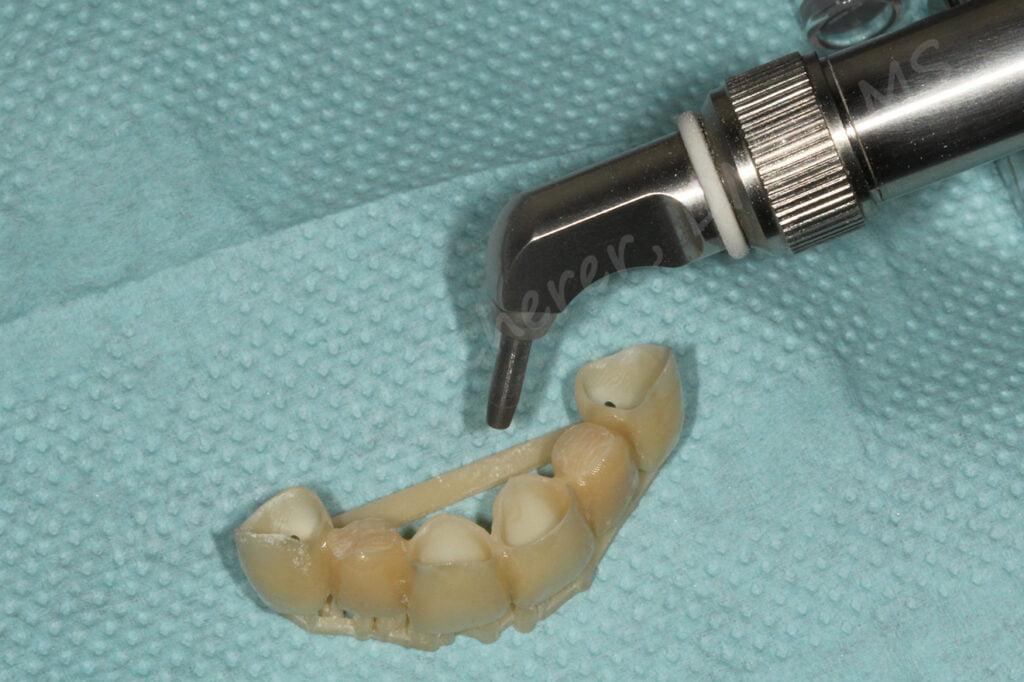
I did an initial try-in of the shell temporary bridge. It seems that anyone who is anyone has to show a 3D printed temp with the supports still in place, lol. Well, I didn’t do it to show off here, I actually kept those supports on there because it makes for a very good handle for the temps during the reline procedure. The shell temp bridge fit passively over the preps, really I was blown away. Previous experience with designing my own shell temps was that I always needed to adjust. Not here, in fact, I was almost 100% sure I would have to grind off the supports because they have always gotten in the way… not here!
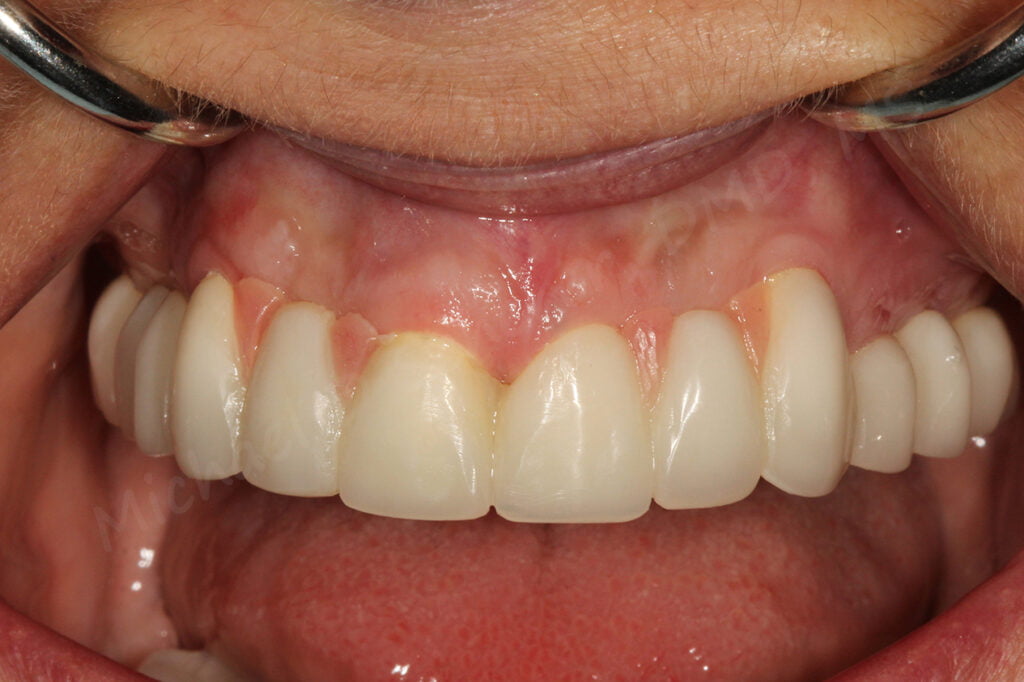
I used a Zest Dental Solutions MicroEtcher CD to lightly air abrade the intaglio of the 3D printed shell temp bridge. I then injected the shell temp with Zest Dental Solutions Turbo Temp EZ provisional material shade A3/A3.5 and seated onto the preps. I held until the material partially set and then pumped it up and down a bit to ensure it wouldn’t get locked in. After a few minutes, I removed the relined temp and was pleased with the appearance of how it transformed from an average looking temporary into something that looked pretty nice!
I took the relined temp and adjusted with a highspeed diamond until the margins looked good. A bit of polishing and glaze, the temporary bridge was ready. I extracted teeth #7/10, placed sutures, and cemented the temporary bridge with temp cement.
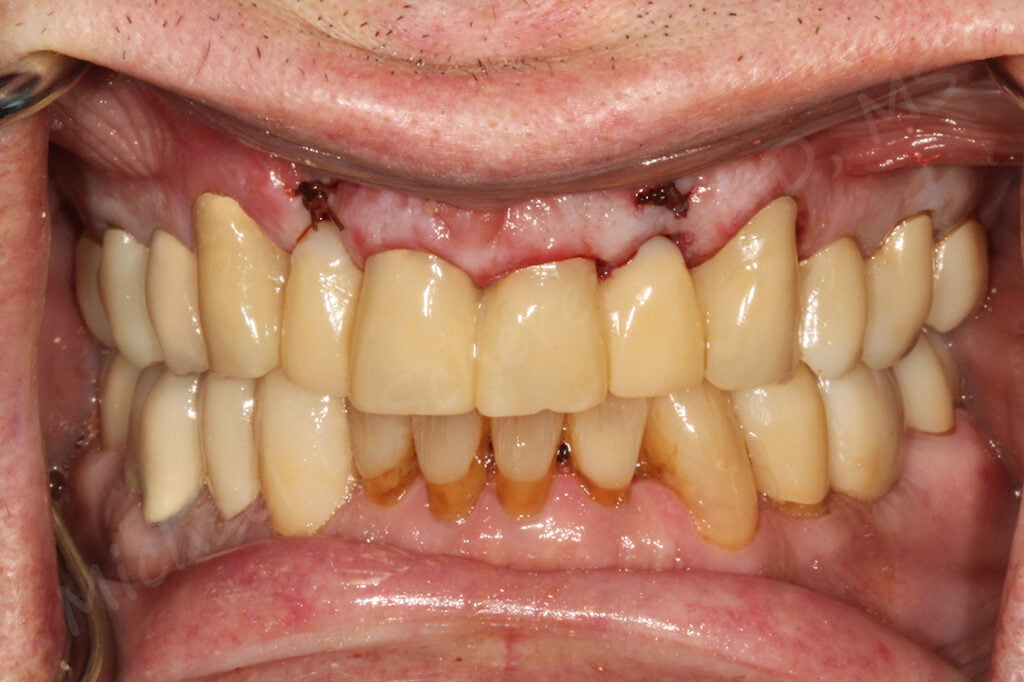
I gave the patient the mirror, his jaw dropped. “Wow, you made this with a 3D printer!?! I’m amazed how far we have come.”
Indeed…
Want to learn more about CBCT, implant planning, 3D printing, and some amazing step-by-step protocols in your office and/or laboratory? Check out our innovative, clinically-focused, fully online digital dentistry course at www.LearnDental3D.com

Dr. Michael Scherer, DMD, MS
Dr. Michael Scherer is an Assistant Clinical Professor at Loma Linda University, a Clinical Instructor at University of Nevada – Las Vegas. He is a fellow of the American College of Prosthodontists, has published articles, books, and in-person and online courses related to implant dentistry, clinical prosthodontics, and digital technology with a special emphasis on full-arch reconstruction.

