
Milling Your Own Custom Titanium Abutments & Split-File Crowns
I’ll admit, I’ve been somewhat obsessed with ti-bases…. especially angle screw channels! As a result, I haven’t had a huge reason to want to mill my own custom titanium abutments because ti-bases rock and work very well. That being said, there is a time and place within my practice and laboratory where it’s tempting to use custom abutments. You may know what I’m talking about – those cases where you just want a bit of extra strength or possibly an abutment with a bit more of a subgingival convexity as compared to the steep angled ti-base. OK, so we are convinced that there is a benefit of using both custom and ti-base abutments, so let’s get over that and just look at what’s the innovative and exciting part – milling titanium abutments and zirconia split-file designs in a combined clinical-laboratory dental office!!

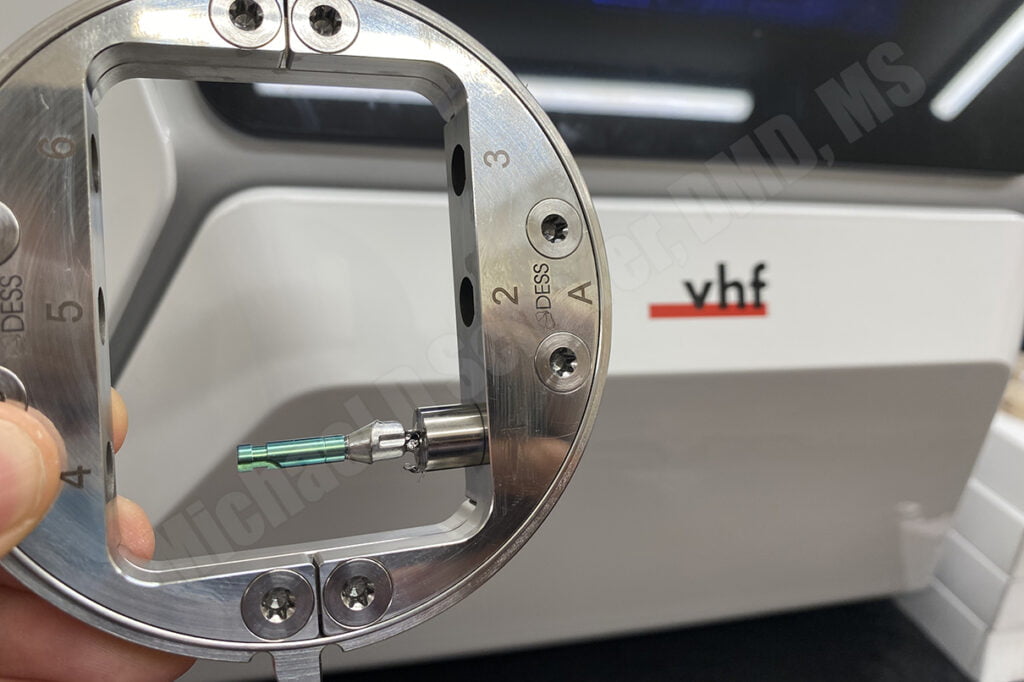
Part of the reason why I invested in a VHF R5 mill is so I could mill titanium discs and blocks. Why would I need a special mill to be able to do that? Turns out milling titanium requires significant cooling as the contact between a bur spinning at 80,000 RPM tends to cause sparks and heat generation. To overcome that limitation, the milling machine sprays coolant, typically water with a bit of lubricant, to help cool the metal and minimize sparking. As a result, the R5 has the native ability to mill both zirconia and titanium in a compact machine – ideal for my combined clinical-laboratory office.
Let’s take a look at a case!
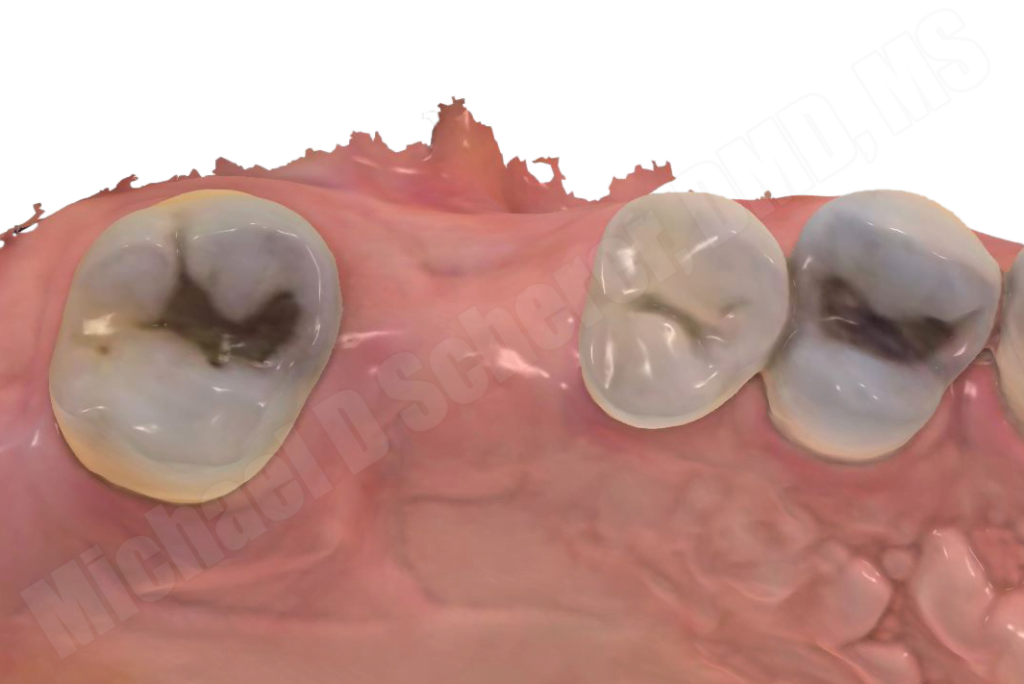
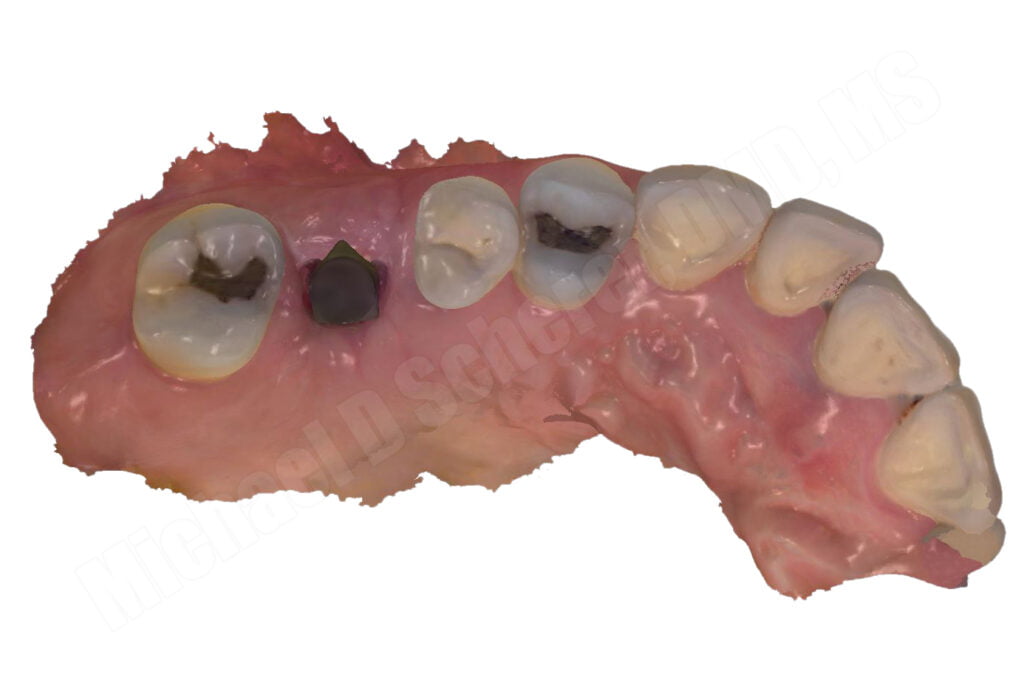
A patient came in requesting an implant & tooth replacement for missing tooth #3. From the intraoral scan using my 3Shape TRIOS intraoral scanner, the clinical presentation looked pretty ideal, but let’s take a look at it on a CBCT.
The CBCT scan was made with a VATECH Green CT and brought into 3Shape Implant Studio software where it was combined with the intraoral scan and the tooth was planned according to the ideal position within the arch. The occlusion was checked, contours verified, and a virtual Hiossen ET implant placed into the software for analysis. We planned a 4.5mmD x 10mmL implant with a surgical guide.

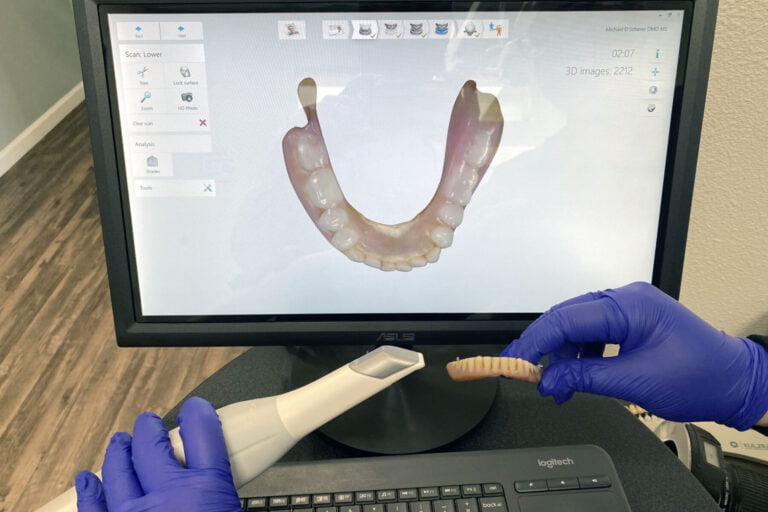
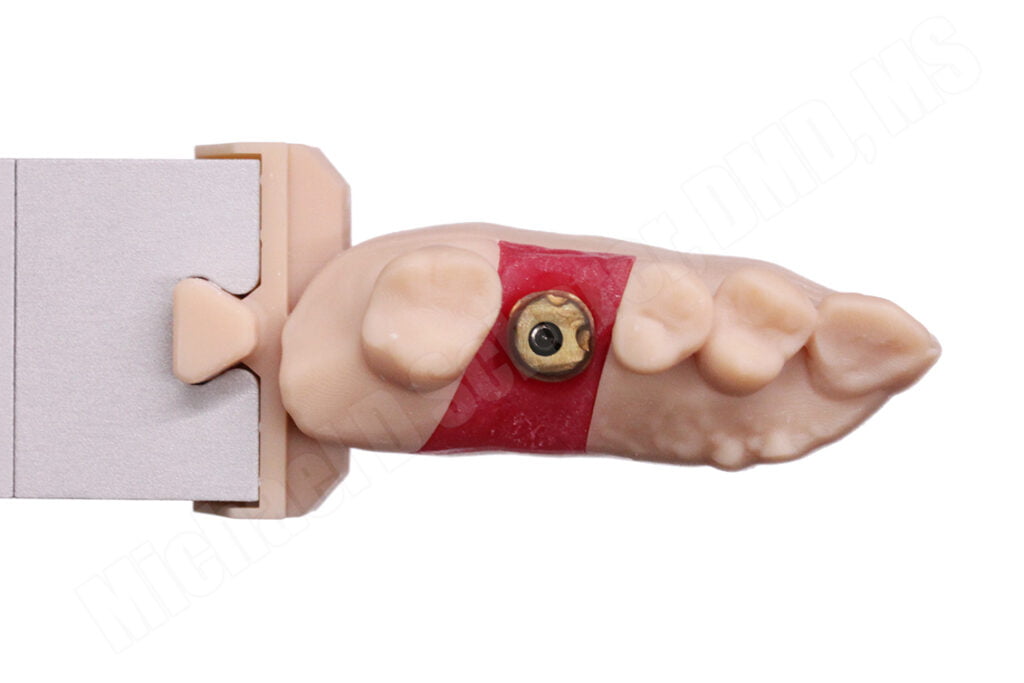
The implant was placed and a healing abutment placed at the time of surgery. Approximately 8 weeks later the patient returned for final impressions. The healing abutment was removed, the TRIOS scan of the arch and tissues was made without the healing abutment in place to capture the emergence form of the tissues. A DESS Scanbody for Hiossen was placed onto the implant and tightened down. An intraoral scan was made of the scanbody merging the two scans together automatically. The opposing arch scan was made and MICP/bite record made with the scanner. The healing abutment was replaced and patient dismissed.

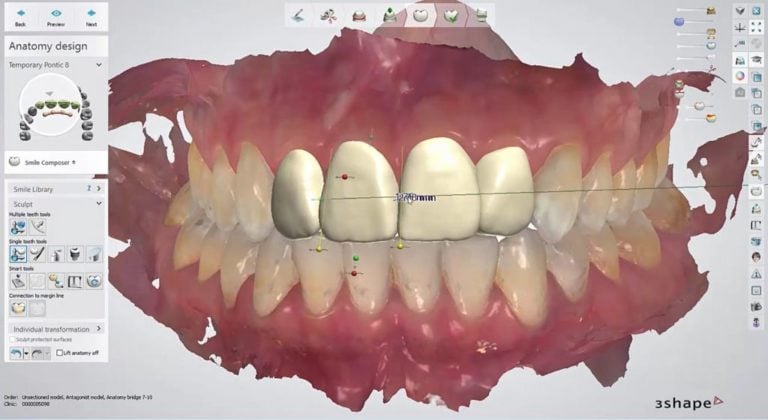
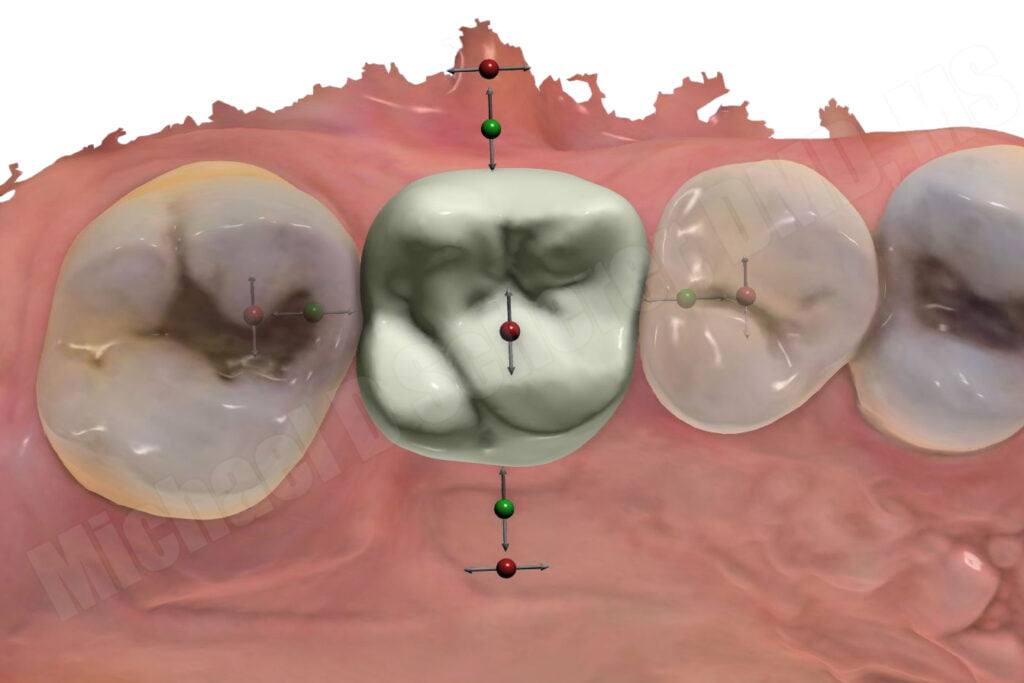
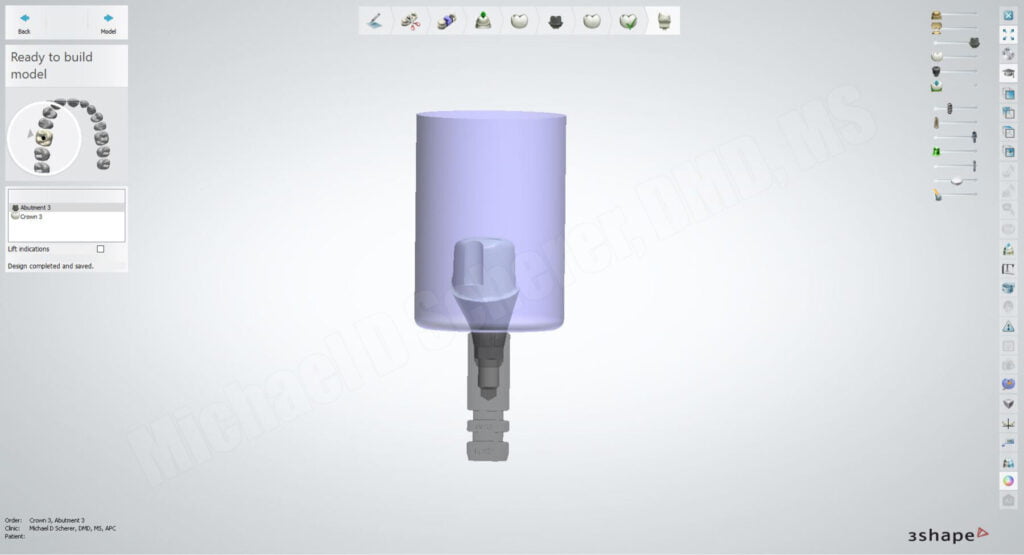
The optical files were imported into 3Shape Dental System software and using the step-by-step wizard function I aligned the virtual scan body to the intraoral scan of the scan body and the software picked it up right away. Using the wizard functions, the 3Shape software took me through designing a custom abutment following the shape of the soft tissues and emergence form.
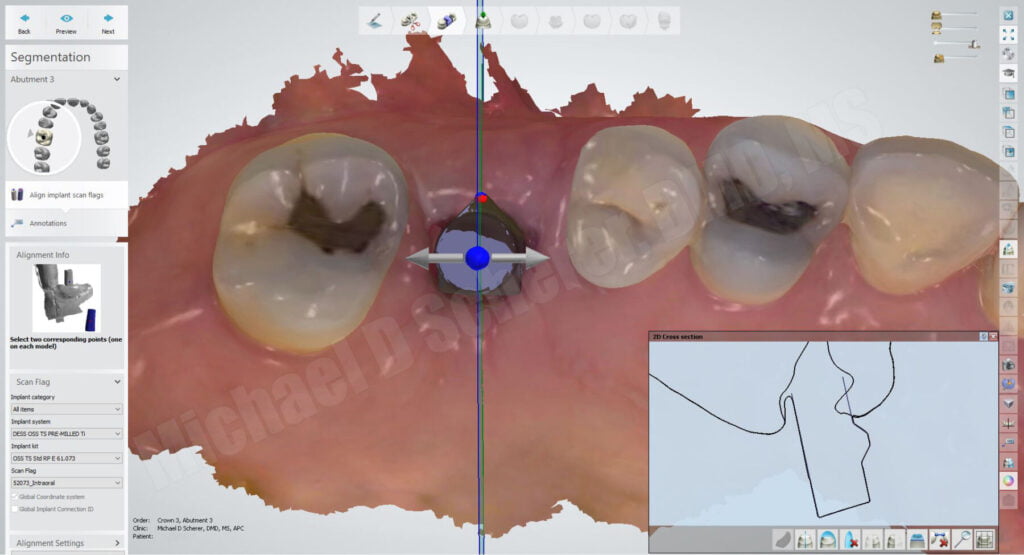

The software allowed me to adjust the size of the custom abutment to fit within the contours of the planned restoration. One great thing about using the right DME files in software like 3Shape to do this task is that you can view the shape of the designed abutment within a virtual blank to ensure that the designed abutment will fit properly within the DESS Ti Pre-Mill Blank for the custom abutment.
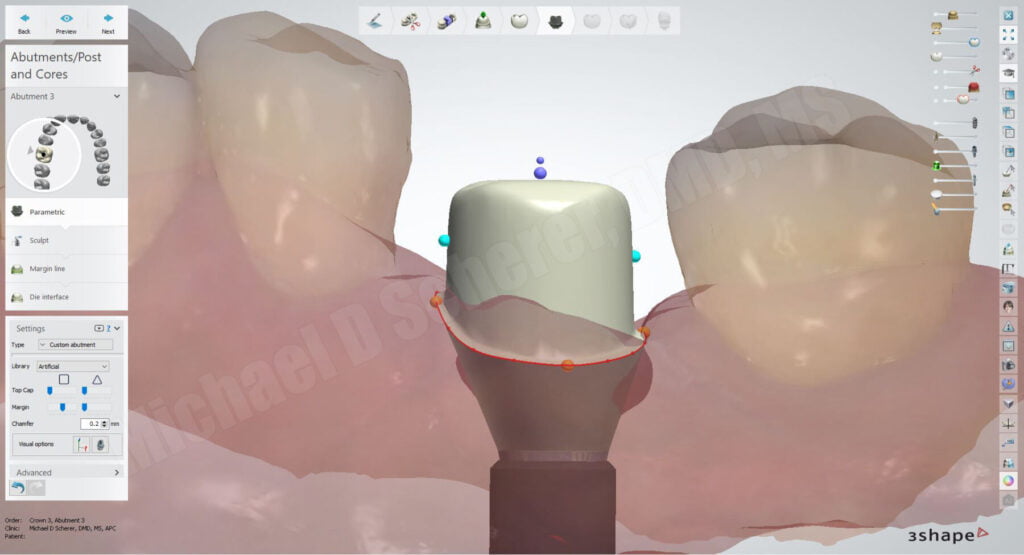
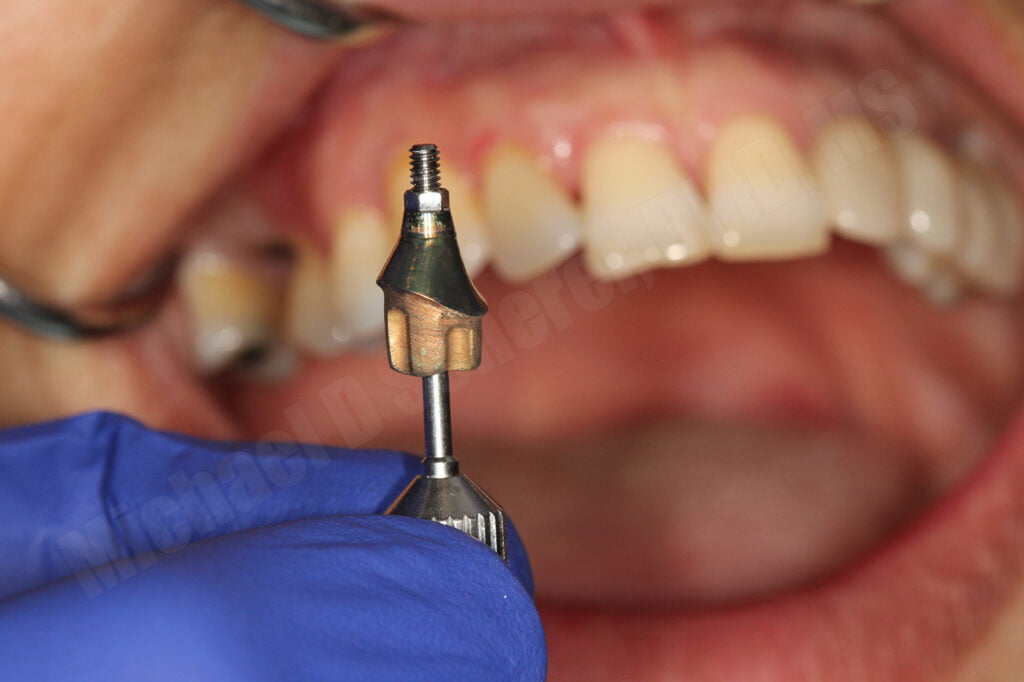
3Shape has a feature that allows you to create a “screw-mentable” crown with a screw access channel through the crown above the custom abutment!! My goal was to deliver an abutment, torque it down, and use a small amount of luting agent to cement the crown intraorally. Essentially I built a “split-file” abutment and crown so that way it was one design and it’s ready for milling!
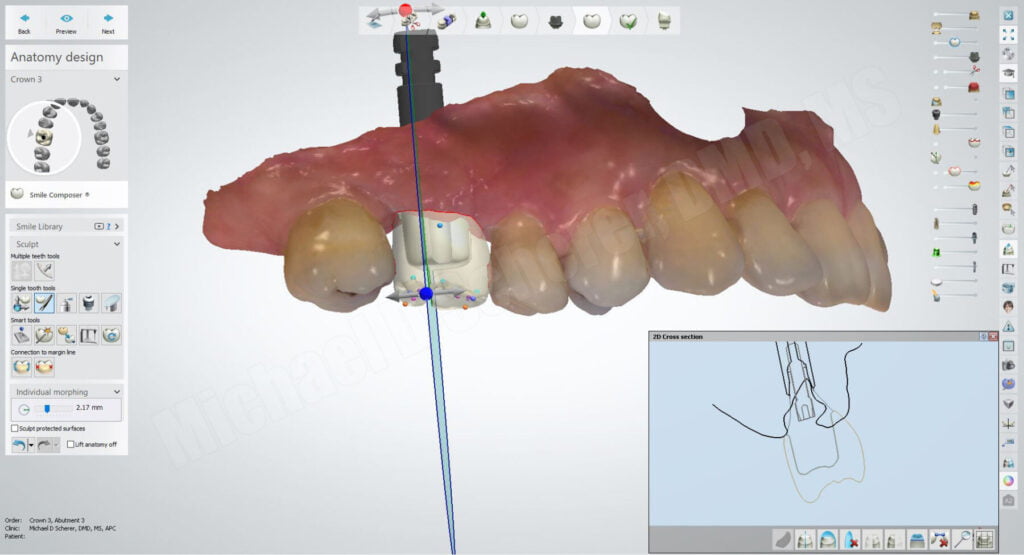
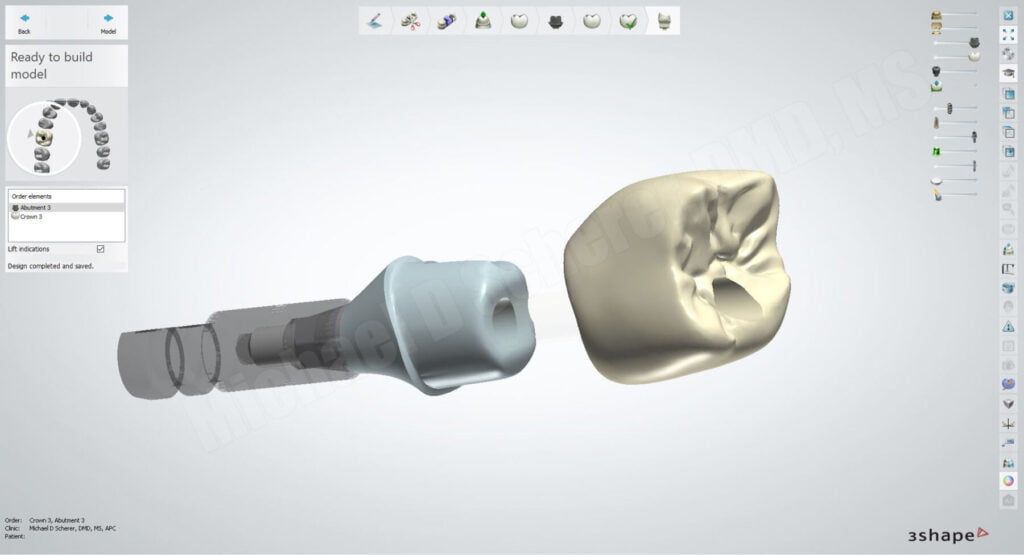
I imported the files into the VHF CAM software to prepare it for milling the abutment. The CAM software orients the abutment to fit properly within the blank according to the 3Shape output file.
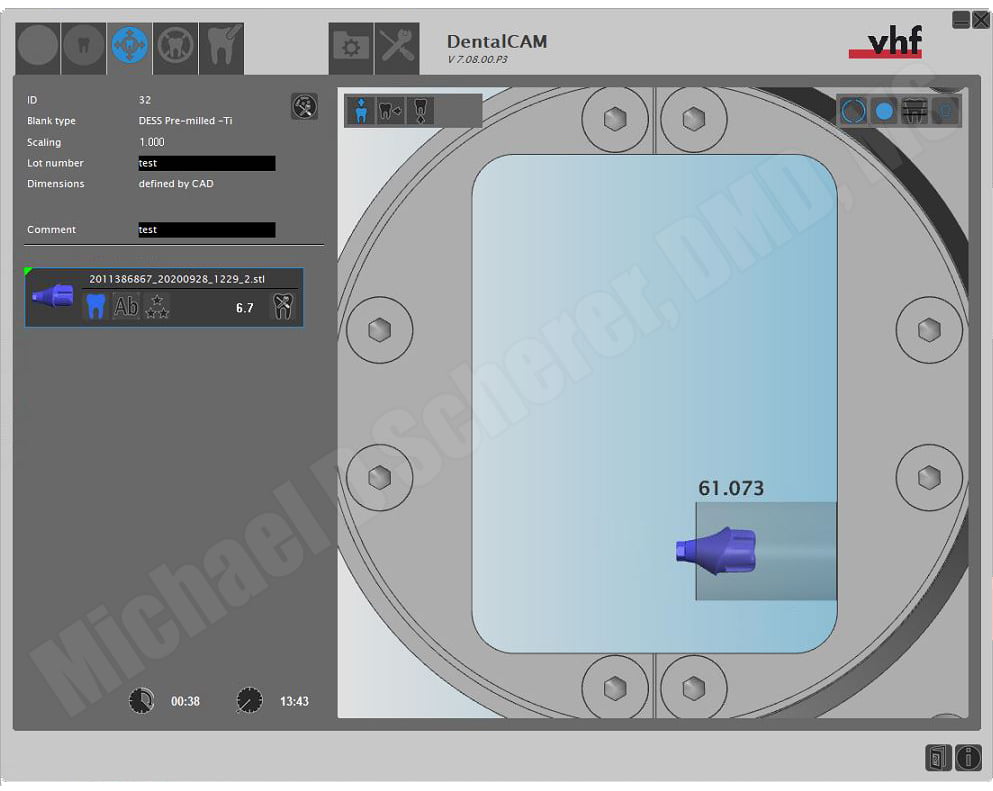
Because the VHF R5 has a 10-disc changer, I was able to run the two jobs in the same milling cycle… wait… really?
The R5 automatically can switch between wet and dry milling without user input or intervention so I was able to program this milling procedure to occur overnight. I started the machine at 6pm, went home, and came back in the next morning and everything’s done! In the morning, I removed the discs from the machine with the completed abutment and zirconia crown and the machined worked overnight.
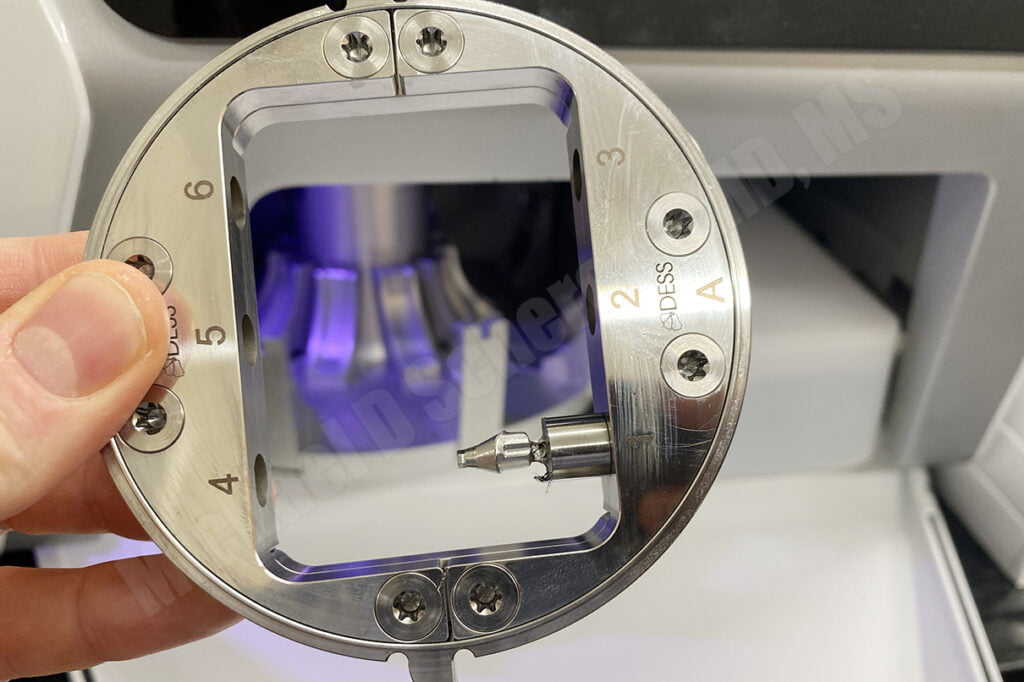
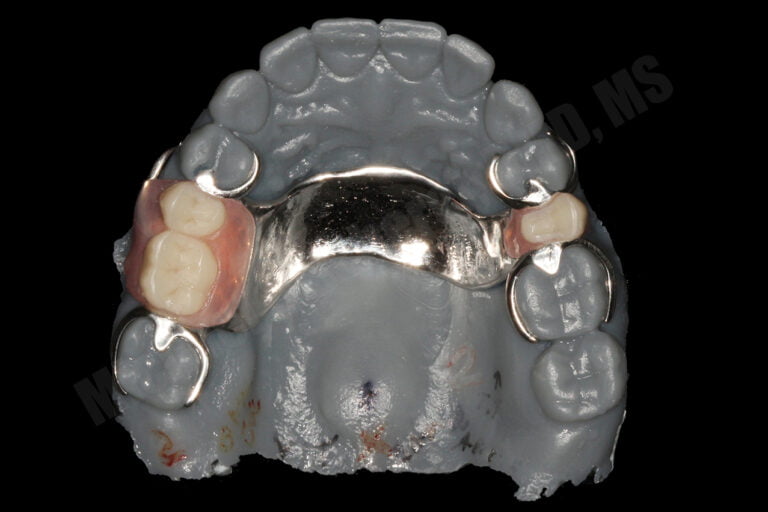
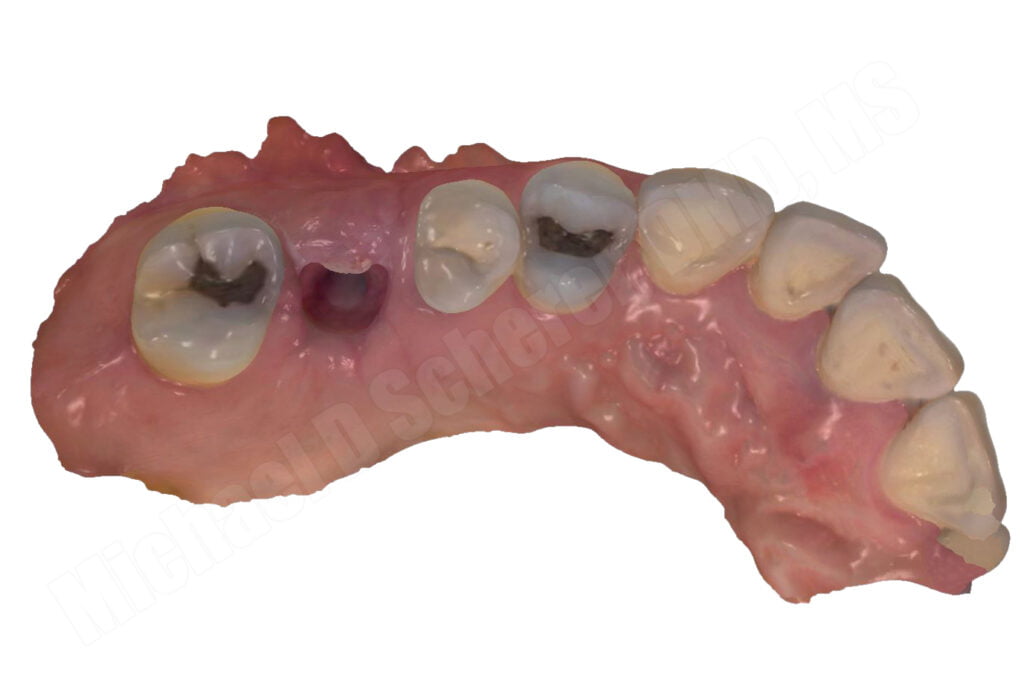
The neat about using the DESS Pre-Mill system with the R5 is that the parts fit right out of the machine, I even tried on an analog, perfect fit!

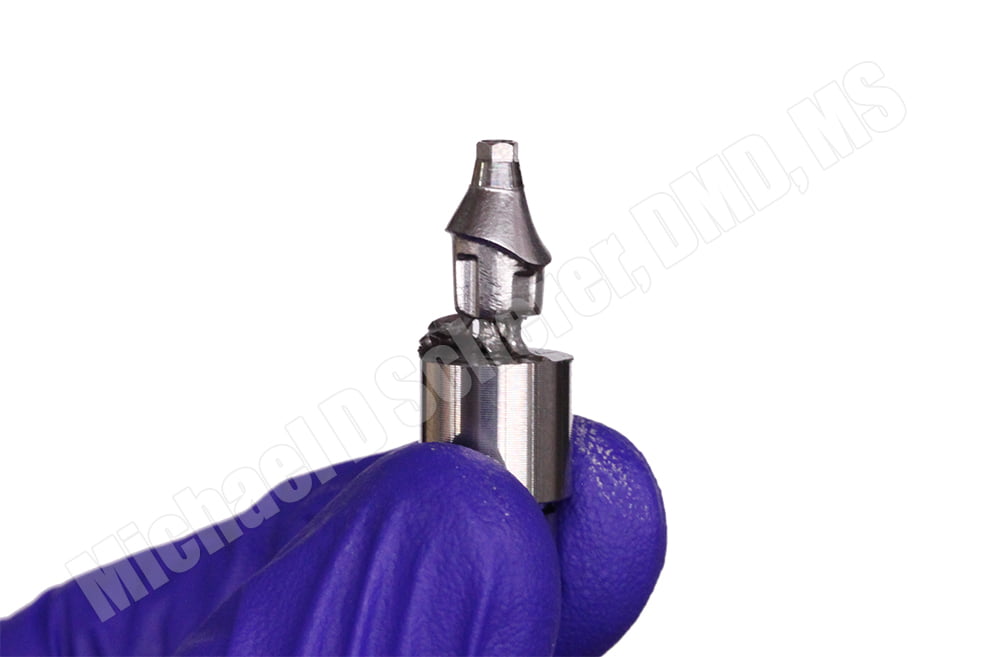
I printed models and gingiva using a NextDent 5100 3D printer using NextDent Model 2.0 Peach and NextDent Gingiva Mask. I fitted a DESS analog into the printed model and articulated the two together using a 3Shape articulator. After removing the sprue from the abutment, I air abraded the abutment using a Danville Microetcher and fitted the crown. Crown fit right on the abutment, although some minor adjustments was needed, it took all of 3 minutes to adjust for small manufacturing tolerance errors.
After completing the staining and glazing procedure for the crown, fitting the contacts, and checking occlusion, I anodized the abutment everywhere except the implant connection to turn the abutment a slightly gold hue color.
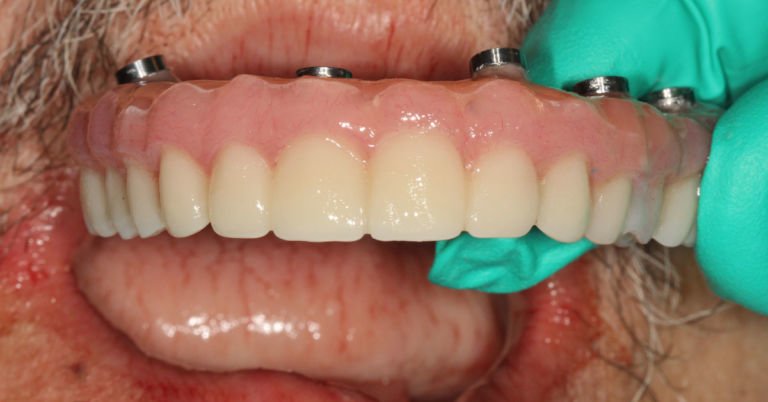
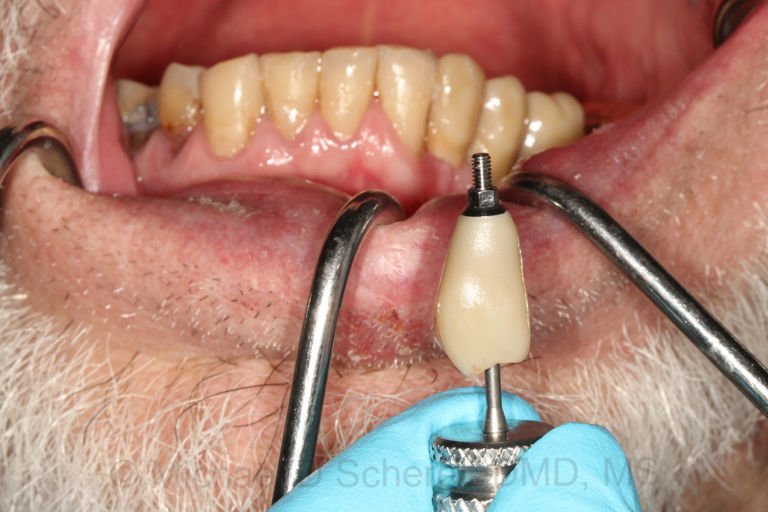
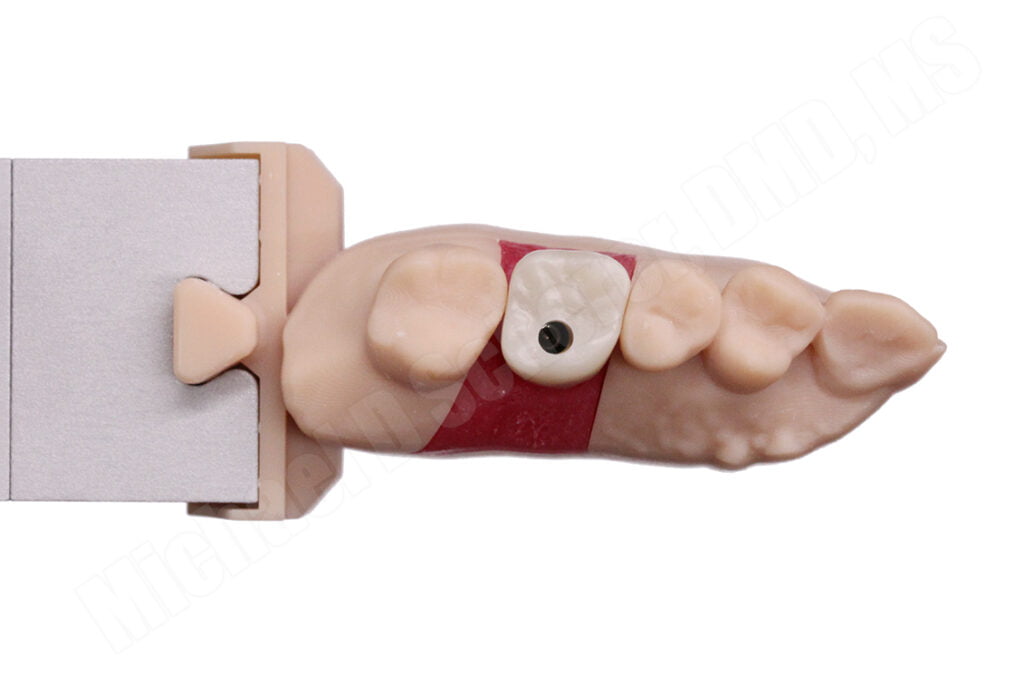
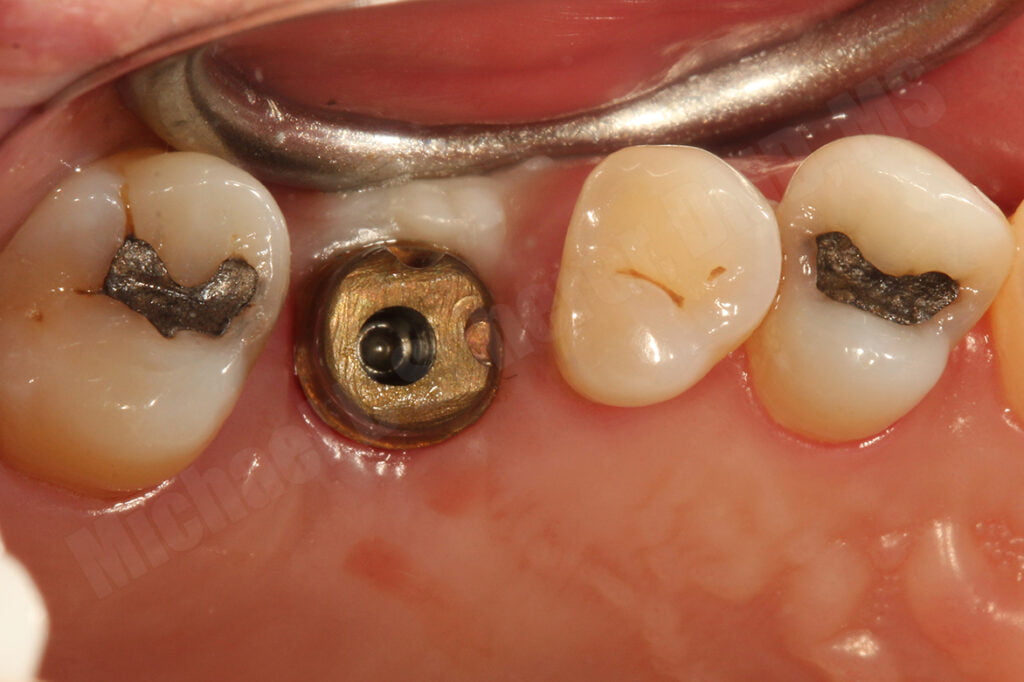
The patient returned, healing abutment removed, and the abutment and crown fitted onto the implant. Literally no adjustments needed, the patient was thrilled the with the final result. The contours of the milled abutment and crown allowed everything to fit in effortlessly.
I torqued the abutment down to manufacturer’s recommended values, air dried the abutment, placed PTFE over the screw channel, and used a small amount of RGMI cement to cement the crown to the abutment. A nice feature of creating a screw channel through the crown was this “screw-mentable” design allows for excess cement used during this process to easily escape from the top of the crown with minimal chance of subgingival cement.

The entire delivery appointment was fast, efficient, and leaves a very happy patient with the beautiful result of the final restoration. Digital dentistry doesn’t need to be complicated or laborious. The key is to make our technology work for us in the right way!
Interested in learning more about CBCT, implant planning, 3D printing, and some amazing step-by-step protocols in your office and/or laboratory? Check out our innovative step-by-step online digital dentistry course at www.LearnDental3D.com

Dr. Michael Scherer, DMD, MS
Dr. Michael Scherer is an Assistant Clinical Professor at Loma Linda University, a Clinical Instructor at University of Nevada – Las Vegas. He is a fellow of the American College of Prosthodontists, has published articles, books, and in-person and online courses related to implant dentistry, clinical prosthodontics, and digital technology with a special emphasis on full-arch reconstruction.