That Print Failure Wasn’t the Printer’s Fault – How I Fixed It!
I’ve been 3D printing for a while now and printing failures used to be a big problem with some of the earlier desktop grade 3D printers. Today, the software and hardware platforms are synced well enough that it can properly analyze STL files and make sure they’re ready for the printing process.
While I have 12 3D printers, two that I use very often are the 3D Systems Nextdent 5100 3D printers. They’re super fast, accurate, and very reliable. In fact, in the 2+ years of using the printer, I have only had 2 print failures! Sure, some simply will think I’m full of it, others think I’m some liar but it’s true. Those two failures were strange events, the printer just didn’t print one print, and the second literally was fixed just by reprinting the same file. Meh, stuff like that occasionally happens, but if you compare that to the 3,000+ prints that I’ve had on those two printers… not bad.
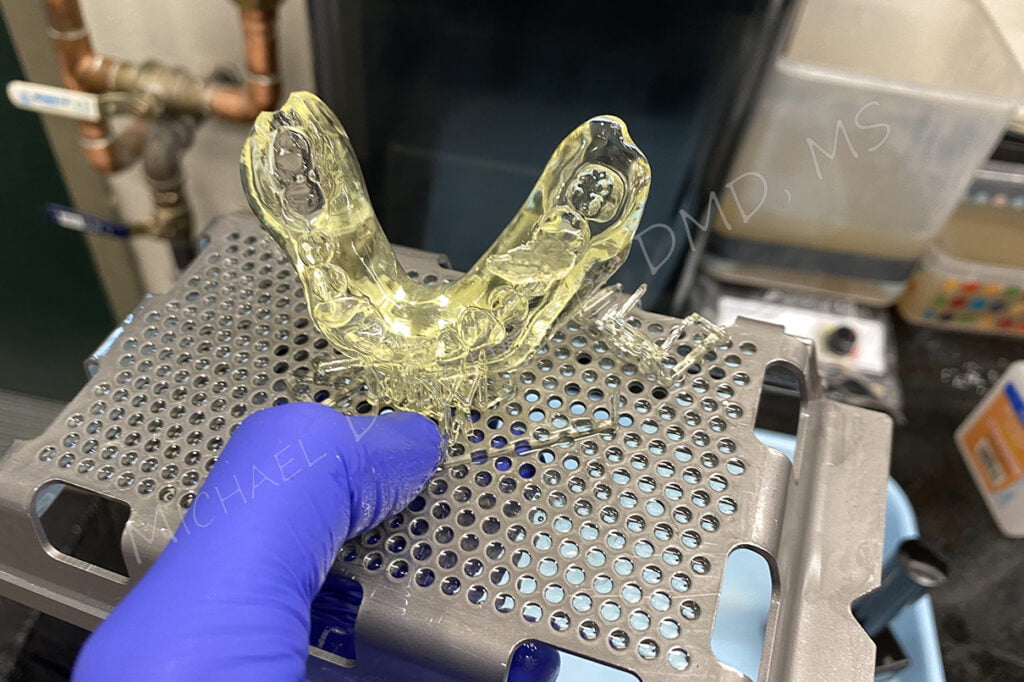
I recently had a third print failure though, OMG Facebook groups are going to go crazy calling me out. Yeah, maybe not… but it does give me an opportunity to figure out why it happened in to potentially elucidate a bit of deeper understanding of how 3D printing works.
So what exactly happened? Let’s take a closer look. My goal was to print an AllonX surgical guide for an upcoming case. I exported the monoblock denture from exocad software and imported it directly into 3D Sprint software. I printed it using NextDent SG Resin.
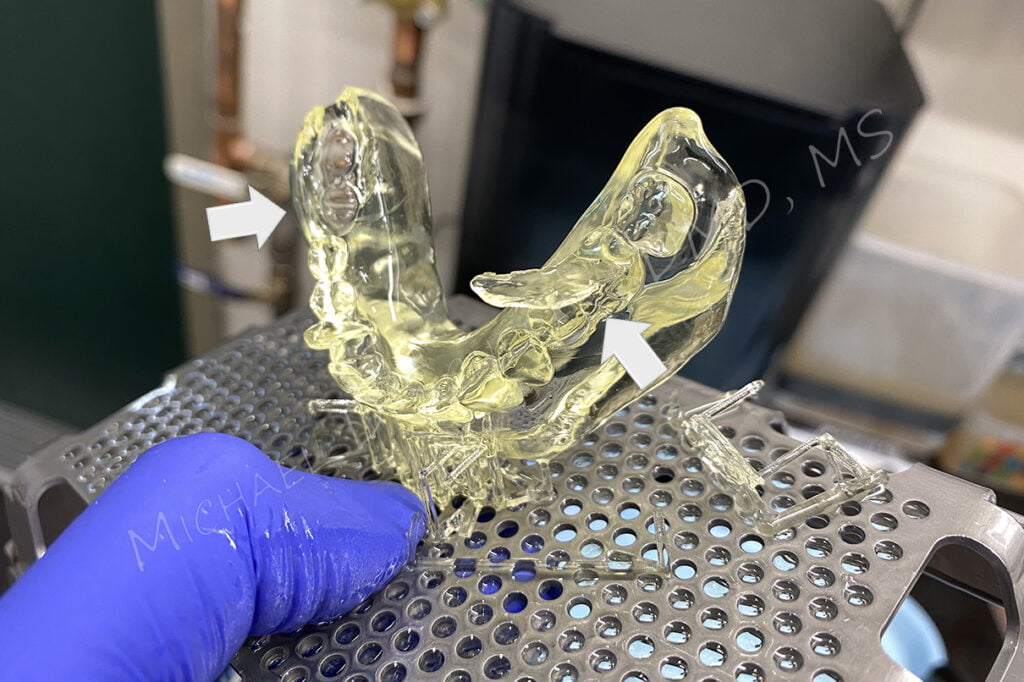
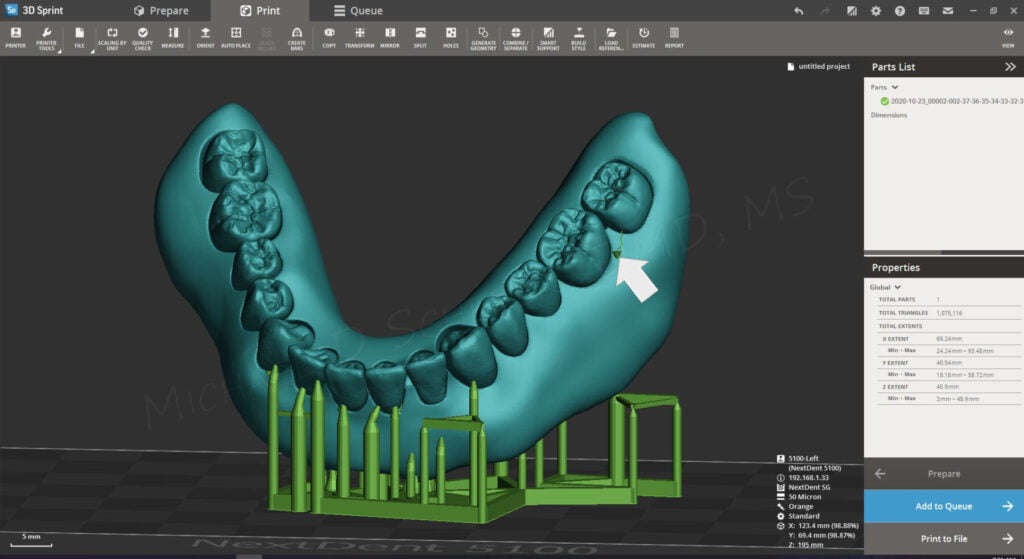
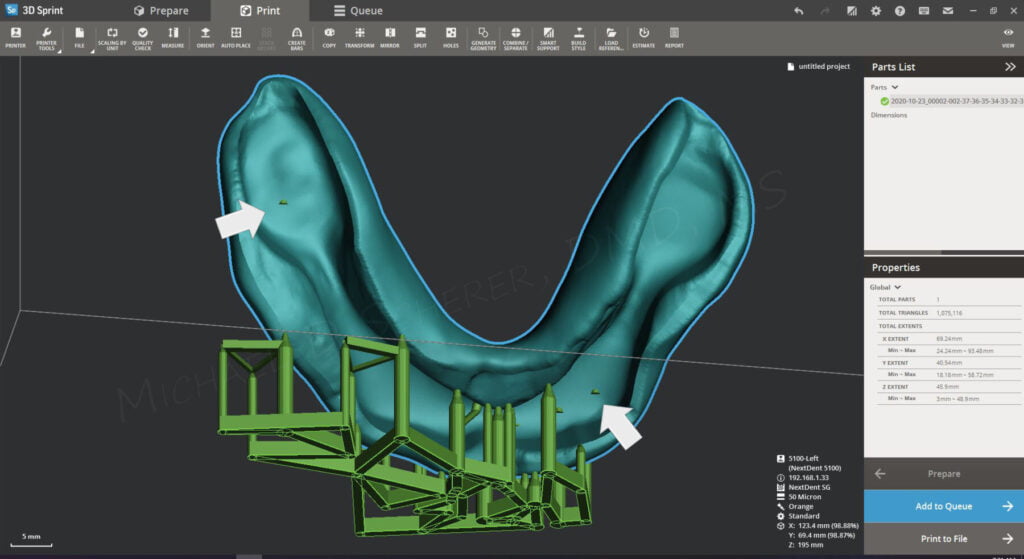
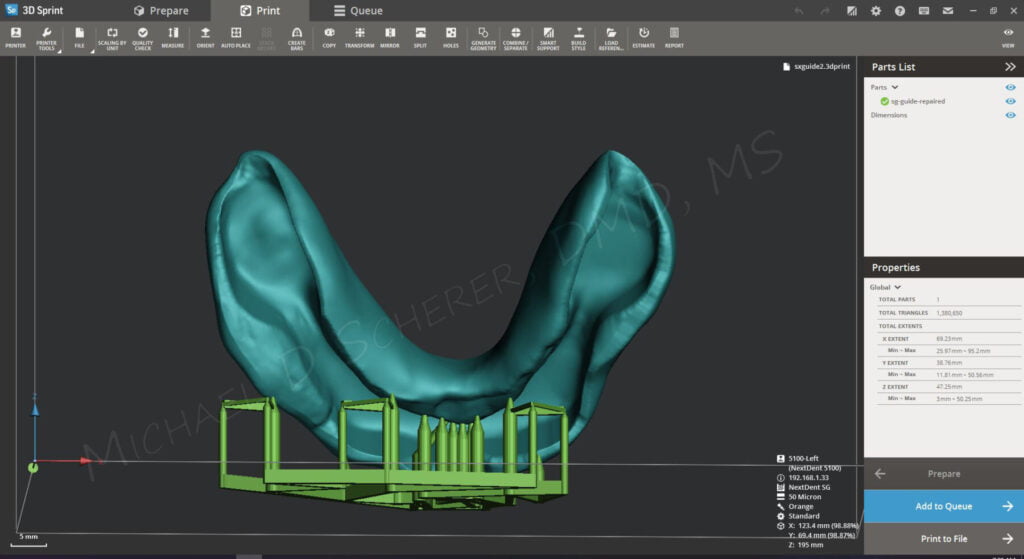
I was surprised what I saw, random areas of fins and what appears to be sockets in the denture base. Overall it appears like the print printed fine except in a few areas right around the left and right molar regions. This immediately made me think… weird! Sometimes things like this happen when there’s dirt on mirrors or if resins are contaminated but I’ve never had those issues with the Nextdent printers. Regardless, I looked at the resin tank, it’s clear. The build platform, good to go. Any dust on the mirrors or projector? Nope. Hmm… let’s take a look at the software. I didn’t see it at first but now that I take a closer look, I can see tiny little green lines indicating random support lines in the areas of the molars. Also, it seems they’re existing between the anterior portion as well.
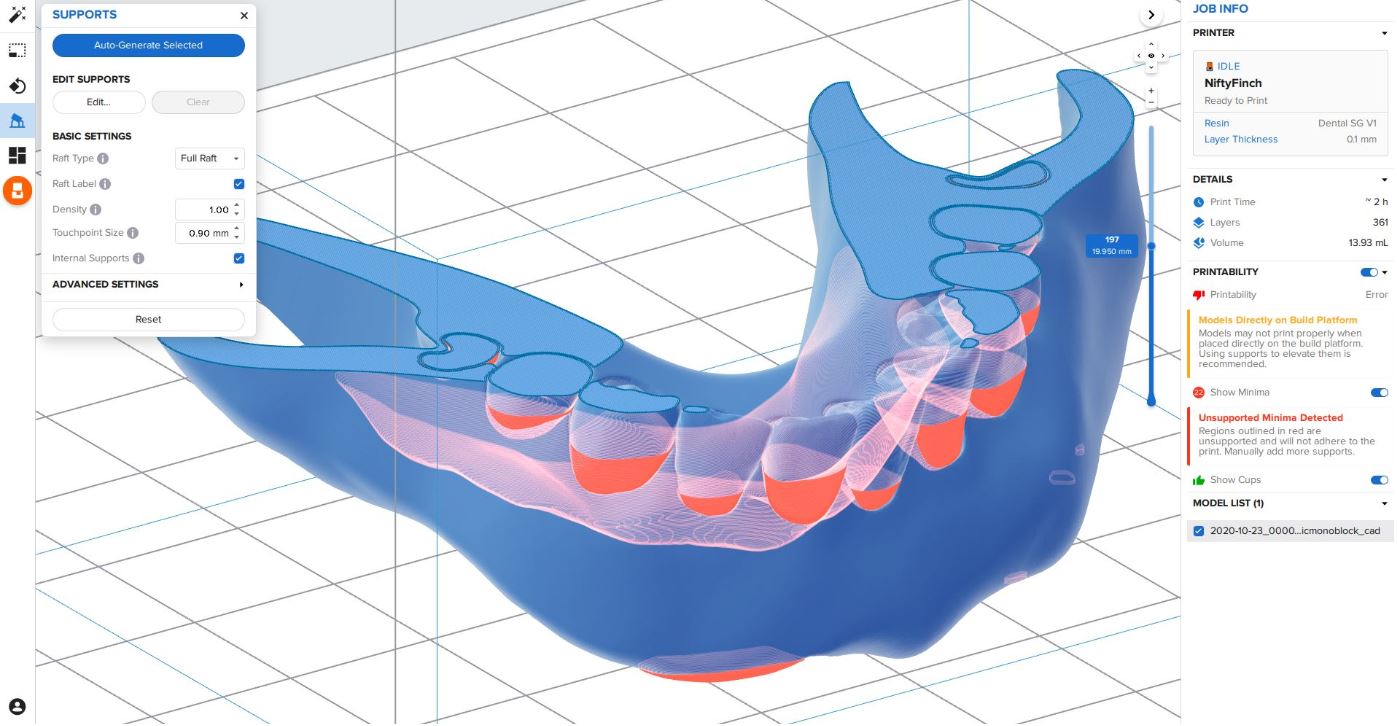
Just for good measure, I thought “why not try the STL in another 3D printer software?” So I imported the same STL file into Formlabs Preform software, which allows me to do an individual slice by slice analysis of the print how the printer would handle it. Ah, this may be the problem… look at the rings around the denture teeth and the software is indicating unsupported areas just below the denture teeth.
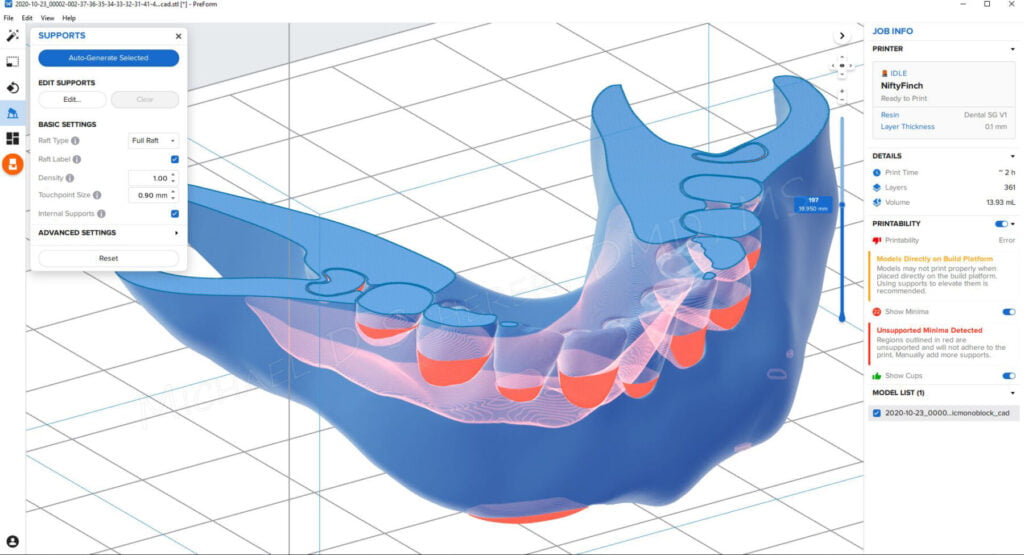
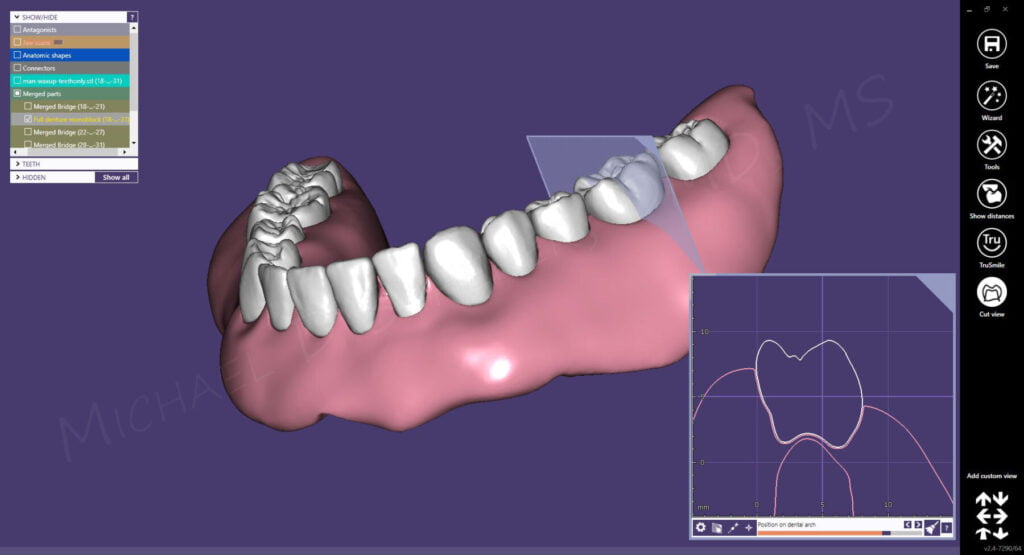
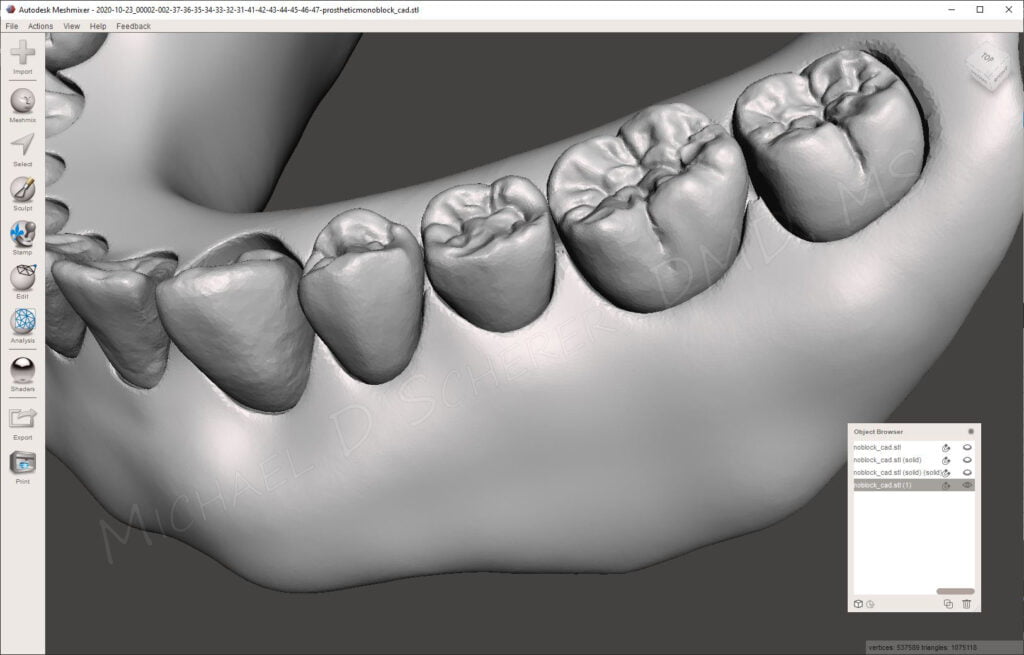
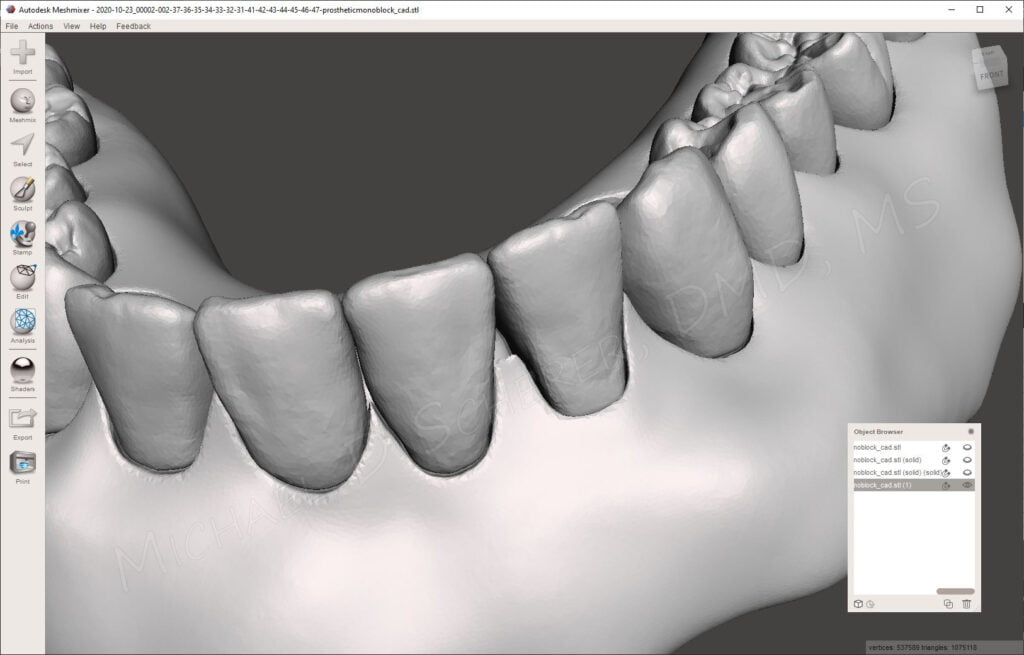
Let’s take a closer look at how it looked in exocad. In exocad, the monoblock output creates essentially a water-tight seal around the denture borders and teeth, however, in this case it appears that the STL file may have pockets underneath the prosthesis. I even checked that I used the function “optimize for 3D printing” in exocad. Strange, but not surprised by this effect which could be the likely reason the printer tried adding supports to those areas.
Likely the reason of why this happened? I built in 0.30mm of cement space underneath the denture teeth in exocad. I just like having denture teeth that fit a bit looser and my technician can then easily fill the space with resin if I print or acrylic if I mill the prostheses. I could have gone back and re-adapted the base in exocad easily using the expert mode, but I didn’t have time to mess around with re-doing the steps so I thought… “Meshmixer to the rescue!!” lol.
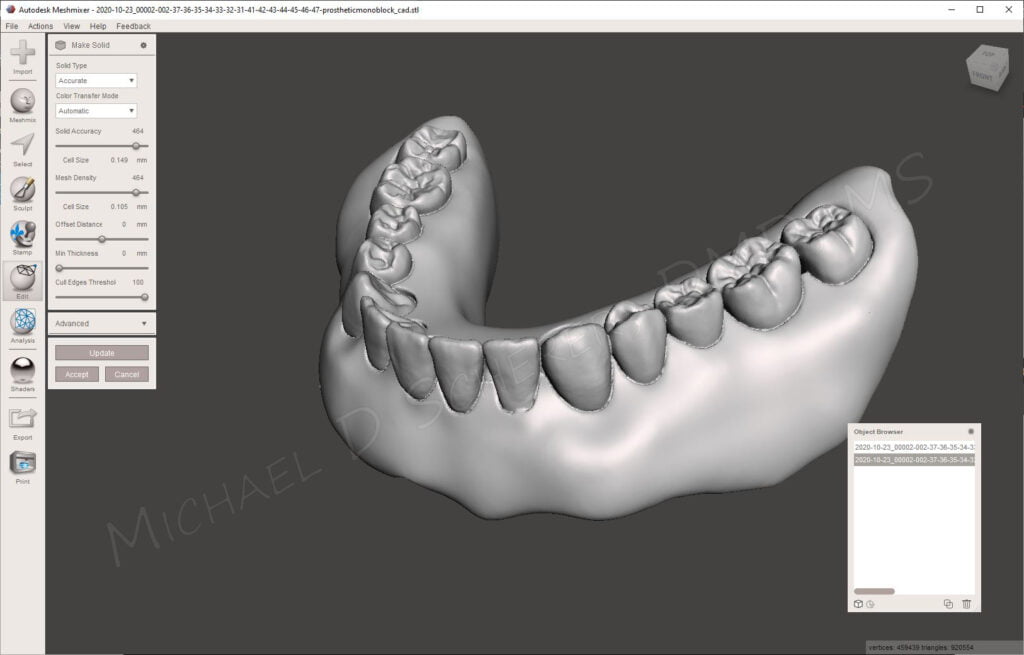
Autodesk Meshmixer software is designed to take 3D files and turn them into “ready-to-print” 3D files. Essentially it’s a stop-gap when things go wrong for the 3D printing enthusiast. Meshmixer has two special special feature, first “inspector” and second “make solid.” The inspector function analyzes the 3D file for any areas of inconsistencies and errors. I tested that function, exocad exported a perfectly good file with no errors. Next – make solid. Make solid will take multiple layers of 3D files and then turn them into a singular mesh file so that way when a 3D printer software prepares a file for printing, it’s not separated. If you’ve had the chance to play around with the software, think of Adobe Photoshop and how it handle’s layers. We essentially need to “flatten the image” if borrowing a Photoshop analogy. exocad exported the monoblock denture as a multi-part combined file. Make solid turns it into a singular 3D STL.
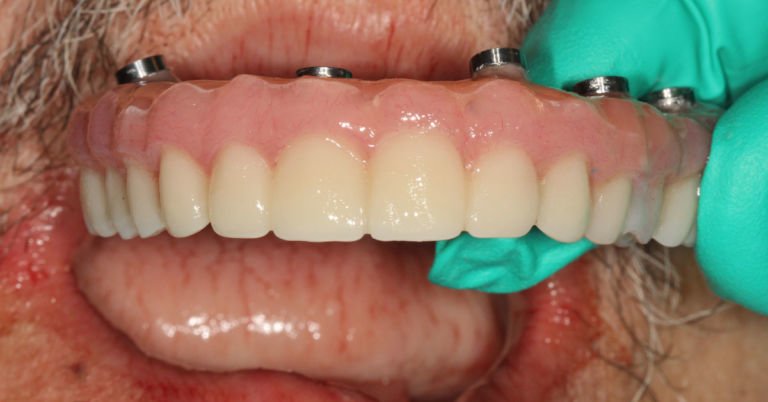
Using the make solid function turned the segmented and layered 3D file with multiple vertices into a “flattened” 3D file with merged vertices. I had to play around with the settings to get it just right because the make solid function tends to wipe away details. Choosing a higher accuracy setting allowed me to repair this surgical guide properly. Now the key with make solid – I rarely use it for surgical guides, dental crowns, occlusal guards etc. Why? Make solid is a last-ditch effort to repair a file and invariably you lose details of the 3D file. In this case it was a good choice because essentially I was just making a classic AllonX surgical guide that I use in my cases and teach in my online courses. It’s a duplicate of the patient’s immediate denture that will become the interim AllonX prosthesis once the implants are placed. As a result, super detail just isn’t required.
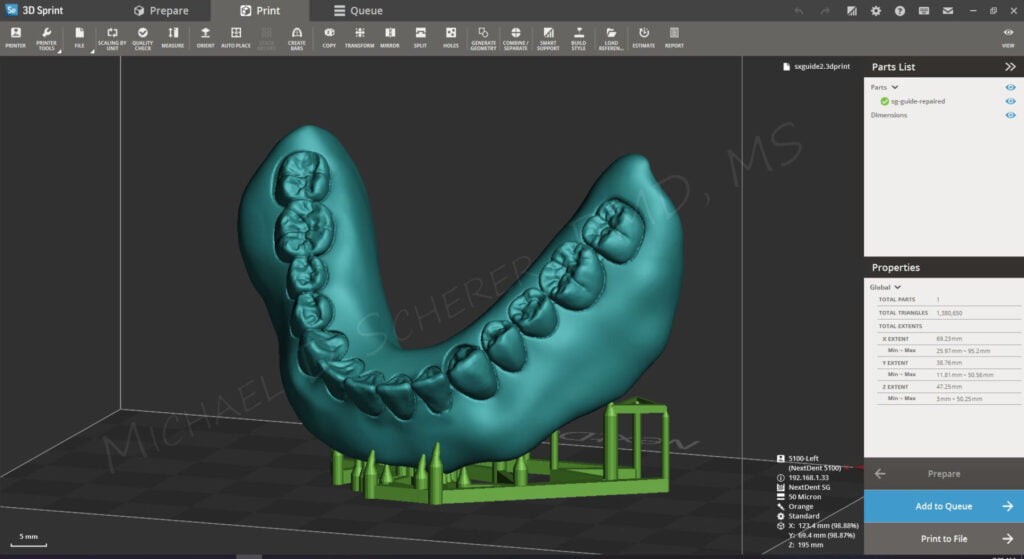
After exporting the newly minted solid model from Meshmixer and bringing it into 3D Sprint software, I immediately saw the differences in the support layers. I kept the guide at the same angle as it’s my preferred way to to print guides and dentures. I clicked print on the Nextdent 5100 printer and it printed perfectly.
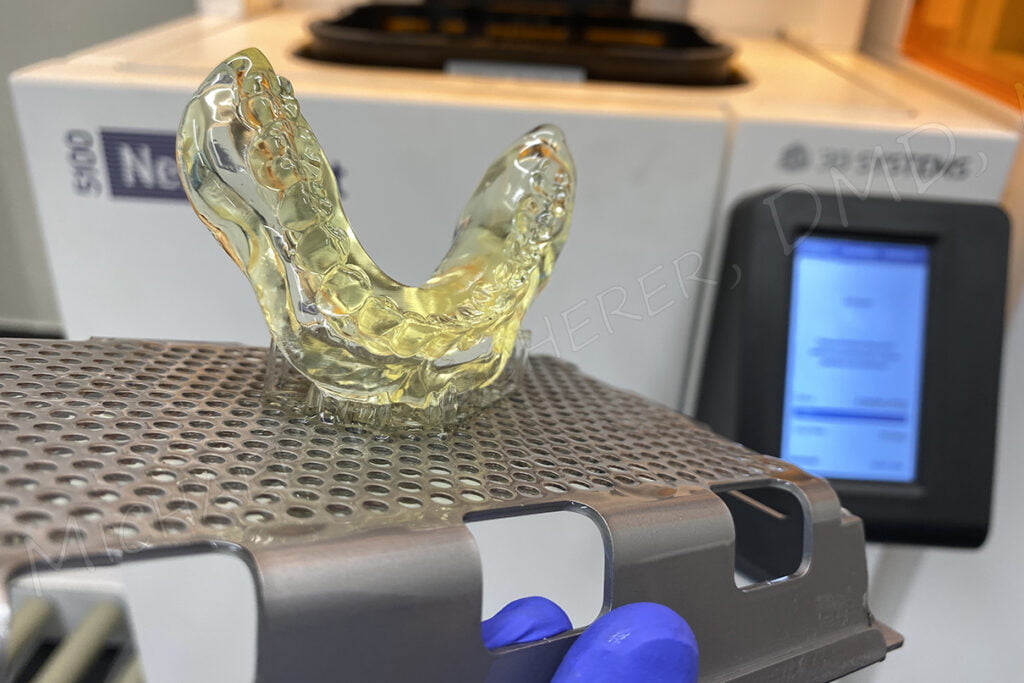
Learning these lessons the hard way is sometimes the best way. The reason why the print failed is because of unsupported areas underneath the denture teeth. As the printer was building layers, it tried building an object on top of open space and just couldn’t make the jump. Sure it takes a bit more time to deal with little issues like this but they’re great lessons on how 3D files work and how 3D printing works.
Interested in learning more about CBCT, implant planning, 3D printing, and some amazing step-by-step guided surgery protocols in your office and/or laboratory? Check out our innovative step-by-step online digital dentistry course at www.LearnDental3D.com

Dr. Michael Scherer, DMD, MS
Dr. Michael Scherer is an Assistant Clinical Professor at Loma Linda University, a Clinical Instructor at University of Nevada – Las Vegas. He is a fellow of the American College of Prosthodontists, has published articles, books, and in-person and online courses related to implant dentistry, clinical prosthodontics, and digital technology with a special emphasis on full-arch reconstruction.

