3D Printing Same-Day Permanent Crowns with a Desktop Printer and Helping Out a Patient at the Same Time!
Yes you read the headline correctly… there are some really incredible things happening with desktop level 3D printing now! It’s been a long time coming and I am very excited about getting a chance to play around with some of the new and exciting materials coming out.
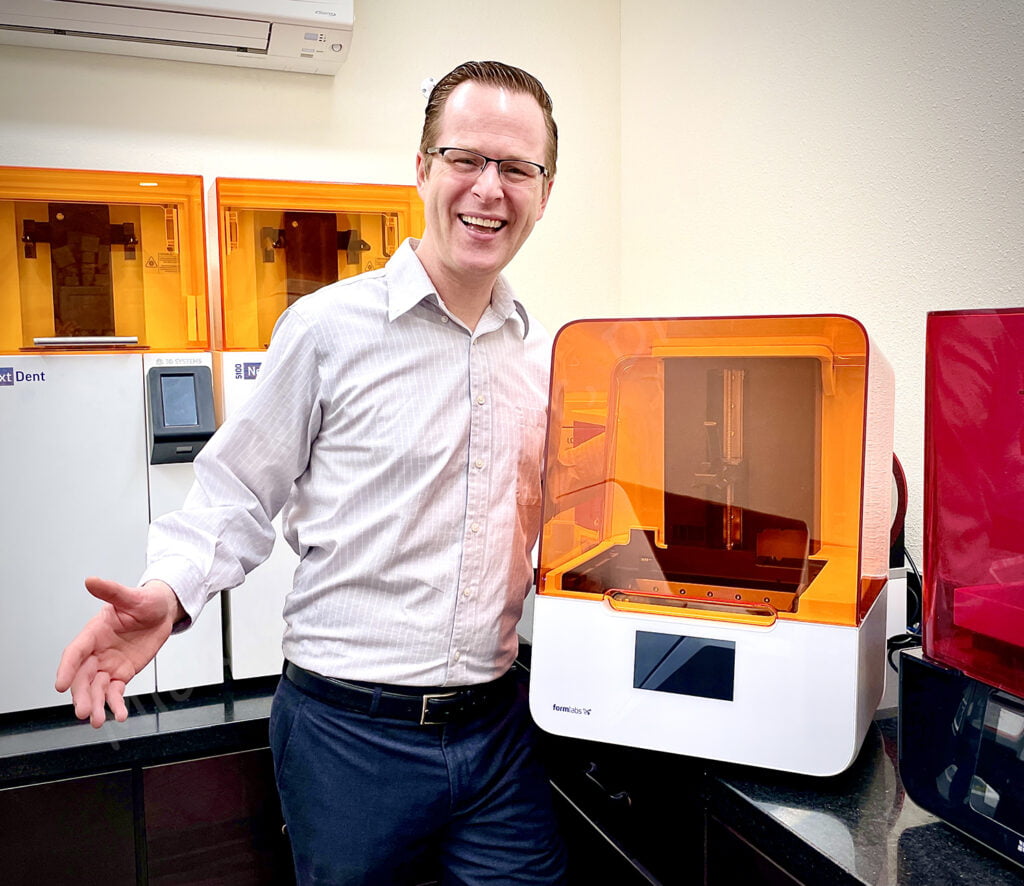
I recently decided to update my older Form2 3D printer (NiftyFinch and I have been on many exciting journey’s over the years!!) with a Form3B 3D printer from Formlabs. Part of the reason why I wanted to try it out was the development of some very interesting development and applications specifically for dentistry.
A big part of my practice is focusing on implant dentistry and providing restorations that work well for a patient long-term. A big part of what I do practicing in a rural part of California is to be able to find creative ways to be able to treat patients that come from considerable distances to my practice. Occasionally these same patients have significant life changes where treatment may be interrupted – it really would be amazing to be able to offer an intermediate treatment option when these things happen…
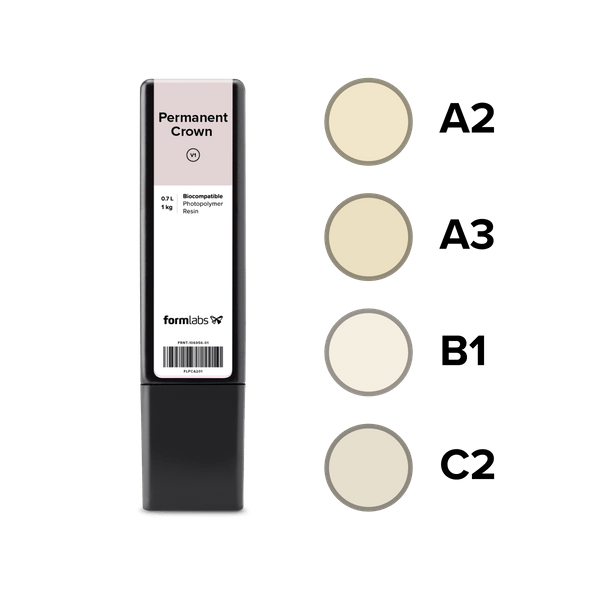
Formlabs has developed a novel newer 3D printing resin with Bego – Permanent Crown Resin. Touted as “the first hybrid material for 3D printing permanent restorations” we were intrigued. Part of the challenge of making final zirconia ceramics or porcelain-metal crowns in implant dentistry is the laboratory cost and turn-around time. It takes between 10 and 30 days for the dental laboratory to fabricate a screw-retained implant crown and the average anterior implant crown costs between $200-800 per unit. When patients have a turn for the worse with their finances and life events, it can be difficult making it work. Being able to 3D print a permanent crown in 30-45 minutes and a fraction of the cost… I am thinking of many possibilities!!
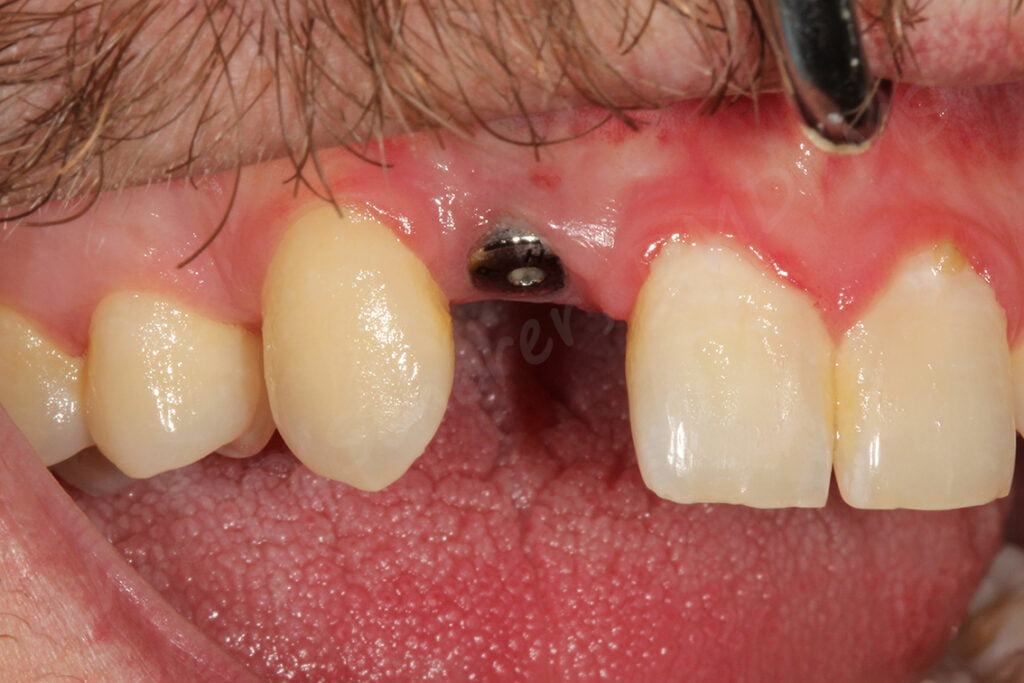
When my Form3B arrived, I immediately thought about a patient I wanted to reach out to – an amazing and kind individual that’s been having a rough time lately between COVID-19 job layoffs and recent life changes. He called our office several months ago indicating that he needed to put his esthetic work on hold until he could get things figured out. He was prepared financially prior to the shutdown but since then, it’s been a long-term “hold” on any discretionary spending. Our original plan was to veneer his anterior teeth after the implant was healed. He was able to pay for the implant but was having trouble going to the next step, which is simply to have us make the crowns/veneers. He was originally congenitally missing the lateral incisor and the one on the opposing side is peg-shaped.
We had placed a Hiossen ET implant just before the COVID-19 shutdown and he’s been wearing an interim partial denture as a replacement since then. He was getting nervous about his partial holding that’s been hanging in there for the past 12 months.
When the new printer arrived, we had him in mind for our first case using Formlabs’ Permanent Crown Resin. We called him up and told him that we got a new piece of technology that allows us to make permanent 3D printed crowns and was able to offer him a special discount as he would be one of our first patients using this new material. “Sign me up!” he said… and we scheduled him to come to our office for impressions.
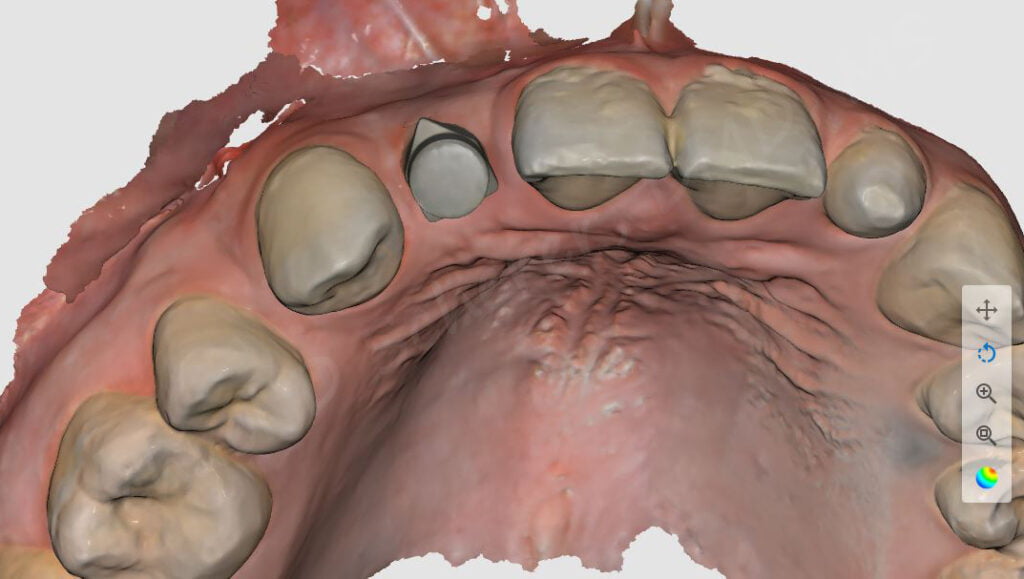
We removed the healing abutment and placed a DESS scan body that matches Hiossen for the diameter of the implant and corresponding platform. I used a Medit i500 intraoral scanner I got from Pearson Dental to capture the scan of the maxillary arch and mandibular arches, the scan body, and the tissues of the implant platform. I placed the healing abutment back and told the patient we need to make his tooth crown. Expecting that it would take several weeks, he went back up to the front desk and my receptionist asked him, “can you come back later today at 3 or 4pm?”… Dumbfounded, he asked, “for what?!” And my receptionist said, “for your printed tooth?” What!?!
He was flabbergasted and a bit taken aback, saying “that’s in two hours!” Yes… we were amazed too… but we were going to make it happen and at a tiny fraction of the cost of our normal ceramic crown cost.
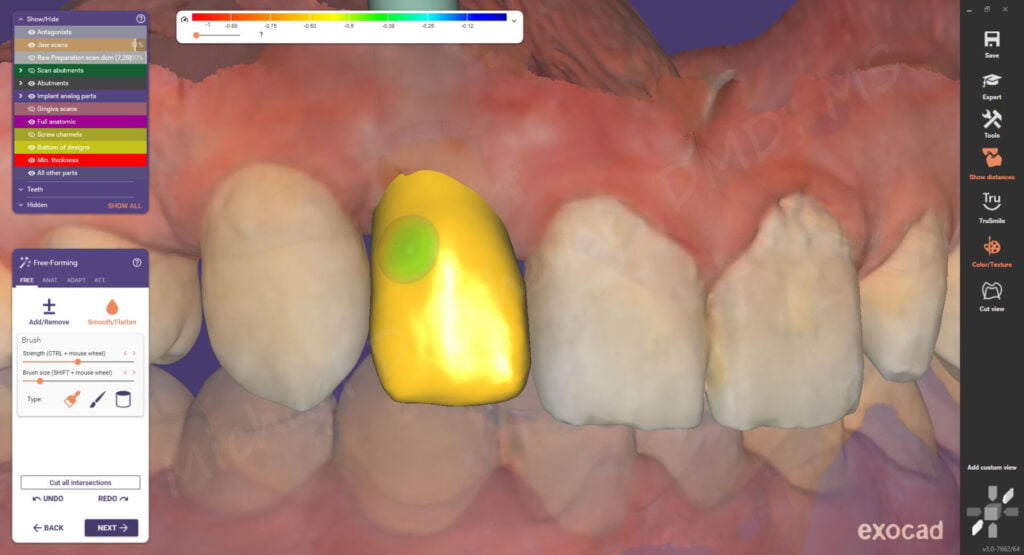
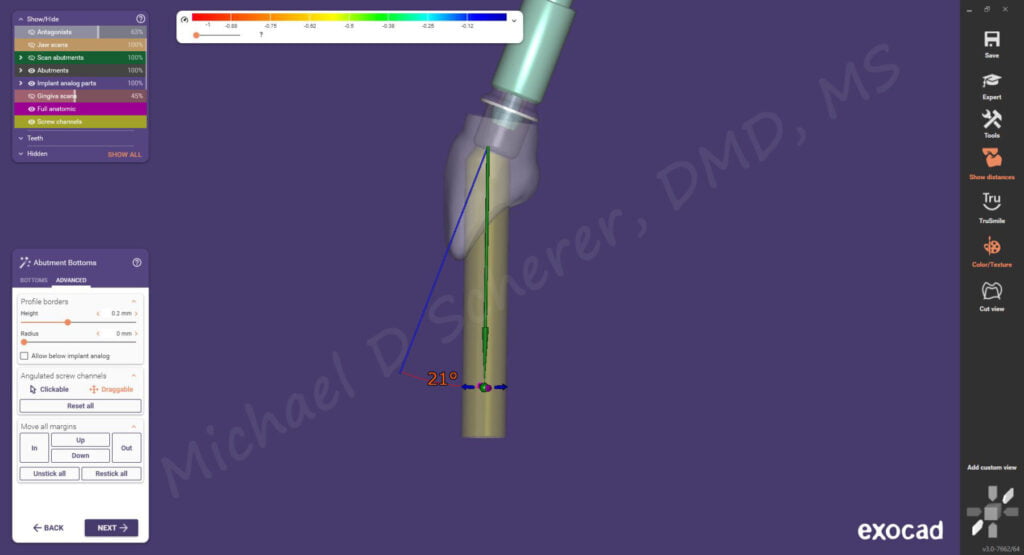
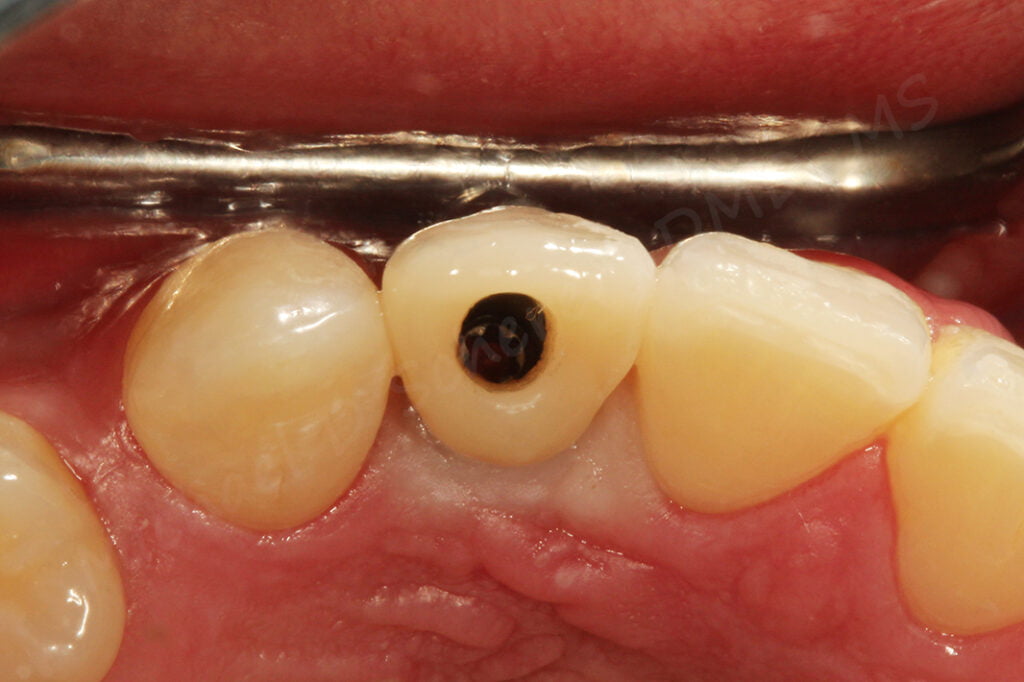
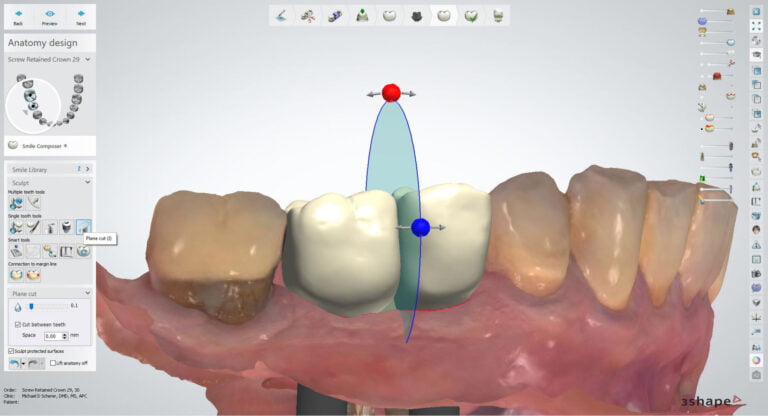
I exported the scans directly from the Medit software and into exocad chairside digital design software where I began designing the tooth restoration right away after scanning. I was able to use the built-in DESS library to control the position of the ti-base, complete a digital wax-up, and even design an angled screw channel so I wouldn’t need to go through the incisal edge of the restoration.
Note: the latest version of exocad “Galway” allows us to now use an easy to use drag tool to change angulation… I love this new feature!! 🙂
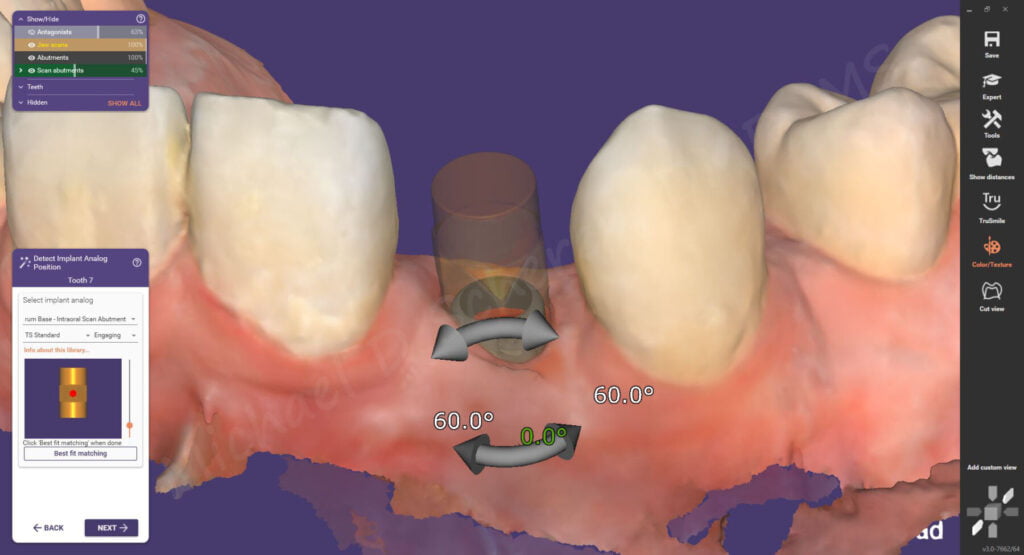
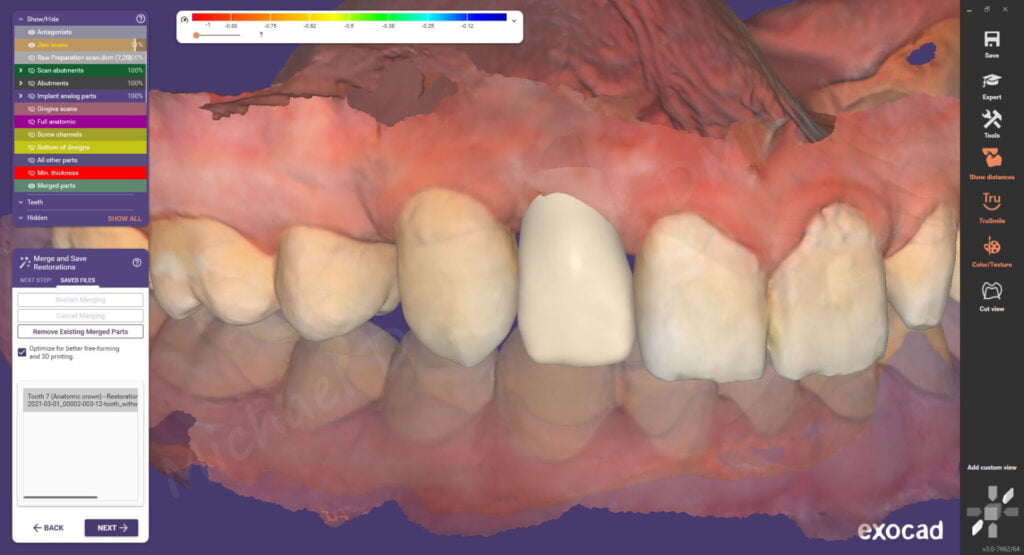
After designing the restoration in exocad, I exported the design STL file. I imported it into Formlabs’ Preform software where I was able to orient the file, add supports, and slightly oversize the fit of the ti-base by a few microns to ensure it would fit passively onto the ti-base.
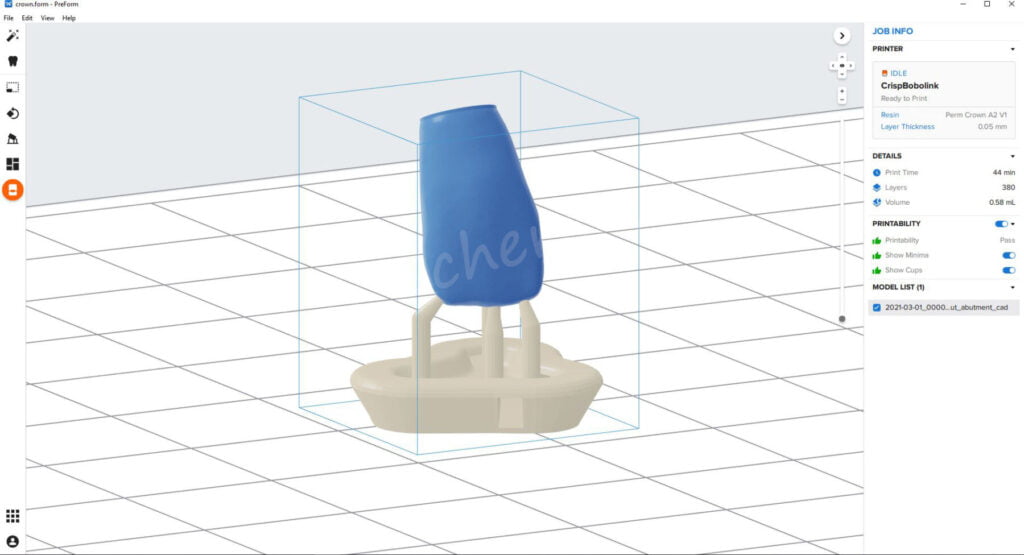
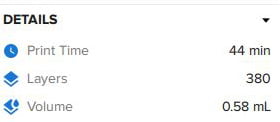
The neat thing about the Preform software is that I was able to get a fairly good idea of how long it would take to print and how much the crown would cost to print. Even though the Permanent Crown Resin was fairly pricey for the 1kg, you get a ton of crowns out of the cartridge (note: in this case, I could print close to 1,700 units out of the cartridge!!).
So the cost to 3D print our patient’s implant crown… yup, less than $1 ($1.25/mL x .58mL) and it will be ready in 44 min. Woohoo!!
The only caveat of printing with the permanent crown resin… I had to order a special stainless-steel build platform. So it did cost a bit more to get started with the resin compared to the rest of the Formlabs resins but it’s a single purchase and will be likely good for a loooong time…
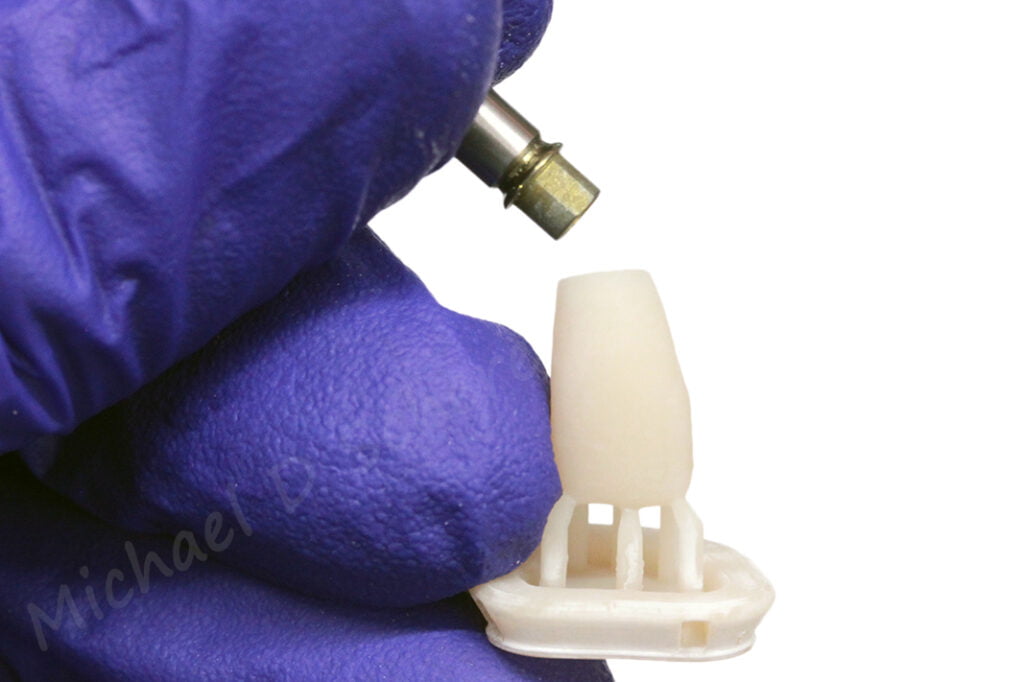
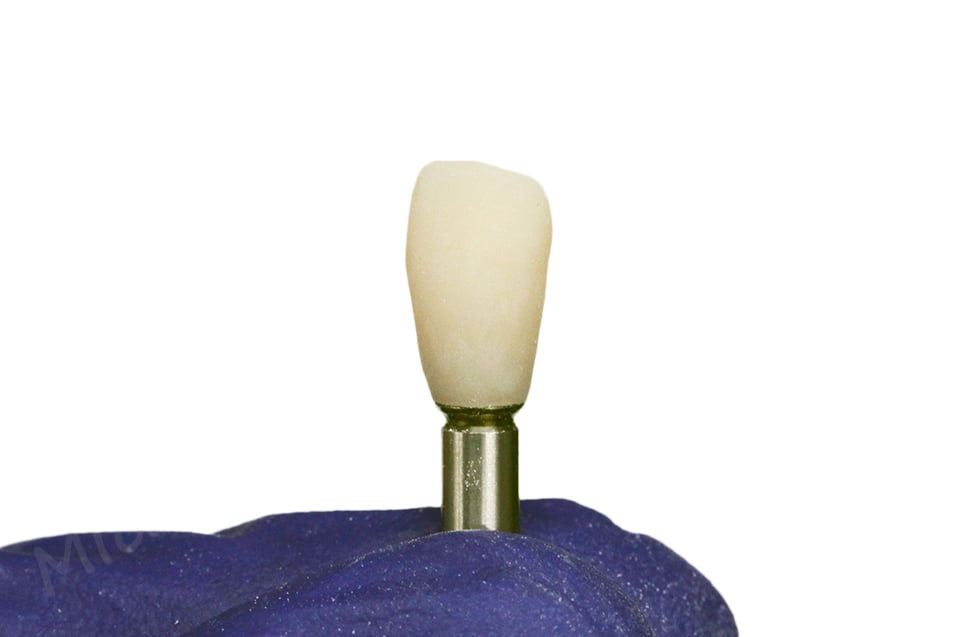
Fast forward 44 minutes – I’ve got a 3D printed permanent crown! I removed the special build platform from the printer and used my flush cutter tool to remove the printed crown and supports. I washed in alcohol and UV cured the crown according to Formlabs’ instruction manual for the resin.
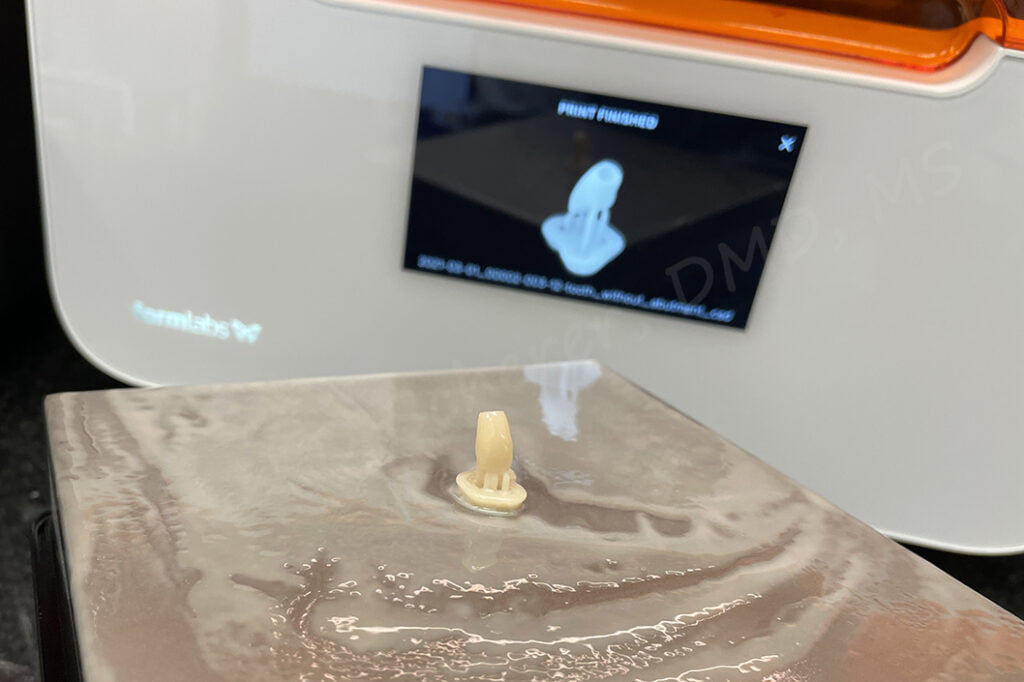
After UV curing, I was able to take a DESS ti-base and place it directly into the crown. I was told by Formlabs that there may need to be a bit of spotting in of the ti-base. I didn’t need any adjustments but I was told in more complicated prints you may need to. I was also told they were working on software updates to make this even more streamlined.
I polished the crown using composite polishing burs, sandblasted using a Zest Dental Solutions MicroEtcher CD, and placed some Optiglaze to characterize the facial surface of the crown just to make it pop a bit. I didn’t have to do this part but I really wanted to make it special for this patient who is down and out. I cemented the crown to the ti-base using Zest Dental Solutions CEM-EZ.
The patient returned approximately 2 hours after making the impressions… we had the crown finished up ahead of time. Note: we had it done with 15 minutes to spare, but told the patient two hours just to give us some wiggle room :).
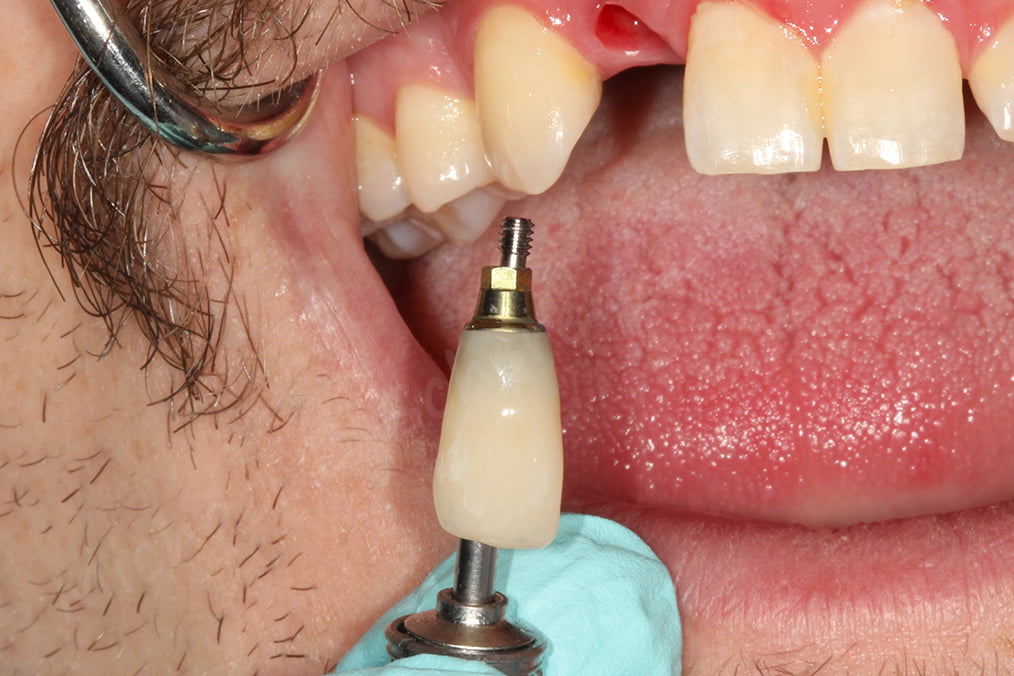
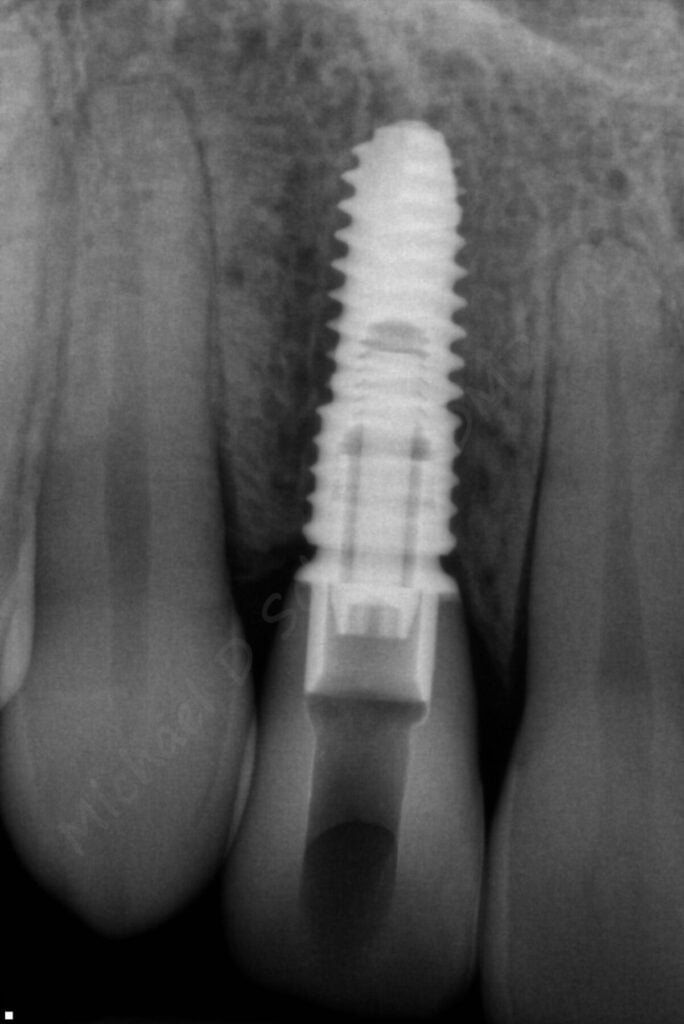
I removed the healing abutment and placed the permanent crown onto the implant. We hand-tightened and made an x-ray to confirm complete adaptation of the crown. I was surprised at the radiographic appearance of the material – looks just like enamel!!
I torqued the crown to 30Ncm – the full torque recommended by the manufacturer, placed PTFE to cover the screw, and closed up the screw access channel with composite resin.
I handed the patient the mirror and he let out some expletive words that I cannot share in a published article…
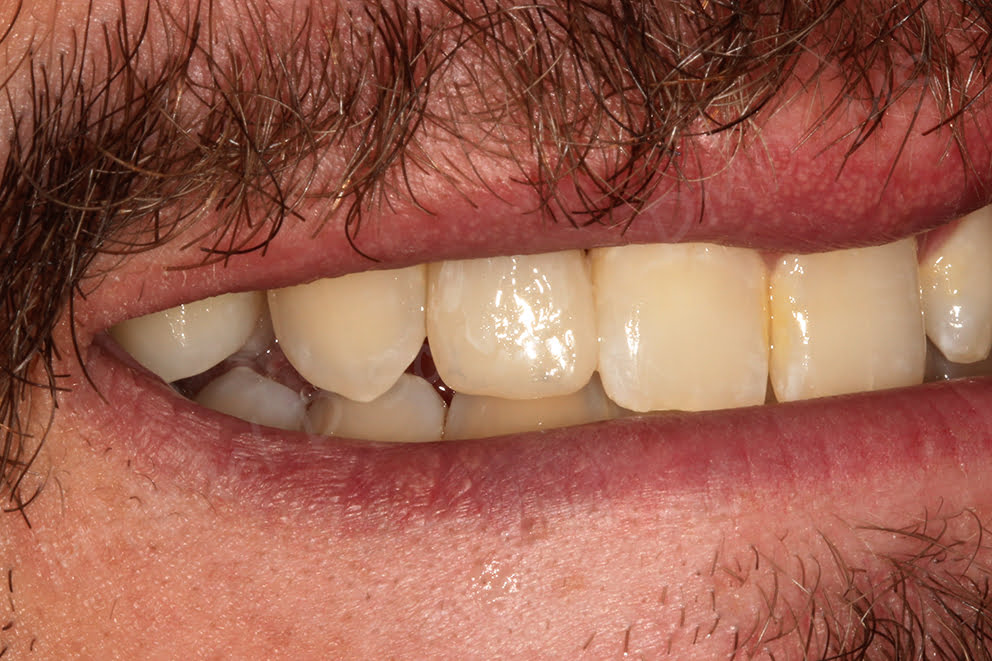
Is this the completion of this patient’s treatment? Likely not. We at some point in the future need to address his esthetic concerns. Will 3D printed crowns fully replace the beauty of ceramic crowns? How will the tissues respond? Will it hold up long-term like ceramics, will the tissue like it nearly as much? Time will tell, but these are all valid questions and as a scientific minded thinker, I ask the same questions. Does this mean that the labs will be going out of business because people will just 3D print their own teeth? No… for the one millionth time no. Many will raise these same issues along with the cost breakdown. Sure, there’s a lot more cost involved here than just the resins – ti-bases, scan bodies, equipment, doctor/technician and office/lab overhead & time, glaze, cement, etc! But the reality is that it’s possible and this is just the beginning of where we are headed to with 3D printing in dentistry.
“Doctor, you have no idea how much this means to me…” the patient said and followed up by saying “I cannot thank you enough, this is amazing how far we have come where you can 3D print a permanent tooth”. I turned up the chair and saw him wipe away tears from his eyes – It was a moment I will never forget.
Want to learn more about CBCT, implant planning, 3D printing, and some amazing step-by-step protocols in your office and/or laboratory? Check out our innovative, clinically-focused, fully online digital dentistry course at www.LearnDental3D.com

Dr. Michael Scherer, DMD, MS
Dr. Michael Scherer is an Assistant Clinical Professor at Loma Linda University, a Clinical Instructor at University of Nevada – Las Vegas. He is a fellow of the American College of Prosthodontists, has published articles, books, and in-person and online courses related to implant dentistry, clinical prosthodontics, and digital technology with a special emphasis on full-arch reconstruction.


